Grandma’s Rice Pudding: Creamy, Sweet, and Full of Nostalgia

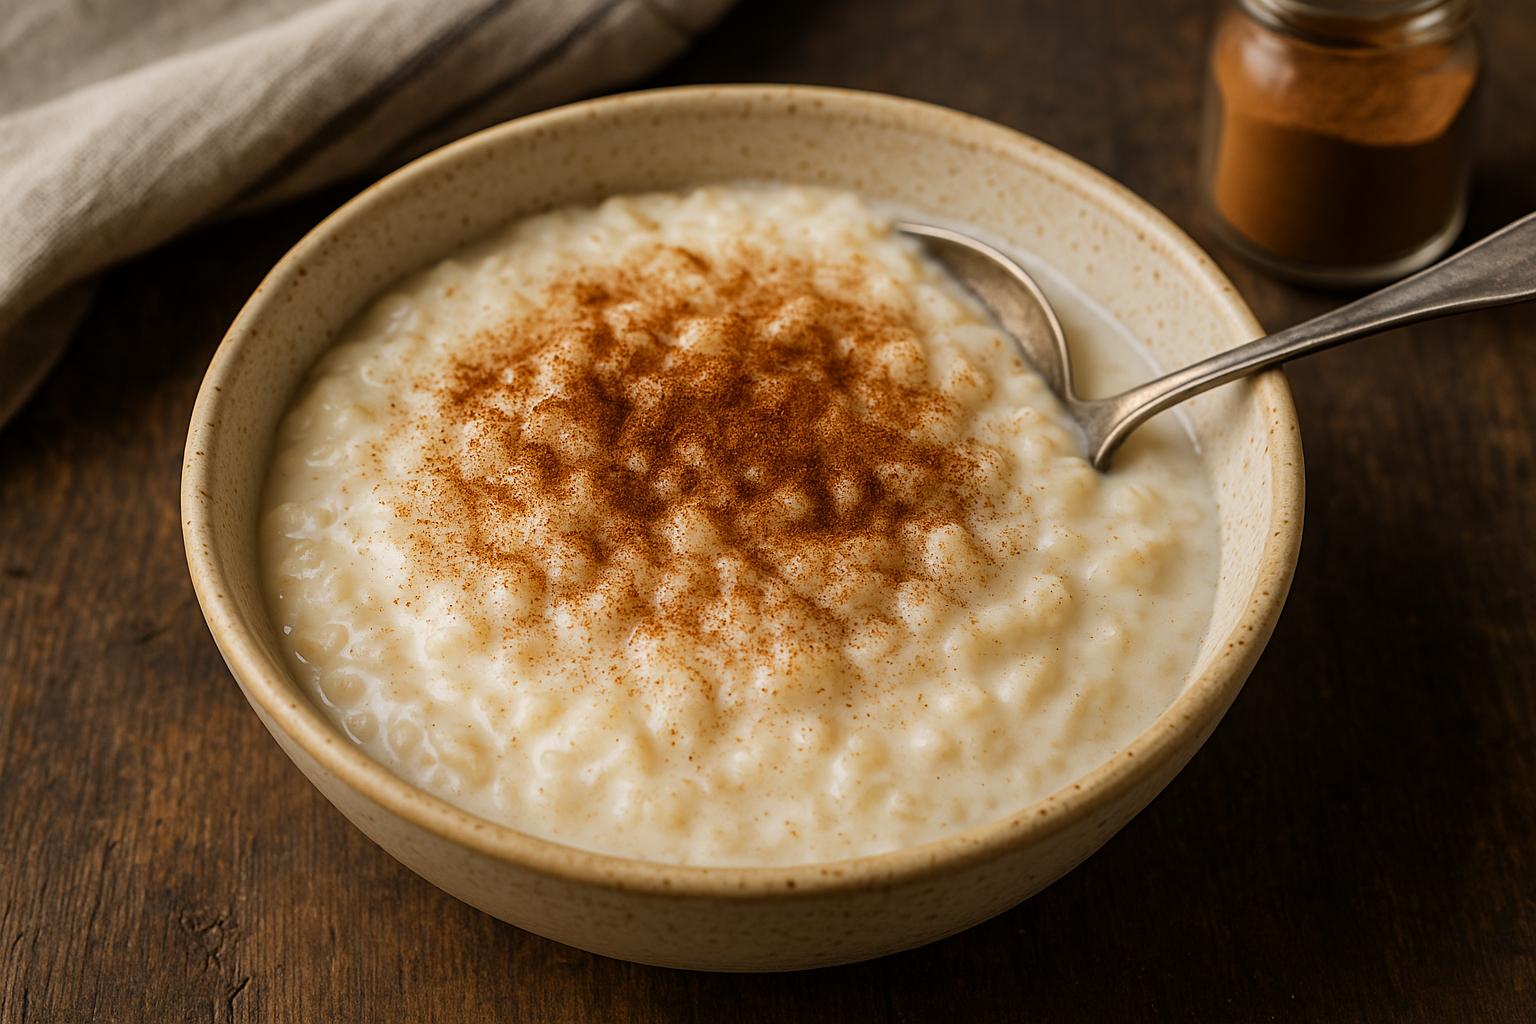
Rice pudding was one of grandma’s most comforting desserts — warm, creamy, and sprinkled with cinnamon. Whether served after Sunday lunch or as a sweet snack in the afternoon, it always brought a sense of calm and joy with every spoonful.

In this article, you’ll learn how to make classic rice pudding from scratch, just like grandma did — simple, cozy, and made with love.


Why You’ll Love This Rice Pudding

  • Uses pantry staples you already have
  • Can be served warm or chilled
  • Naturally gluten-free and easy to adapt
  • Great for leftover rice or fresh batch cooking
  • A timeless dessert that never goes out of style

Ingredients for Grandma’s Rice Pudding

This recipe makes 4–6 servings.

  • 1 cup cooked white rice (short or medium grain is best)
  • 2 cups whole milk
  • ½ cup heavy cream (or more milk for a lighter version)
  • ⅓ cup sugar
  • 1 large egg
  • ½ teaspoon vanilla extract
  • ¼ teaspoon ground cinnamon
  • Pinch of salt
  • Optional: ¼ cup raisins or golden raisins
  • Extra cinnamon for topping

Step-by-Step Instructions

1. Combine Rice, Milk, and Cream

In a medium saucepan, combine the cooked rice, milk, cream, sugar, and salt.

Cook over medium heat, stirring frequently, for about 15–18 minutes, until the mixture thickens slightly and the rice is very soft.


2. Temper the Egg

In a small bowl, beat the egg.

Scoop out a few spoonfuls of the hot mixture and slowly whisk it into the egg to temper it.

Then pour the egg mixture back into the saucepan and cook for 2–3 minutes, stirring constantly. The pudding will thicken more.


3. Finish with Flavor

Stir in the vanilla extract and cinnamon. Add raisins if using.

Cook for another 1–2 minutes, then remove from heat.


4. Serve Warm or Cold

Let the pudding sit for a few minutes before serving. It will continue to thicken as it cools.

Serve warm, at room temperature, or chilled.

Dust with cinnamon or nutmeg before serving, if desired.


Serving Suggestions

  • Sprinkle with cinnamon sugar or nutmeg
  • Add a spoonful of whipped cream or fruit preserves
  • Stir in chocolate chips or chopped nuts
  • Layer with fresh fruit like berries or banana slices
  • Drizzle with caramel sauce or honey

Grandma’s tip: A bowl of warm rice pudding is perfect on rainy days.


Storage and Reheating

Store:

  • Refrigerate in an airtight container for up to 4 days

Reheat:

  • Add a splash of milk and warm gently in a saucepan or microwave

Freeze:

  • Not recommended — the texture may become grainy

Variations to Try

  • Coconut Rice Pudding: Use part coconut milk for a tropical twist
  • Spiced Version: Add cardamom, cloves, or star anise
  • Vegan: Use almond or oat milk, and skip the egg
  • Lemon or Orange Zest: For a citrusy brightness
  • Chocolate Rice Pudding: Stir in melted chocolate or cocoa powder

Grandma’s Secrets for Perfect Rice Pudding

  • Use short-grain rice for the creamiest texture
  • Stir often to prevent sticking or scorching
  • Don’t rush — low, gentle heat gives the best results
  • Let it cool slightly before serving to enhance flavor
  • For extra richness, finish with a small pat of butter

Final Thoughts: A Hug in a Bowl

Grandma’s rice pudding was more than a dessert — it was a moment of peace, a pause in the day, and a taste of tradition. Creamy, sweet, and endlessly comforting, it’s a recipe worth keeping alive in every kitchen.

Now it’s your turn to make this timeless favorite — and maybe pass it down, too.

Grandma’s Apple Crisp: Warm, Spiced, and Topped with Buttery Crumble

Few things say “home” like a warm dish of apple crisp coming out of the oven. With tender spiced apples, a crispy oat topping, and that unmistakable aroma of cinnamon and butter, grandma’s apple crisp was a dessert you never had to wait for a special occasion to enjoy — just a few ripe apples and a little love.

In this guide, you’ll learn how to make the perfect apple crisp, just like grandma did — rustic, simple, and absolutely satisfying.


Why Apple Crisp Is a Timeless Favorite

  • Easier and faster than apple pie — no crust needed
  • Made with simple pantry ingredients
  • Perfect for using seasonal apples
  • Best served warm with vanilla ice cream or whipped cream
  • A true comfort dessert that feeds the soul

Ingredients for Grandma’s Apple Crisp

This recipe serves 6–8 people.

For the Filling:

  • 6 medium apples (Granny Smith, Honeycrisp, or a mix), peeled and sliced
  • 2 tablespoons granulated sugar
  • 2 tablespoons brown sugar
  • 1 tablespoon all-purpose flour
  • 1 teaspoon ground cinnamon
  • ¼ teaspoon ground nutmeg
  • 1 teaspoon lemon juice

For the Topping:

  • ¾ cup rolled oats
  • ¾ cup all-purpose flour
  • ½ cup brown sugar
  • ½ cup unsalted butter, cold and cubed
  • ¼ teaspoon salt
  • Optional: ½ teaspoon cinnamon or chopped nuts for added texture

Step-by-Step Instructions

1. Preheat the Oven

Set your oven to 175°C (350°F) and lightly butter a 9×9-inch baking dish or similar.


2. Prepare the Apple Filling

In a large mixing bowl, toss the sliced apples with sugar, brown sugar, flour, cinnamon, nutmeg, and lemon juice.

Pour the apple mixture into the prepared baking dish and spread evenly.


3. Make the Crisp Topping

In another bowl, mix oats, flour, brown sugar, salt, and cinnamon.

Cut in the cold butter using a pastry cutter or your fingertips until the mixture resembles coarse crumbs.

Sprinkle the topping evenly over the apples.


4. Bake

Bake for 40–45 minutes, or until the topping is golden brown and the apples are tender and bubbling.

Let cool for at least 10–15 minutes before serving — this allows the filling to set slightly.


Serving Suggestions

  • Warm with a scoop of vanilla ice cream
  • Drizzled with caramel sauce
  • Served cold for breakfast with a dollop of Greek yogurt
  • With whipped cream and a sprinkle of cinnamon

Grandma’s Favorite: A warm bowl of apple crisp with milk poured over the top — old-fashioned and delicious!


Storage and Reheating Tips

Store:

  • Cover and refrigerate for up to 4 days

Reheat:

  • Oven: Warm at 160°C (325°F) for 10–15 minutes
  • Microwave: Heat individual portions in short intervals

Freeze:

  • Freeze after baking (cooled) for up to 3 months
  • Thaw in the fridge overnight and reheat before serving

Delicious Variations

  • Apple-Pear Crisp: Replace half the apples with ripe pears
  • Maple Apple Crisp: Add 2 tablespoons of maple syrup to the filling
  • Berry Apple Crisp: Mix in fresh or frozen berries with the apples
  • Coconut-Oat Topping: Add shredded coconut to the topping for extra texture
  • Gluten-Free Version: Use gluten-free flour and oats

Grandma’s Tips for the Perfect Apple Crisp

  • Use tart apples like Granny Smith for balance
  • Slice apples evenly so they cook at the same rate
  • Don’t skip the lemon juice — it brightens the flavor
  • Use real butter for the richest, crunchiest topping
  • Let it rest before serving — this helps the juices settle

Final Thoughts: A Rustic Treat with Heart

Grandma’s apple crisp wasn’t fancy — and that’s exactly what made it so special. No need for perfection, just ripe fruit, cozy spices, and a golden, buttery topping that brought everyone back for seconds.

Now it’s your turn to carry on that tradition with a dessert that’s as comforting as it is delicious.