Grandma’s Cinnamon Rolls: Soft, Gooey, and Baked with Love

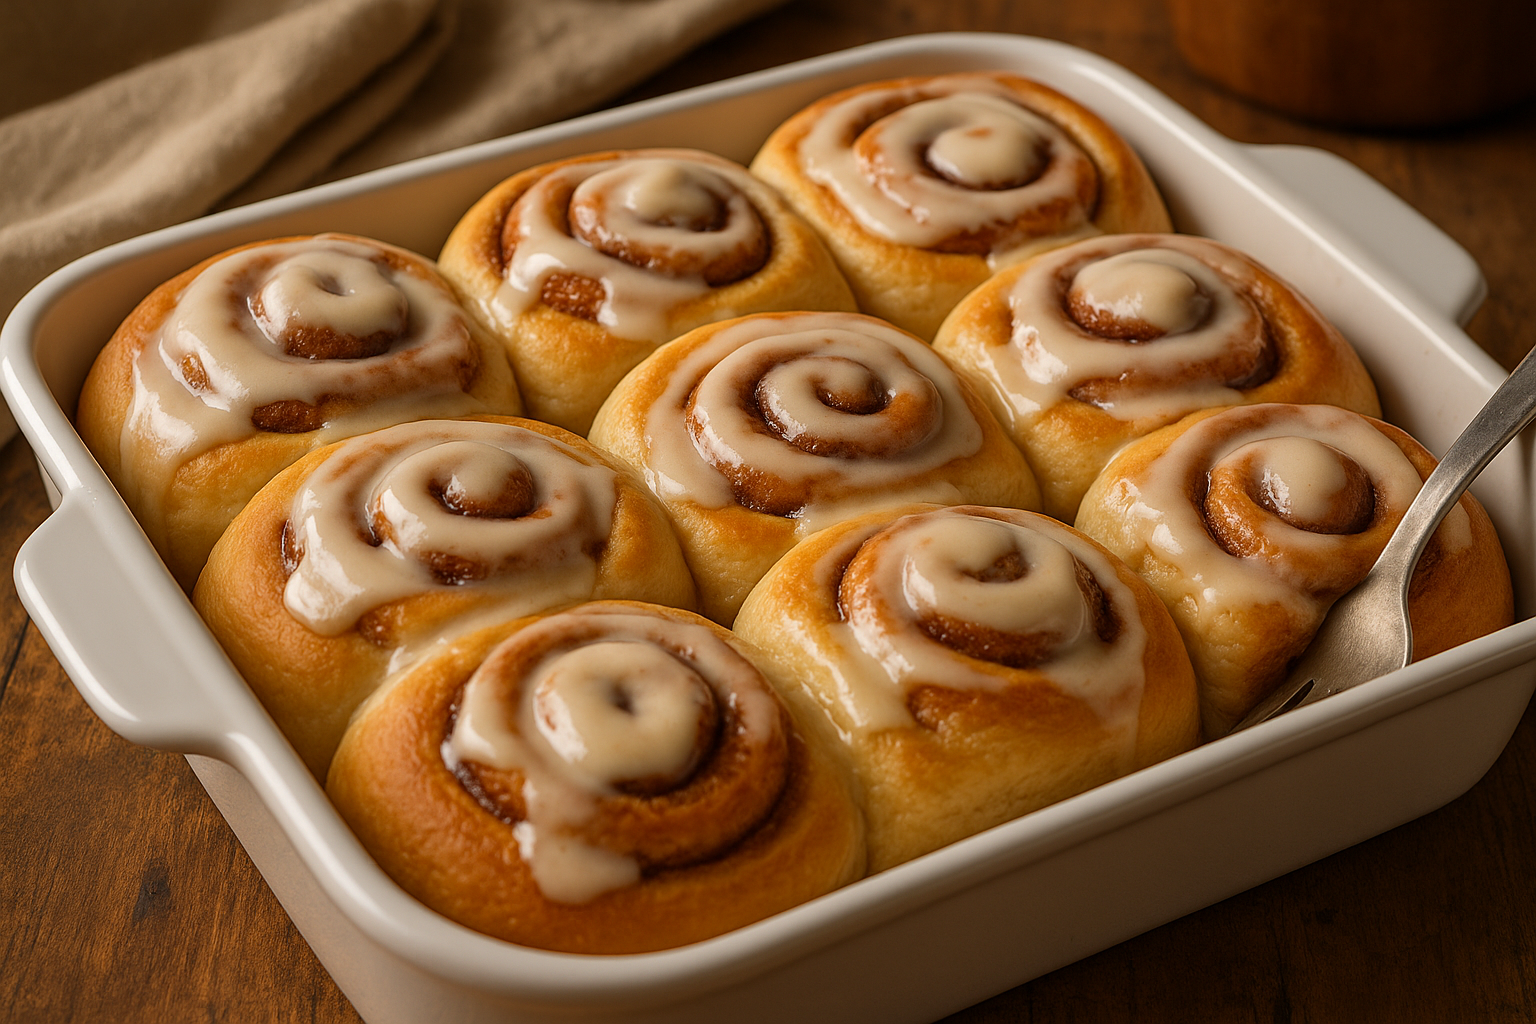
Few smells are as comforting as the warm, sweet scent of cinnamon rolls baking in the oven. Fluffy, buttery, and dripping with icing, grandma’s cinnamon rolls were the kind of treat that made everyone stop what they were doing and come to the kitchen.

In this article, you’ll learn how to make soft, homemade cinnamon rolls from scratch — the kind that rise high, melt in your mouth, and make any morning feel special.


Why These Cinnamon Rolls Are So Special

  • Buttery, soft dough that rises perfectly
  • Sweet cinnamon-sugar filling that caramelizes as it bakes
  • Creamy vanilla or cream cheese icing
  • Can be made ahead and baked fresh in the morning
  • A beloved treat for breakfast, brunch, or holidays

Ingredients for Grandma’s Cinnamon Rolls

Makes 12 large rolls.

For the Dough:

  • 4 cups all-purpose flour (plus more as needed)
  • 2 ¼ teaspoons (1 packet) instant yeast
  • 1 cup warm milk (about 110°F / 43°C)
  • ⅓ cup granulated sugar
  • ⅓ cup unsalted butter, melted
  • 1 teaspoon salt
  • 2 large eggs

For the Filling:

  • ¾ cup brown sugar, packed
  • 2 tablespoons ground cinnamon
  • ⅓ cup unsalted butter, softened

For the Icing:

  • 1 cup powdered sugar
  • 1–2 tablespoons milk
  • ½ teaspoon vanilla extract
  • Optional: 2 tablespoons cream cheese, softened

Step-by-Step Instructions

1. Make the Dough

In a large bowl, combine warm milk, sugar, and yeast. Let sit for 5 minutes until frothy.

Add melted butter, eggs, and salt. Gradually stir in the flour until a soft dough forms.

Knead by hand or with a mixer for 6–8 minutes, until the dough is smooth and elastic.


2. Let It Rise

Place the dough in a greased bowl, cover, and let rise in a warm place for 1–1.5 hours, or until doubled in size.


3. Prepare the Filling

Mix the brown sugar and cinnamon in a small bowl.


4. Roll and Fill

Punch down the dough and roll it into a large rectangle (about 16×12 inches).

Spread softened butter over the surface, then sprinkle with the cinnamon-sugar mixture.


5. Shape the Rolls

Starting from the long side, roll the dough into a tight log.

Cut into 12 equal pieces and place them in a greased 9×13-inch baking dish.


6. Second Rise

Cover and let the rolls rise for 30–45 minutes, until puffy and touching.

Meanwhile, preheat the oven to 175°C (350°F).


7. Bake

Bake for 20–25 minutes, or until golden brown and cooked through.

Let cool for 10 minutes before icing.


8. Make the Icing

Mix powdered sugar, vanilla, and milk (and cream cheese, if using) until smooth.

Drizzle over warm rolls.


Storage and Reheating

  • Store at room temp for 2 days, or refrigerate for up to 5 days
  • Reheat in the microwave or oven until warm
  • Freeze un-iced rolls for up to 2 months — thaw and ice after baking

Make-Ahead Option

  • Prepare rolls, cover tightly, and refrigerate overnight before the second rise
  • Let come to room temp and rise in the morning, then bake as directed

Variations to Try

  • Raisin Cinnamon Rolls: Add ½ cup raisins to the filling
  • Pecan Sticky Buns: Add chopped pecans and caramel glaze
  • Pumpkin Spice Rolls: Add pumpkin purée to the dough and pumpkin spice to the filling
  • Chocolate Rolls: Add mini chocolate chips to the filling
  • Lemon Icing: Use lemon juice instead of milk in the icing

Grandma’s Tips for the Best Cinnamon Rolls

  • Use warm milk, not hot, so you don’t kill the yeast
  • Let the dough rise in a draft-free, warm area
  • Roll the dough tightly to avoid gaps in the spirals
  • Don’t overbake — rolls should be soft, not dry
  • Add the icing while warm so it melts just enough

Final Thoughts: A Swirl of Sweet Memories

Grandma’s cinnamon rolls were more than just a breakfast treat — they were a celebration of togetherness, patience, and sweetness. Whether for holidays, birthdays, or slow Sunday mornings, this recipe brings the same magic to your own home.

Warm, gooey, and unforgettable — that’s how cinnamon rolls should be.

Grandma’s Homemade Mac and Cheese: Creamy, Cheesy, and Baked to Perfection

No boxed mix ever came close to grandma’s baked mac and cheese. Rich, golden, and packed with gooey cheese, it was always the most requested side dish at family dinners — and often the first to disappear from the table.

This article will show you how to make classic baked macaroni and cheese, the old-fashioned way: comforting, creamy, and full of real, melted cheese.

Why This Mac and Cheese Is a Family Favorite

  • Made with real cheese and a creamy béchamel sauce
  • Topped with a buttery golden crust
  • Easily customizable with mix-ins or spices
  • Perfect for holidays, potlucks, or weeknight dinners
  • Comfort food at its absolute best

Ingredients for Grandma’s Mac and Cheese

Serves 6–8 people.

For the Pasta:

  • 1 lb (450g) elbow macaroni or small shells
  • Salt for pasta water

For the Cheese Sauce:

  • 4 tablespoons butter
  • 4 tablespoons all-purpose flour
  • 3 cups milk (whole milk preferred)
  • 2 cups shredded sharp cheddar cheese
  • 1 cup shredded mozzarella (or another melty cheese)
  • ½ teaspoon salt
  • ¼ teaspoon black pepper
  • Optional: pinch of paprika or dry mustard

For the Topping:

  • ½ cup breadcrumbs (panko or regular)
  • 1 tablespoon melted butter
  • Optional: more shredded cheese on top

Step-by-Step Instructions

1. Cook the Pasta

Boil the macaroni in salted water until just al dente (about 1 minute less than package directions).

Drain and set aside.

2. Make the Roux

In a large saucepan, melt the butter over medium heat.

Add the flour and stir constantly for about 2 minutes until lightly golden.

3. Add the Milk

Slowly whisk in the milk to avoid lumps.

Cook, stirring constantly, until the sauce thickens — about 5–7 minutes.

4. Add the Cheese

Remove from heat and stir in the shredded cheddar and mozzarella.

Season with salt, pepper, and optional paprika or mustard powder.

Taste and adjust seasoning as needed.

5. Combine Pasta and Sauce

Mix the drained pasta into the cheese sauce until fully coated.

Transfer to a greased 9×13-inch baking dish.

6. Add the Topping

Mix breadcrumbs with melted butter and sprinkle over the top.

You can also add a little more shredded cheese for extra crispiness.

7. Bake

Bake at 180°C (350°F) for 25–30 minutes, or until bubbly and golden on top.

Let rest for 5–10 minutes before serving.

Serving Ideas

  • Serve as a main dish with salad or roasted vegetables
  • As a side for fried chicken, barbecue, or meatloaf
  • Add bacon bits, caramelized onions, or jalapeños for extra flavor
  • Use as a base for mac and cheese bowls with toppings like pulled pork or veggies

Storage and Reheating

Store:

  • Refrigerate in an airtight container for up to 4 days

Reheat:

  • Oven: Cover with foil and bake at 160°C (325°F) until hot
  • Microwave: Heat individual portions with a splash of milk

Freeze:

  • Freeze after baking. Wrap tightly and freeze for up to 2 months
  • Thaw overnight in the fridge and reheat thoroughly

Tasty Variations

  • Three-Cheese Mac: Add Gruyère, Monterey Jack, or Parmesan
  • Spicy Mac: Add cayenne, hot sauce, or pepper jack
  • Veggie Mac: Stir in cooked spinach, peas, or roasted cauliflower
  • Southern-Style: Add beaten egg to the sauce before baking for a firmer texture
  • Gluten-Free: Use GF pasta and flour

Grandma’s Tips for the Creamiest Mac and Cheese

  • Use freshly shredded cheese — it melts better than pre-shredded
  • Don’t overcook the pasta before baking
  • For extra creaminess, use a splash of cream or add more cheese to the sauce
  • Let the mac and cheese rest after baking so it sets up perfectly
  • Always taste the sauce before baking — adjust seasoning early!

Final Thoughts: The Ultimate Comfort Classic

Whether served on a holiday table or a rainy Tuesday night, grandma’s mac and cheese was always a dish that brought smiles and second helpings. With its gooey interior and golden, cheesy crust, it’s a recipe that deserves a permanent place in your kitchen — and in your heart.