Grandma’s Chicken Pot Pie: A Creamy, Golden-Baked Classic Filled with Love

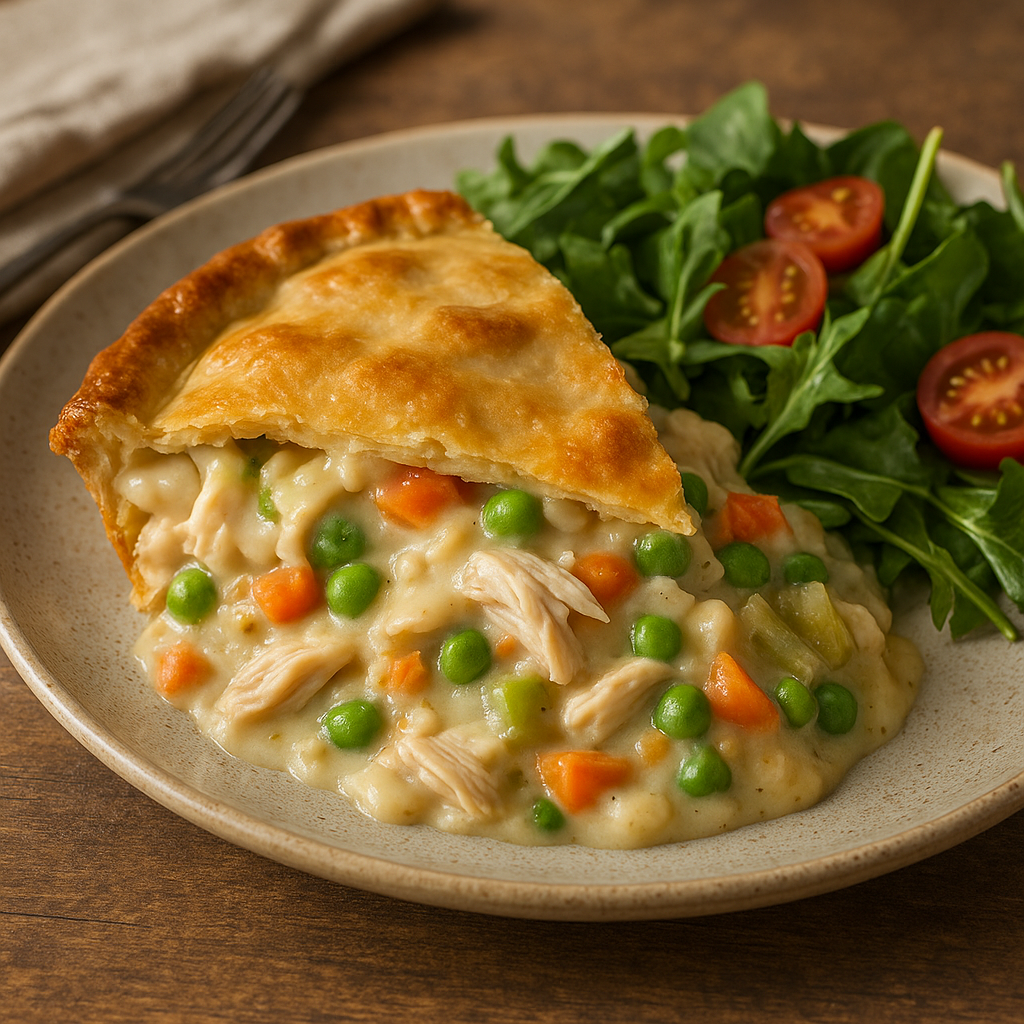
When it came to comfort food, nothing could beat grandma’s homemade chicken pot pie. With its flaky golden crust, creamy chicken filling, and colorful mix of vegetables, it was more than just dinner — it was a warm, baked hug served fresh from the oven.

This article will guide you through how to make a traditional chicken pot pie from scratch — hearty, homemade, and bursting with flavor, just like grandma’s.

Why This Chicken Pot Pie Is a True Classic

  • Golden, flaky top crust that seals in all the goodness
  • Creamy, savory filling made with real ingredients
  • Tender chunks of chicken and vegetables in every bite
  • Perfect for family dinners, leftovers, or meal prep
  • Brings back warm memories of grandma’s kitchen

Ingredients for Grandma’s Chicken Pot Pie

This recipe fills one 9-inch deep pie dish (or a medium casserole).

For the Crust (Top Only or Double if Desired):

  • 1 ¼ cups all-purpose flour
  • ½ teaspoon salt
  • ½ cup cold unsalted butter, cubed
  • 3–5 tablespoons ice water

Or use store-bought pie crust or puff pastry for a shortcut.

For the Filling:

  • 2 tablespoons unsalted butter
  • 1 small onion, chopped
  • 2 cloves garlic, minced
  • 2 carrots, diced
  • 2 celery stalks, diced
  • ⅓ cup all-purpose flour
  • 2 cups chicken broth
  • ¾ cup whole milk or half-and-half
  • 2–3 cups cooked chicken, shredded or diced
  • ½ cup frozen peas
  • ½ teaspoon dried thyme
  • Salt and pepper to taste

For Finishing:

  • 1 egg, beaten (for egg wash)

Step-by-Step Instructions

1. Prepare the Crust (If Making from Scratch)

Mix flour and salt in a bowl. Cut in cold butter until crumbly.

Add ice water one tablespoon at a time until the dough holds together. Form into a disc, wrap in plastic, and refrigerate for at least 30 minutes.

2. Make the Filling

In a large skillet or saucepan, melt butter over medium heat.

Add onion, garlic, carrots, and celery. Cook until vegetables are soft, about 6–8 minutes.

Stir in flour and cook for 1–2 minutes, stirring constantly, to form a roux.

Gradually whisk in chicken broth and milk. Cook until thickened (5–7 minutes).

Stir in the cooked chicken, peas, thyme, salt, and pepper. Let simmer 2–3 minutes. Remove from heat and let cool slightly.

3. Assemble the Pie

Preheat oven to 200°C (400°F).

Pour the filling into a 9-inch pie dish or baking dish.

Roll out your pie dough to fit over the top. Lay it gently over the filling and trim any excess. Crimp the edges and cut small slits to vent.

Brush with beaten egg for a shiny, golden crust.

4. Bake

Bake for 30–35 minutes, or until the crust is golden and the filling is bubbling.

Let rest for 10–15 minutes before serving — this allows the filling to set.

Serving Suggestions

  • Serve with a simple green salad or roasted vegetables
  • Pair with a glass of iced tea or lemonade
  • Enjoy as is — it’s a complete meal on its own

Tips for the Best Chicken Pot Pie

  • Use leftover roasted chicken or rotisserie chicken to save time
  • Add extra herbs like rosemary or parsley for flavor
  • Let the filling cool slightly before topping with crust — prevents soggy dough
  • Don’t skip the egg wash — it gives that classic golden look
  • For extra comfort, add a splash of cream to the filling

Make-Ahead and Storage

Make Ahead:

  • Prep filling and crust separately up to 1 day ahead
  • Assemble and bake when ready to serve
  • Or assemble and refrigerate (unbaked) for up to 24 hours

Store:

  • Refrigerate leftovers for up to 4 days

Reheat:

  • Bake at 175°C (350°F) until hot and bubbly
  • Microwave individual portions if needed, but crust may lose some crispness

Freeze:

  • Freeze whole assembled, unbaked pot pie. Wrap tightly.
  • Bake from frozen at 190°C (375°F) for 45–55 minutes

Final Thoughts: Dinner, the Way Grandma Did It

Grandma’s chicken pot pie was more than a meal — it was a reminder of everything good: cozy evenings, full plates, and second helpings shared around the table. From the rich, creamy filling to the golden crust, every forkful was filled with love and tradition.

Now it’s your turn to bring that magic into your own kitchen with this timeless, delicious recipe.

Grandma’s Old-Fashioned Meatloaf: Moist, Flavorful, and Full of Love

Back in the day, meatloaf wasn’t just a weeknight meal — it was a centerpiece. In grandma’s kitchen, this hearty classic was made with simple pantry ingredients, baked to perfection, and served with sides like mashed potatoes, green beans, or buttered corn. It was the kind of meal that brought everyone to the table — and kept them there for seconds.

In this article, we’ll share the step-by-step recipe for grandma’s old-fashioned meatloaf, including all the tips she used to keep it moist, flavorful, and unforgettable.

Why Grandma’s Meatloaf Stands the Test of Time

While modern versions experiment with bacon-wrapped crusts or exotic spices, grandma’s meatloaf has stayed a favorite because it’s:

  • Easy to make with simple ingredients
  • Perfectly moist — never dry or bland
  • Packed with rich, savory flavor
  • Great for leftovers and sandwiches
  • A symbol of traditional, home-cooked comfort food

Let’s recreate the magic.

Ingredients for Classic Meatloaf

This recipe serves 4 to 6 people.

For the Meatloaf:

  • 1 ½ pounds ground beef (80/20 preferred for flavor)
  • 1 small onion, finely chopped
  • 2 garlic cloves, minced
  • ¾ cup breadcrumbs (plain or Italian)
  • ½ cup milk
  • 2 large eggs
  • 2 tablespoons ketchup
  • 1 tablespoon Worcestershire sauce
  • 1 teaspoon salt
  • ½ teaspoon black pepper
  • 1 teaspoon dried thyme or parsley (optional)

For the Glaze:

  • ½ cup ketchup
  • 2 tablespoons brown sugar
  • 1 tablespoon yellow mustard or Dijon

Optional Add-ins: chopped green bell pepper, grated carrot, shredded cheese, or a pinch of smoked paprika for added depth.

Step-by-Step Instructions

1. Preheat the Oven

Set your oven to 175°C (350°F). Line a baking sheet with parchment paper or lightly grease a loaf pan.

2. Soak the Breadcrumbs

In a small bowl, combine the breadcrumbs and milk. Let sit for 5 minutes so the crumbs absorb the liquid — this keeps the meatloaf moist.

3. Mix the Meatloaf

In a large bowl, combine ground beef, chopped onion, garlic, soaked breadcrumbs, eggs, ketchup, Worcestershire sauce, salt, pepper, and herbs.

Mix gently with your hands or a spoon just until combined. Don’t overmix, or the meatloaf may turn out tough.

4. Shape and Place

Form the mixture into a loaf shape and place on the prepared baking sheet, or gently press into a loaf pan.

Grandma’s Tip: Free-form loaves (on a baking sheet) allow for better caramelization and more crust!

5. Add the Glaze

Mix together the ketchup, brown sugar, and mustard. Spread half the glaze on top of the meatloaf.

Reserve the rest for basting later or serving on the side.

6. Bake Until Done

Bake uncovered for 55–65 minutes, or until the internal temperature reaches 70°C (160°F).

Halfway through baking, spread the remaining glaze on top for extra flavor.

7. Let Rest Before Slicing

Remove from the oven and let the meatloaf rest for 10–15 minutes before slicing. This helps the juices redistribute and keeps each slice moist.

Serving Suggestions

Grandma often served her meatloaf with:

  • Mashed potatoes and gravy
  • Steamed green beans or glazed carrots
  • Buttered corn or baked sweet potatoes
  • A side of homemade rolls or biscuits

And of course — a generous drizzle of that sweet-savory glaze.

Tips for a Better Meatloaf

  • Use meat with some fat (80/20 ground beef) — lean meat can be dry
  • Don’t skip the soaking — breadcrumbs + milk = moist texture
  • Let it rest after baking — this step is essential
  • Use fresh aromatics — onion and garlic add essential flavor
  • Bake on a sheet for more crust, or in a loaf pan for a moist interior

Leftovers That Don’t Go to Waste

One of the best things about meatloaf is how delicious the leftovers are. Try:

  • Meatloaf sandwiches on toasted bread with lettuce and mayo
  • Crumbled into pasta sauces or stuffed into bell peppers
  • Fried meatloaf patties for breakfast
  • Served cold with mustard or pickles for a snack

Variations You Can Try

  • Turkey meatloaf: Use ground turkey and add extra moisture (like grated zucchini)
  • Cheesy center: Add a layer of shredded cheese inside the loaf
  • Bacon-wrapped: Wrap in bacon before baking for a smoky twist
  • Spicy version: Add hot sauce, jalapeños, or smoked paprika to the mix
  • Vegetable-loaded: Mix in grated carrots, mushrooms, or spinach

Final Thoughts: A Slice of Comfort

Grandma’s meatloaf isn’t just a meal — it’s a tradition. It’s the smell that filled the house on Sundays, the crispy ends that everyone fought over, and the warmth of a full plate and a full heart.

When you make this meatloaf, you’re not just cooking — you’re carrying on a legacy of love, care, and good food made simply and well.