Grandma’s Homemade Biscuits: Fluffy, Buttery, and Made from Scratch

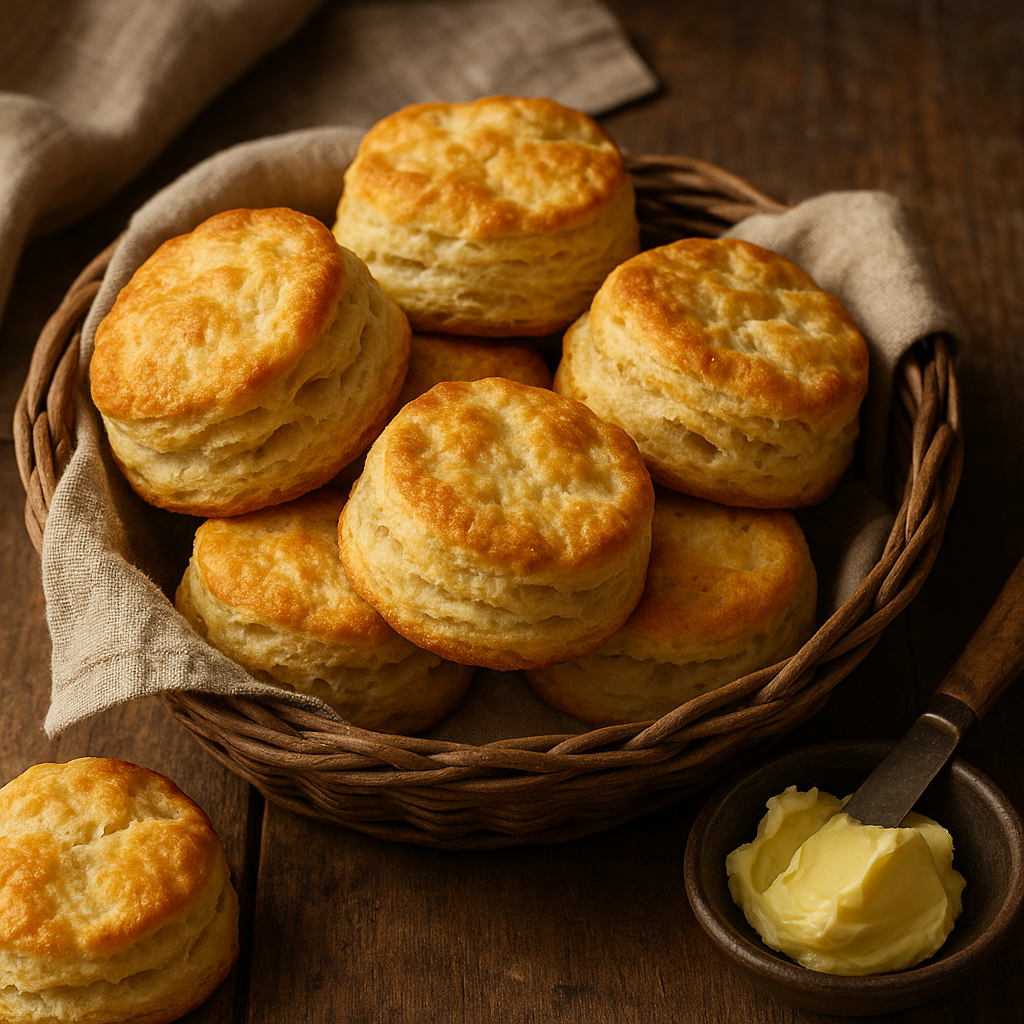
There was nothing quite like the smell of freshly baked biscuits coming out of grandma’s oven. With golden tops, soft layers, and a buttery, melt-in-your-mouth texture, they were a staple at every breakfast and Sunday dinner.

This article will walk you through how to make old-fashioned buttermilk biscuits from scratch — simple ingredients, no shortcuts, and full of that homemade love you remember.


Why You’ll Love These Homemade Biscuits

  • Made with real butter and buttermilk
  • Flaky, fluffy, and tender inside
  • Perfect for breakfast, lunch, or dinner
  • No fancy equipment required — just a bowl and your hands
  • Delicious plain or with jam, honey, or gravy

Ingredients for Grandma’s Biscuits

Makes 10–12 biscuits depending on size.

  • 2 cups all-purpose flour
  • 1 tablespoon baking powder
  • ½ teaspoon baking soda
  • 1 teaspoon salt
  • 6 tablespoons cold unsalted butter, cubed
  • ¾ cup cold buttermilk (plus more for brushing)

No buttermilk? Add 1 tablespoon lemon juice or vinegar to regular milk and let sit 5 minutes.


Step-by-Step Instructions

1. Preheat the Oven

Preheat to 220°C (425°F).

Line a baking sheet with parchment paper or lightly grease it.


2. Mix the Dry Ingredients

In a large bowl, whisk together flour, baking powder, baking soda, and salt.


3. Cut in the Butter

Add cold, cubed butter to the flour mixture.

Use a pastry cutter or your fingers to cut the butter into the flour until it resembles coarse crumbs.

You want some small lumps — that’s what creates flakiness.


4. Add Buttermilk

Pour in the buttermilk and gently stir until a shaggy dough forms.

Do not overmix — overworked dough leads to tough biscuits.


5. Fold the Dough

Turn dough onto a floured surface. Pat it into a rectangle, then fold it into thirds like a letter.

Repeat this fold 2–3 times. It builds layers for flakiness.

Pat the dough to ¾-inch thickness.


6. Cut the Biscuits

Use a floured round cutter (or a glass) to cut biscuits.

Press straight down — don’t twist, or the edges won’t rise evenly.

Place biscuits close together on the baking sheet for soft sides, or spaced apart for crispy edges.


7. Bake

Brush tops with buttermilk for a golden crust.

Bake for 12–15 minutes, or until tops are golden brown.

Let cool slightly and serve warm.


Serving Suggestions

  • With butter and honey or jam
  • Split and filled with fried chicken or eggs
  • Covered in country-style sausage gravy
  • With strawberries and whipped cream for shortcake
  • Used as a base for mini sandwiches

Grandma’s tip: Serve biscuits right out of the oven — that’s when they shine.


How to Store and Reheat

Store:

  • Cool completely and store in an airtight container at room temp for up to 2 days

Reheat:

  • Wrap in foil and warm in a 160°C (325°F) oven for 8–10 minutes
  • Or microwave individual biscuits for 10–15 seconds

Freeze:

  • Freeze unbaked biscuits on a tray, then transfer to a bag
  • Bake from frozen — add 2–3 minutes to baking time

Flavor Variations to Try

  • Cheddar and Chive Biscuits: Add shredded cheese and fresh herbs
  • Garlic Butter Biscuits: Brush with garlic-herb butter after baking
  • Sweet Biscuits: Add a tablespoon of sugar and top with cinnamon
  • Spicy Biscuits: Mix in diced jalapeños or cayenne pepper
  • Whole Wheat Version: Use half whole wheat, half all-purpose flour

Common Mistakes and Fixes

  • Tough biscuits? Overmixed dough — stir gently and briefly
  • Flat biscuits? Make sure your baking powder is fresh
  • Spread too much? Dough too warm — chill it before baking
  • Dry biscuits? Not enough fat or liquid — measure carefully

Grandma’s Biscuit Secrets

  • Use very cold butter and buttermilk
  • Don’t skip the folds — that’s how you get flaky layers
  • Handle the dough as little as possible
  • Bake hot and fast — high heat gives a good rise
  • Always use a sharp cutter and press straight down

Final Thoughts: A Classic Worth Mastering

Homemade biscuits may be simple, but they carry so much heart and history. With each warm, buttery bite, you’re not just enjoying a recipe — you’re preserving a piece of tradition, the way grandma did it.

So roll up your sleeves, flour your counter, and bake a batch of biscuits that feel like home.

Grandma’s Banana Bread: Moist, Sweet, and Full of Old-Fashioned Flavor

Few recipes have stood the test of time like banana bread — and grandma’s version was always the best. With a perfectly moist texture, a hint of cinnamon, and rich banana flavor, it was the ideal way to use up ripe bananas and fill the house with warmth.

In this article, you’ll learn how to make classic banana bread from scratch, just like grandma did — using simple ingredients, one bowl, and a little love.


Why You’ll Love This Banana Bread

  • Super moist and tender, never dry
  • One-bowl recipe — easy to mix and bake
  • Great for breakfast, dessert, or snacking
  • Freezes well and stays fresh for days
  • Delicious plain or with nuts, chocolate chips, or spices

Ingredients for Classic Banana Bread

Makes 1 loaf (8–10 slices).

  • 3 ripe bananas (mashed)
  • ½ cup unsalted butter (softened or melted)
  • ½ cup granulated sugar
  • ¼ cup brown sugar (for extra moisture and flavor)
  • 2 large eggs
  • 1 teaspoon vanilla extract
  • 1 ½ cups all-purpose flour
  • 1 teaspoon baking soda
  • ½ teaspoon cinnamon (optional)
  • ¼ teaspoon salt
  • Optional: ½ cup chopped walnuts or chocolate chips

Step-by-Step Instructions

1. Preheat the Oven

Preheat to 175°C (350°F).

Grease a standard loaf pan (8×4-inch or 9×5-inch) with butter or cooking spray.


2. Mash the Bananas

In a large bowl, mash the ripe bananas until mostly smooth with a fork or potato masher.


3. Mix Wet Ingredients

Add the softened or melted butter, both sugars, eggs, and vanilla to the mashed bananas.

Whisk until well combined.


4. Add Dry Ingredients

Sprinkle flour, baking soda, cinnamon, and salt over the banana mixture.

Stir gently with a spatula until just combined — do not overmix.

Fold in nuts or chocolate chips if using.


5. Bake

Pour the batter into the prepared loaf pan.

Bake for 50–60 minutes, or until a toothpick inserted in the center comes out clean.

If the top is browning too quickly, cover loosely with foil.


6. Cool and Slice

Let the banana bread cool in the pan for 10–15 minutes, then remove and cool completely on a wire rack before slicing.


Serving Suggestions

  • Toasted with butter or peanut butter
  • Warmed up with a scoop of vanilla ice cream
  • As a snack with coffee or tea
  • Topped with cream cheese or Nutella
  • With a dollop of Greek yogurt and honey for breakfast

How to Store and Freeze

Store:

  • Wrap in foil or store in an airtight container at room temp for up to 4 days

Refrigerate:

  • For slightly longer storage (up to 6–7 days)

Freeze:

  • Wrap the loaf or slices tightly in plastic and foil
  • Freeze for up to 2–3 months
  • Thaw at room temperature or reheat gently

Variations to Try

  • Banana Nut Bread: Add walnuts, pecans, or almonds
  • Chocolate Banana Bread: Mix in cocoa powder and chocolate chunks
  • Coconut Banana Bread: Fold in shredded coconut
  • Healthy Version: Use whole wheat flour and honey instead of sugar
  • Gluten-Free: Use a 1:1 gluten-free flour blend

Grandma’s Tips for the Best Banana Bread

  • Use very ripe bananas — brown and spotty is best
  • Don’t overmix — stir just until no streaks of flour remain
  • Let it cool completely before slicing for clean cuts
  • Store wrapped to keep it moist
  • Try baking mini loaves to share or freeze individually

Final Thoughts: A Slice of Home

Banana bread is more than just a way to use old bananas — it’s a tradition, a treat, and a memory baked into every slice. Grandma knew that, and now so do you.

With this simple recipe, you can bring that old-fashioned comfort into your kitchen — and maybe start your own tradition too.


Grandma’s Classic Banana Bread: Moist, Sweet, and Made with Ripe Bananas

There’s something magical about the smell of banana bread baking in the oven — especially when it’s grandma’s recipe. Sweet, moist, and perfectly spiced, it was her go-to solution for overripe bananas and a surefire way to bring the family together at the table.

In this article, you’ll learn how to make classic banana bread from scratch, just like grandma did. It’s easy, delicious, and impossible to eat just one slice.


Why Banana Bread Is a Timeless Favorite

  • Uses up overripe bananas that would otherwise go to waste
  • Made with simple pantry staples
  • Incredibly moist and flavorful
  • Perfect as a breakfast, snack, or dessert
  • Easily customizable with nuts, chocolate, or spices

Ingredients for Grandma’s Banana Bread

This recipe makes one 9×5 inch loaf (about 8–10 slices).

  • 3 ripe bananas, mashed
  • ½ cup unsalted butter, melted
  • ¾ cup brown sugar (or use white sugar)
  • 2 large eggs
  • 1 teaspoon vanilla extract
  • 1 ½ cups all-purpose flour
  • 1 teaspoon baking soda
  • ½ teaspoon salt
  • ½ teaspoon cinnamon (optional, but recommended)
  • Optional: ½ cup chopped walnuts, pecans, or chocolate chips

Grandma’s Tip: The riper the bananas, the sweeter and more flavorful your bread will be.


Step-by-Step Instructions

1. Preheat the Oven

Preheat your oven to 175°C (350°F). Grease a 9×5 inch loaf pan or line it with parchment paper.


2. Mash the Bananas

In a large bowl, mash the bananas with a fork until smooth.

Stir in the melted butter and mix until combined.


3. Add the Wet Ingredients

Mix in the brown sugar, eggs, and vanilla extract. Stir until fully blended.


4. Add the Dry Ingredients

In a separate bowl, whisk together the flour, baking soda, salt, and cinnamon.

Gradually add the dry mixture to the banana mixture. Stir just until combined — do not overmix.

Fold in nuts or chocolate chips if using.


5. Bake

Pour the batter into the prepared loaf pan and smooth the top.

Bake for 50–60 minutes, or until a toothpick inserted into the center comes out clean.

If the top browns too quickly, cover loosely with foil during the last 10–15 minutes.


6. Cool and Serve

Let the bread cool in the pan for 10 minutes, then transfer to a wire rack to cool completely.

Slice and serve warm or at room temperature — delicious either way!


How to Store and Freeze Banana Bread

Room Temperature:

  • Wrap in foil or plastic wrap and keep for up to 3 days

Refrigerator:

  • Lasts up to 1 week, but may dry out slightly

Freezer:

  • Wrap tightly in plastic wrap and foil; freeze for up to 3 months
  • To serve, thaw at room temperature or toast slices directly from frozen

Fun Variations

  • Chocolate Banana Bread: Add ¼ cup cocoa powder and chocolate chips
  • Banana Nut Bread: Use chopped walnuts or pecans
  • Spiced Banana Bread: Add ground nutmeg, clove, or cardamom
  • Banana Coconut Bread: Mix in shredded coconut
  • Healthy Twist: Use whole wheat flour and swap butter for coconut oil or Greek yogurt

Grandma’s Secrets for the Best Banana Bread

  • Use extra ripe bananas — black spots are good!
  • Don’t overmix the batter — stir just until no flour streaks remain
  • Let it cool fully before slicing for cleaner cuts
  • Add a few banana slices on top before baking for a beautiful finish
  • Wrap leftovers while still slightly warm to keep moisture inside

Final Thoughts: A Slice of Sweet Nostalgia

Banana bread was more than just a way to use old bananas — it was grandma’s way of turning something ordinary into something unforgettable. With its soft texture, sweet aroma, and comforting flavor, this banana bread recipe brings those memories back in every bite.

Now you can carry on that tradition with your own homemade loaf — and maybe share a slice with someone you love.