Grandma’s Mashed Potatoes: Potatoes, Buttery, and the Perfect Side Dish

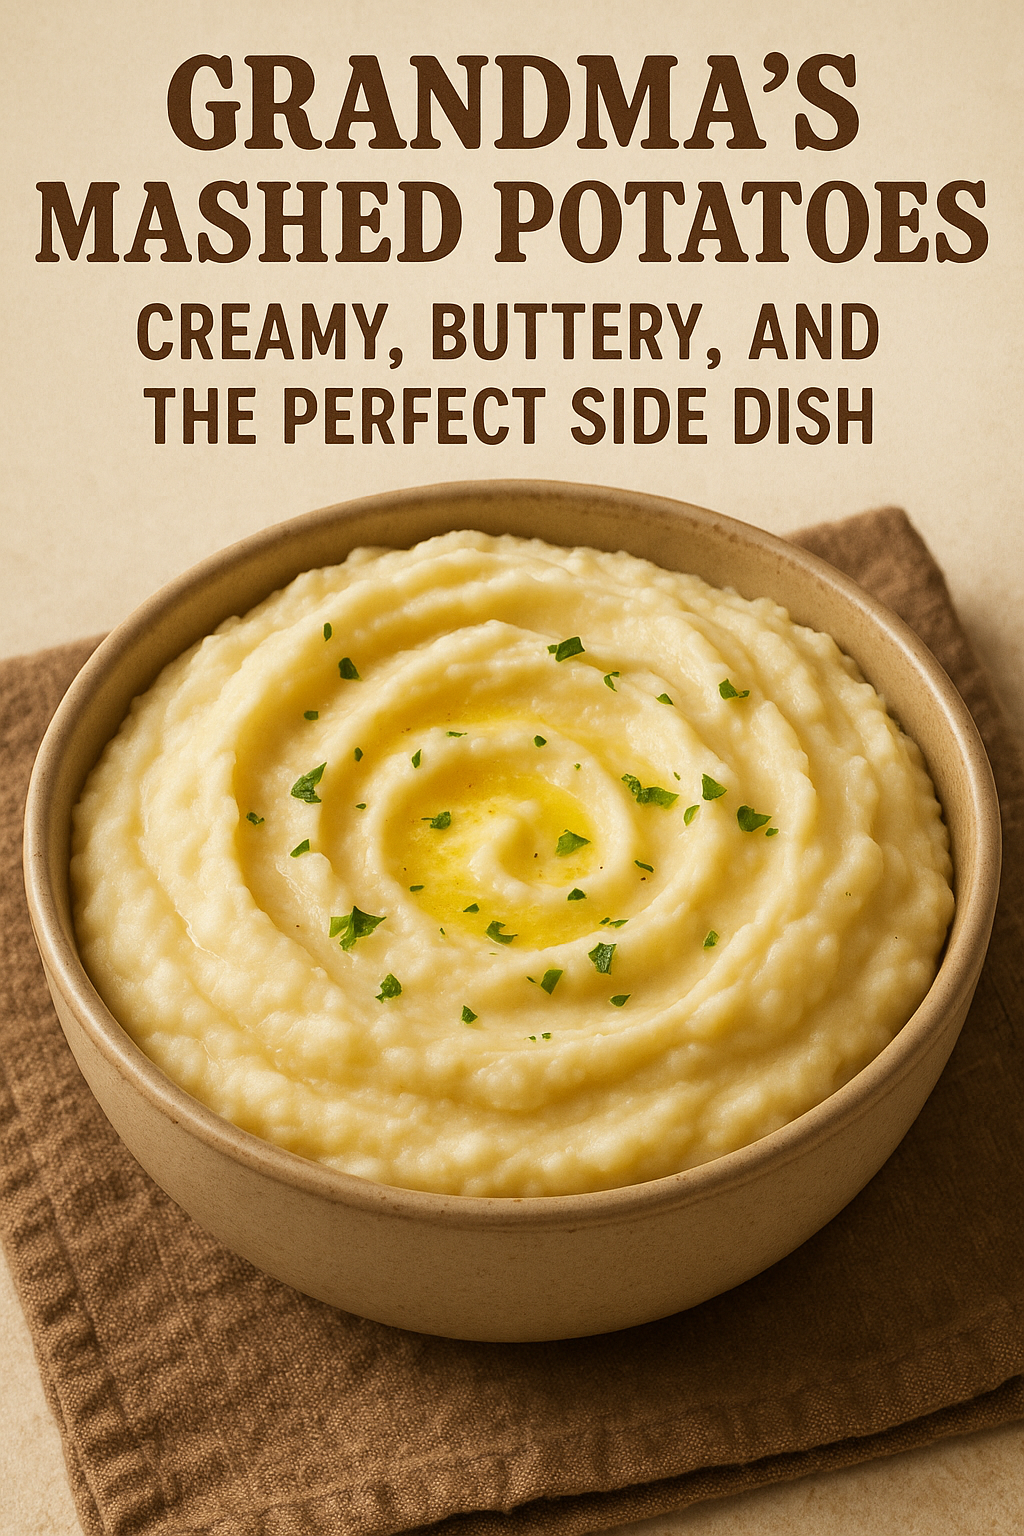
When it came to comfort food, grandma’s mashed potatoes were unbeatable. Creamy, fluffy, rich, and smooth — they were the heart of every holiday table and the ultimate companion to roasts, stews, and gravy.

In this article, you’ll learn how to make perfect mashed potatoes from scratch, just like grandma used to, using simple ingredients and a few key tips to get them light and luscious every time.

Why These Mashed Potatoes Are the Best

  • Incredibly creamy and buttery
  • Made with real potatoes, milk, and butter
  • Perfect for everyday meals or special occasions
  • Easy to customize with herbs, garlic, or cheese
  • Can be made ahead and reheated without drying out

Ingredients for Homemade Mashed Potatoes

Serves 6–8 people.

  • 3 lbs (about 1.4 kg) Yukon Gold or Russet potatoes, peeled and cut into chunks
  • ½ cup (1 stick) unsalted butter
  • 1 cup whole milk (or heavy cream for extra richness)
  • Salt, to taste
  • Freshly ground black pepper, to taste
  • Optional: 2 cloves garlic, smashed (for garlic mashed potatoes)

Step-by-Step Instructions

1. Peel and Chop the Potatoes

Peel the potatoes and cut them into even chunks — about 2-inch pieces.

Place them in a large pot and cover with cold water. Add 1 tablespoon of salt to the water.

Grandma’s tip: Always start with cold water to ensure even cooking.

2. Boil the Potatoes

Bring the pot to a boil over medium-high heat.

Cook until the potatoes are fork-tender, about 15–20 minutes.

Drain the potatoes well and return them to the pot.

3. Heat the Milk and Butter

In a small saucepan (or microwave-safe bowl), warm the milk and butter until melted and hot. Do not boil.

This helps absorb better into the potatoes.

4. Mash the Potatoes

Use a potato masher, ricer, or hand mixer to mash the hot potatoes.

Slowly pour in the warm milk-butter mixture while mashing until smooth and fluffy.

Season with salt and pepper to taste.

Serving Suggestions

  • Topped with gravy or melted butter
  • Paired with roast chicken, turkey, beef, or pork
  • With meatloaf and green beans
  • Served under beef stew or chicken pot pie filling
  • As a base for shepherd’s pie

Optional Add-Ins and Flavor Variations

  • Garlic Mashed Potatoes: Boil smashed garlic cloves with the potatoes
  • Cheddar Mashed Potatoes: Add shredded sharp cheddar after mashing
  • Herbed Potatoes: Stir in chopped chives, parsley, or thyme
  • Cream Cheese Potatoes: Add 2–4 tbsp cream cheese for extra tang
  • Loaded Mashed Potatoes: Add bacon, sour cream, green onion, and cheese

How to Store and Reheat

Store:

  • Refrigerate in an airtight container for up to 4 days

Reheat:

  • Stovetop: Add a splash of milk and stir over low heat
  • Microwave: Reheat in intervals, stirring and adding milk as needed
  • Oven: Cover with foil and bake at 160°C (325°F) for 20 minutes

Freeze:

  • Freeze in a freezer-safe bag or container for up to 1 month
  • Thaw in the fridge overnight and reheat with milk and butter

Tips for the Best Texture

  • Use starchy potatoes (Russet or Yukon Gold) for fluffier mash
  • Don’t overwork the potatoes — mashing too much makes them gluey
  • Always add warm liquids, not cold
  • Taste and adjust seasoning at the end
  • Use a ricer for extra-smooth mashed potatoes

Common Mistakes to Avoid

  • Lumpy mash? Potatoes weren’t fully cooked or mashed evenly
  • Gummy texture? Potatoes were overmixed or under-drained
  • Bland flavor? Not enough salt or butter
  • Watery mash? Overcooked or too much milk added at once

Grandma’s Final Touch

Before serving, grandma always added a pat of butter on top, a sprinkle of fresh chives, or a little paprika for color. It wasn’t just food — it was her way of saying “I love you.”

Final Thoughts: The Creamy Side of Home

Mashed potatoes may seem simple, but when made with care — like grandma did — they become something extraordinary. Creamy, rich, and always comforting, this recipe brings old-fashioned flavor and love to every plate.

Try it today, and pass the tradition on.

Grandma’s Homemade Biscuits: Fluffy, Buttery, and Made from Scratch

There was nothing quite like the smell of freshly baked biscuits coming out of grandma’s oven. With golden tops, soft layers, and a buttery, melt-in-your-mouth texture, they were a staple at every breakfast and Sunday dinner.

This article will walk you through how to make old-fashioned buttermilk biscuits from scratch — simple ingredients, no shortcuts, and full of that homemade love you remember.


Why You’ll Love These Homemade Biscuits

  • Made with real butter and buttermilk
  • Flaky, fluffy, and tender inside
  • Perfect for breakfast, lunch, or dinner
  • No fancy equipment required — just a bowl and your hands
  • Delicious plain or with jam, honey, or gravy

Ingredients for Grandma’s Biscuits

Makes 10–12 biscuits depending on size.

  • 2 cups all-purpose flour
  • 1 tablespoon baking powder
  • ½ teaspoon baking soda
  • 1 teaspoon salt
  • 6 tablespoons cold unsalted butter, cubed
  • ¾ cup cold buttermilk (plus more for brushing)

No buttermilk? Add 1 tablespoon lemon juice or vinegar to regular milk and let sit 5 minutes.


Step-by-Step Instructions

1. Preheat the Oven

Preheat to 220°C (425°F).

Line a baking sheet with parchment paper or lightly grease it.


2. Mix the Dry Ingredients

In a large bowl, whisk together flour, baking powder, baking soda, and salt.


3. Cut in the Butter

Add cold, cubed butter to the flour mixture.

Use a pastry cutter or your fingers to cut the butter into the flour until it resembles coarse crumbs.

You want some small lumps — that’s what creates flakiness.


4. Add Buttermilk

Pour in the buttermilk and gently stir until a shaggy dough forms.

Do not overmix — overworked dough leads to tough biscuits.


5. Fold the Dough

Turn dough onto a floured surface. Pat it into a rectangle, then fold it into thirds like a letter.

Repeat this fold 2–3 times. It builds layers for flakiness.

Pat the dough to ¾-inch thickness.


6. Cut the Biscuits

Use a floured round cutter (or a glass) to cut biscuits.

Press straight down — don’t twist, or the edges won’t rise evenly.

Place biscuits close together on the baking sheet for soft sides, or spaced apart for crispy edges.


7. Bake

Brush tops with buttermilk for a golden crust.

Bake for 12–15 minutes, or until tops are golden brown.

Let cool slightly and serve warm.


Serving Suggestions

  • With butter and honey or jam
  • Split and filled with fried chicken or eggs
  • Covered in country-style sausage gravy
  • With strawberries and whipped cream for shortcake
  • Used as a base for mini sandwiches

Grandma’s tip: Serve biscuits right out of the oven — that’s when they shine.


How to Store and Reheat

Store:

  • Cool completely and store in an airtight container at room temp for up to 2 days

Reheat:

  • Wrap in foil and warm in a 160°C (325°F) oven for 8–10 minutes
  • Or microwave individual biscuits for 10–15 seconds

Freeze:

  • Freeze unbaked biscuits on a tray, then transfer to a bag
  • Bake from frozen — add 2–3 minutes to baking time

Flavor Variations to Try

  • Cheddar and Chive Biscuits: Add shredded cheese and fresh herbs
  • Garlic Butter Biscuits: Brush with garlic-herb butter after baking
  • Sweet Biscuits: Add a tablespoon of sugar and top with cinnamon
  • Spicy Biscuits: Mix in diced jalapeños or cayenne pepper
  • Whole Wheat Version: Use half whole wheat, half all-purpose flour

Common Mistakes and Fixes

  • Tough biscuits? Overmixed dough — stir gently and briefly
  • Flat biscuits? Make sure your baking powder is fresh
  • Spread too much? Dough too warm — chill it before baking
  • Dry biscuits? Not enough fat or liquid — measure carefully

Grandma’s Biscuit Secrets

  • Use very cold butter and buttermilk
  • Don’t skip the folds — that’s how you get flaky layers
  • Handle the dough as little as possible
  • Bake hot and fast — high heat gives a good rise
  • Always use a sharp cutter and press straight down

Final Thoughts: A Classic Worth Mastering

Homemade biscuits may be simple, but they carry so much heart and history. With each warm, buttery bite, you’re not just enjoying a recipe — you’re preserving a piece of tradition, the way grandma did it.

So roll up your sleeves, flour your counter, and bake a batch of biscuits that feel like home.

Grandma’s Banana Bread: Moist, Sweet, and Full of Old-Fashioned Flavor

Few recipes have stood the test of time like banana bread — and grandma’s version was always the best. With a perfectly moist texture, a hint of cinnamon, and rich banana flavor, it was the ideal way to use up ripe bananas and fill the house with warmth.

In this article, you’ll learn how to make classic banana bread from scratch, just like grandma did — using simple ingredients, one bowl, and a little love.


Why You’ll Love This Banana Bread

  • Super moist and tender, never dry
  • One-bowl recipe — easy to mix and bake
  • Great for breakfast, dessert, or snacking
  • Freezes well and stays fresh for days
  • Delicious plain or with nuts, chocolate chips, or spices

Ingredients for Classic Banana Bread

Makes 1 loaf (8–10 slices).

  • 3 ripe bananas (mashed)
  • ½ cup unsalted butter (softened or melted)
  • ½ cup granulated sugar
  • ¼ cup brown sugar (for extra moisture and flavor)
  • 2 large eggs
  • 1 teaspoon vanilla extract
  • 1 ½ cups all-purpose flour
  • 1 teaspoon baking soda
  • ½ teaspoon cinnamon (optional)
  • ¼ teaspoon salt
  • Optional: ½ cup chopped walnuts or chocolate chips

Step-by-Step Instructions

1. Preheat the Oven

Preheat to 175°C (350°F).

Grease a standard loaf pan (8×4-inch or 9×5-inch) with butter or cooking spray.


2. Mash the Bananas

In a large bowl, mash the ripe bananas until mostly smooth with a fork or potato masher.


3. Mix Wet Ingredients

Add the softened or melted butter, both sugars, eggs, and vanilla to the mashed bananas.

Whisk until well combined.


4. Add Dry Ingredients

Sprinkle flour, baking soda, cinnamon, and salt over the banana mixture.

Stir gently with a spatula until just combined — do not overmix.

Fold in nuts or chocolate chips if using.


5. Bake

Pour the batter into the prepared loaf pan.

Bake for 50–60 minutes, or until a toothpick inserted in the center comes out clean.

If the top is browning too quickly, cover loosely with foil.


6. Cool and Slice

Let the banana bread cool in the pan for 10–15 minutes, then remove and cool completely on a wire rack before slicing.


Serving Suggestions

  • Toasted with butter or peanut butter
  • Warmed up with a scoop of vanilla ice cream
  • As a snack with coffee or tea
  • Topped with cream cheese or Nutella
  • With a dollop of Greek yogurt and honey for breakfast

How to Store and Freeze

Store:

  • Wrap in foil or store in an airtight container at room temp for up to 4 days

Refrigerate:

  • For slightly longer storage (up to 6–7 days)

Freeze:

  • Wrap the loaf or slices tightly in plastic and foil
  • Freeze for up to 2–3 months
  • Thaw at room temperature or reheat gently

Variations to Try

  • Banana Nut Bread: Add walnuts, pecans, or almonds
  • Chocolate Banana Bread: Mix in cocoa powder and chocolate chunks
  • Coconut Banana Bread: Fold in shredded coconut
  • Healthy Version: Use whole wheat flour and honey instead of sugar
  • Gluten-Free: Use a 1:1 gluten-free flour blend

Grandma’s Tips for the Best Banana Bread

  • Use very ripe bananas — brown and spotty is best
  • Don’t overmix — stir just until no streaks of flour remain
  • Let it cool completely before slicing for clean cuts
  • Store wrapped to keep it moist
  • Try baking mini loaves to share or freeze individually

Final Thoughts: A Slice of Home

Banana bread is more than just a way to use old bananas — it’s a tradition, a treat, and a memory baked into every slice. Grandma knew that, and now so do you.

With this simple recipe, you can bring that old-fashioned comfort into your kitchen — and maybe start your own tradition too.


Grandma’s Homemade Pickles: Crisp, Tangy, and Easy to Make at Home

Long before pickles came in fancy jars from the grocery store, grandma was making her own — crunchy, vinegary, and bursting with garlic and dill. They were kept in glass jars tucked away in cool pantries, always ready to be served with sandwiches, grilled meats, or just as a salty snack.

This article teaches you how to make classic homemade pickles, grandma-style — no special equipment, no preservatives, just simple ingredients and a lot of flavor.


Why Make Your Own Pickles?

  • Incredibly easy — no canning or special tools required
  • Ready in just 24–48 hours (quick pickles!)
  • You control the flavor, crunch, and spice
  • Made with real ingredients
  • Delicious with burgers, sandwiches, charcuterie boards, and more

Ingredients for Classic Dill Pickles

This recipe makes about 2 quart-sized jars of pickles.

You’ll Need:

  • 6–8 small cucumbers (Kirby or Persian cucumbers work best)
  • 2 cups white vinegar
  • 2 cups water
  • 2 tablespoons kosher salt
  • 1 tablespoon sugar
  • 4 garlic cloves, peeled
  • 1 tablespoon black peppercorns
  • 1 tablespoon mustard seeds (optional)
  • 4–6 sprigs fresh dill
  • Optional: pinch of red pepper flakes for a spicy kick

Step-by-Step Instructions

1. Prepare the Jars

Clean and dry your jars thoroughly.

Cut cucumbers into spears, chips, or leave whole — depending on your preference and jar size.

Place fresh dill, garlic cloves, peppercorns, and mustard seeds at the bottom of each jar.

Tightly pack the cucumbers into the jars.


2. Make the Brine

In a saucepan, combine vinegar, water, salt, and sugar.

Bring to a simmer and stir until the salt and sugar are dissolved.

Remove from heat and let it cool slightly.


3. Pour the Brine

Carefully pour the warm (not hot) brine into the jars, covering the cucumbers completely.

Tap the jars gently on the counter to release air bubbles.

Seal with lids and let them cool to room temperature.


4. Refrigerate and Wait

Place jars in the refrigerator for at least 24–48 hours before eating. The longer they sit, the more flavorful they become.

They’ll stay good in the fridge for up to 1–2 months!


Serving Ideas for Grandma’s Pickles

  • With burgers, hot dogs, and sandwiches
  • On a cheese or charcuterie board
  • Chopped into potato or pasta salads
  • As a topping for tuna salad or deviled eggs
  • Just eaten cold, straight from the jar

Grandma’s tip: Save the leftover brine for pickling onions, eggs, or more cucumbers!


Flavor Variations to Try

  • Sweet Pickles: Add more sugar to the brine and reduce garlic
  • Spicy Pickles: Add sliced jalapeños or red chili flakes
  • Bread and Butter Style: Use a mix of white and apple cider vinegar, add more sugar, and include onion slices
  • Garlic Bomb: Double the garlic for a bold punch
  • Asian-Inspired: Add ginger slices and a dash of soy sauce

Storage and Shelf Life

  • Keep pickles refrigerated at all times
  • Best enjoyed within 4 weeks, though they’ll last up to 2 months if sealed properly
  • Always use clean utensils to remove pickles from the jar — no fingers!

Final Thoughts: Crunchy, Tangy, and Full of Tradition

Grandma’s pickles weren’t just snacks — they were made with care, preserved with purpose, and shared with pride. Whether packed into lunchboxes or placed in little dishes on the dinner table, they added flavor and fun to every bite.

Grandma’s Classic Banana Bread: Moist, Sweet, and Made with Ripe Bananas

There’s something magical about the smell of banana bread baking in the oven — especially when it’s grandma’s recipe. Sweet, moist, and perfectly spiced, it was her go-to solution for overripe bananas and a surefire way to bring the family together at the table.

In this article, you’ll learn how to make classic banana bread from scratch, just like grandma did. It’s easy, delicious, and impossible to eat just one slice.


Why Banana Bread Is a Timeless Favorite

  • Uses up overripe bananas that would otherwise go to waste
  • Made with simple pantry staples
  • Incredibly moist and flavorful
  • Perfect as a breakfast, snack, or dessert
  • Easily customizable with nuts, chocolate, or spices

Ingredients for Grandma’s Banana Bread

This recipe makes one 9×5 inch loaf (about 8–10 slices).

  • 3 ripe bananas, mashed
  • ½ cup unsalted butter, melted
  • ¾ cup brown sugar (or use white sugar)
  • 2 large eggs
  • 1 teaspoon vanilla extract
  • 1 ½ cups all-purpose flour
  • 1 teaspoon baking soda
  • ½ teaspoon salt
  • ½ teaspoon cinnamon (optional, but recommended)
  • Optional: ½ cup chopped walnuts, pecans, or chocolate chips

Grandma’s Tip: The riper the bananas, the sweeter and more flavorful your bread will be.


Step-by-Step Instructions

1. Preheat the Oven

Preheat your oven to 175°C (350°F). Grease a 9×5 inch loaf pan or line it with parchment paper.


2. Mash the Bananas

In a large bowl, mash the bananas with a fork until smooth.

Stir in the melted butter and mix until combined.


3. Add the Wet Ingredients

Mix in the brown sugar, eggs, and vanilla extract. Stir until fully blended.


4. Add the Dry Ingredients

In a separate bowl, whisk together the flour, baking soda, salt, and cinnamon.

Gradually add the dry mixture to the banana mixture. Stir just until combined — do not overmix.

Fold in nuts or chocolate chips if using.


5. Bake

Pour the batter into the prepared loaf pan and smooth the top.

Bake for 50–60 minutes, or until a toothpick inserted into the center comes out clean.

If the top browns too quickly, cover loosely with foil during the last 10–15 minutes.


6. Cool and Serve

Let the bread cool in the pan for 10 minutes, then transfer to a wire rack to cool completely.

Slice and serve warm or at room temperature — delicious either way!


How to Store and Freeze Banana Bread

Room Temperature:

  • Wrap in foil or plastic wrap and keep for up to 3 days

Refrigerator:

  • Lasts up to 1 week, but may dry out slightly

Freezer:

  • Wrap tightly in plastic wrap and foil; freeze for up to 3 months
  • To serve, thaw at room temperature or toast slices directly from frozen

Fun Variations

  • Chocolate Banana Bread: Add ¼ cup cocoa powder and chocolate chips
  • Banana Nut Bread: Use chopped walnuts or pecans
  • Spiced Banana Bread: Add ground nutmeg, clove, or cardamom
  • Banana Coconut Bread: Mix in shredded coconut
  • Healthy Twist: Use whole wheat flour and swap butter for coconut oil or Greek yogurt

Grandma’s Secrets for the Best Banana Bread

  • Use extra ripe bananas — black spots are good!
  • Don’t overmix the batter — stir just until no flour streaks remain
  • Let it cool fully before slicing for cleaner cuts
  • Add a few banana slices on top before baking for a beautiful finish
  • Wrap leftovers while still slightly warm to keep moisture inside

Final Thoughts: A Slice of Sweet Nostalgia

Banana bread was more than just a way to use old bananas — it was grandma’s way of turning something ordinary into something unforgettable. With its soft texture, sweet aroma, and comforting flavor, this banana bread recipe brings those memories back in every bite.

Now you can carry on that tradition with your own homemade loaf — and maybe share a slice with someone you love.


Grandma’s Homemade Tomato Sauce: A Slow-Simmered Classic Full of Tradition

In grandma’s kitchen, tomato sauce wasn’t just something that came from a jar — it was an all-day process, filled with rich aromas, bubbling pots, and the kind of care that only tradition can teach. This sauce was the base for Sunday dinners, lasagnas, meatballs, and impromptu spaghetti nights.

In this guide, you’ll learn how to make homemade tomato sauce from scratch, just like grandma did — slowly simmered, deeply flavorful, and built from simple, whole ingredients.

Why Homemade Tomato Sauce Is Worth It

While store-bought sauces are convenient, grandma’s version wins every time — here’s why:

  • Made from real tomatoes, not concentrate
  • Free of preservatives, sugar, and fillers
  • Slow-simmered for deep flavor
  • Easily customizable with herbs and spices
  • Can be made in large batches and frozen

Ingredients for Grandma’s Tomato Sauce

This recipe yields about 6 cups of sauce, enough for 2–3 meals.

Basic Ingredients:

  • 2 tablespoons olive oil
  • 1 medium onion, finely chopped
  • 4 cloves garlic, minced
  • 2 cans (28 oz or 800g each) whole peeled tomatoes OR 10–12 fresh ripe tomatoes (peeled and chopped)
  • 2 tablespoons tomato paste (for richness)
  • 1 teaspoon salt
  • ½ teaspoon black pepper
  • 1 teaspoon sugar (optional, to balance acidity)
  • 1 teaspoon dried oregano
  • ½ teaspoon dried basil
  • 1 bay leaf
  • Optional: ½ teaspoon red pepper flakes

Finish with:

  • 1 tablespoon butter (for creaminess)
  • Handful of chopped fresh basil or parsley
  • Grated Parmesan cheese (optional)

Step-by-Step Instructions

1. Sauté the Aromatics

In a large pot, heat the olive oil over medium heat.

Add the chopped onion and cook until translucent — about 5 minutes. Stir in the garlic and cook for another 1–2 minutes, just until fragrant (don’t let it burn).

2. Add Tomatoes

If using canned tomatoes, crush them by hand or blend slightly for smoother texture. If using fresh tomatoes, peel and chop them.

Add tomatoes and their juice to the pot along with the tomato paste. Stir to combine.

3. Add Seasonings

Stir in salt, pepper, sugar (if using), oregano, basil, bay leaf, and red pepper flakes if you want a little heat.

Bring the sauce to a simmer.

4. Simmer Low and Slow

Lower the heat and simmer uncovered for 45 minutes to 1½ hours, stirring occasionally. The longer it cooks, the deeper the flavor.

If it gets too thick, add a splash of water or broth. If too thin, let it simmer uncovered to reduce.

5. Blend (Optional)

For a smooth sauce, blend with an immersion blender directly in the pot, or use a regular blender in batches (be careful with hot liquids). For a rustic, chunky sauce, skip this step.

6. Finish and Adjust

Remove bay leaf. Stir in a tablespoon of butter to add shine and richness. Taste and adjust salt, herbs, or sugar.

Stir in fresh basil or parsley at the end for a burst of freshness.

Grandma’s Tomato Sauce Tips

  • Use ripe, in-season tomatoes if making from fresh — Roma or San Marzano are ideal
  • Cook long and slow to break down acidity and bring out sweetness
  • Use butter at the end — it mellows sharpness and adds silkiness
  • Don’t skip the onion and garlic — they build the flavor foundation
  • Freeze in portions for easy future meals

How to Use Grandma’s Tomato Sauce

This sauce is versatile and goes far beyond pasta. Use it for:

  • Spaghetti or linguine with fresh herbs and cheese
  • Lasagna or baked ziti
  • Pizza sauce (just reduce slightly more)
  • Meatballs or sausage in sauce
  • Eggplant Parmesan
  • Shakshuka or poached eggs in tomato sauce
  • Stuffed peppers or zucchini

Storage and Freezing

Refrigerate:

  • Store in airtight containers for up to 5–7 days.

Freeze:

  • Freeze in freezer bags or containers for up to 3 months.
  • Use ice cube trays to freeze in small portions.

Reheat:

  • Thaw in the fridge or heat directly from frozen on the stove.
  • Stir well and re-season if needed.

Variations You Can Try

  • Add red wine: Splash in ¼ cup red wine during simmering for depth
  • Meaty version: Brown ground beef or sausage with the onions
  • Creamy version: Stir in a splash of cream or dollop of ricotta at the end
  • Roasted flavor: Use fire-roasted tomatoes or roast your own beforehand
  • Fresh garden version: Add chopped zucchini, mushrooms, or bell peppers

Final Thoughts: A Sauce That Feeds the Soul

Grandma’s tomato sauce wasn’t just a recipe — it was the heart of the meal, the reason everyone gathered around the table. It was made without shortcuts, always in big batches, and always with the hope that someone would come back for seconds.

Whether you’re making spaghetti for two or lasagna for a crowd, this slow-simmered sauce is your base for building beautiful meals and beautiful memories.

Grandma’s Classic Banana Bread: Moist, Sweet, and Made with Ripe Bananas

There’s something timeless and healing about a big pot of hot, homemade vegetable soup. No matter the season or occasion, grandma’s classic vegetable soup was always there to comfort — whether you were sick, sad, cold, or just hungry. Full of color, flavor, and simple ingredients, it was her way of saying, “Everything will be alright.”

In this article, you’ll learn how to recreate that old-fashioned vegetable soup that simmered gently on grandma’s stove — loaded with fresh vegetables, tender potatoes, and just the right seasoning.

Why This Soup Is So Special

Unlike fancy modern recipes or pre-packaged mixes, grandma’s vegetable soup was:

  • Flexible — she used whatever was in the fridge or garden
  • Nourishing — packed with real ingredients, vitamins, and fiber
  • Fragrant and slow-cooked — building layers of flavor over time
  • Easy to make in big batches for family dinners or freezing later

Best of all, it made the whole house smell like home.

Ingredients You’ll Need

This recipe serves 6–8 hearty portions.

Base Vegetables:

  • 2 tablespoons olive oil or butter
  • 1 medium onion, chopped
  • 2 garlic cloves, minced
  • 2 celery stalks, diced
  • 3 large carrots, peeled and sliced
  • 2 medium potatoes, cubed
  • 1 zucchini, diced
  • 1 cup green beans, chopped
  • 1 cup corn kernels (fresh or frozen)
  • 1 cup green peas (fresh or frozen)
  • 1 can diced tomatoes (400g / 14oz)

Broth and Seasonings:

  • 6 cups vegetable broth or water
  • 1 bay leaf
  • 1 teaspoon dried thyme
  • Salt and pepper to taste
  • Optional: 1 teaspoon smoked paprika or a pinch of chili flakes for warmth

Add-ins and Variations:

  • 1 cup shredded cabbage or kale
  • 1 can of beans (kidney, white, or chickpeas), drained
  • Small pasta (like elbow or ditalini), cooked separately
  • Fresh parsley or basil for garnish
  • Parmesan rind during cooking for extra flavor (optional)

Step-by-Step Instructions

1. Sauté the Base

Heat the oil or butter in a large pot over medium heat. Add the onions and cook until translucent. Stir in the garlic, celery, and carrots. Sauté for about 5–7 minutes until slightly softened.

2. Add the Broth and Hearty Veggies

Add the potatoes, tomatoes (with juice), bay leaf, thyme, and broth. Bring everything to a gentle boil.

Reduce heat and simmer for 20–25 minutes, or until the potatoes and carrots are nearly tender.

Grandma’s Tip: Keep the lid partially on for a richer broth.

3. Add the Remaining Vegetables

Add the green beans, zucchini, corn, and peas. Simmer for another 10–15 minutes, until all the vegetables are soft but not mushy.

If adding beans, leafy greens, or cooked pasta, stir them in now and cook for just a few minutes more.

4. Taste and Adjust

Season with salt and pepper to taste. Add any optional flavor boosts like paprika or chili flakes. Remove bay leaf before serving.

5. Let It Rest

Remove the soup from heat and let it sit for 5–10 minutes before serving. This allows the flavors to meld and deepen — grandma always insisted on this step.

What Makes This Recipe So Flexible?

One of the best things about grandma’s vegetable soup is how adaptable it is:

  • Out of peas? Add broccoli florets.
  • No potatoes? Try sweet potatoes, turnips, or pasta.
  • No broth? Use water and season generously.
  • No fresh veggies? Frozen works too.

This was a “use what you have” recipe — and it always worked.

How to Serve

Grandma’s vegetable soup was often the main course — simple, hearty, and served with:

  • Crusty bread or toast with butter
  • Homemade cornbread or cheese biscuits
  • White rice or noodles on the side
  • A sprinkle of grated Parmesan or cheddar on top

It’s also great as a starter for larger meals or packed in a thermos for school and work lunches.

How to Store and Reheat

Storage:

  • Let the soup cool completely.
  • Store in an airtight container in the fridge for up to 5 days.
  • Or freeze for up to 3 months — perfect for busy weeks!

Reheating:

  • Reheat gently on the stovetop over medium-low heat.
  • Add a splash of water or broth if it thickens too much in the fridge.
  • Stir often and taste before serving.

Grandma’s Tips for the Best Soup Every Time

  • Layer the flavors by adding vegetables in stages.
  • Don’t skip the garlic and onion — they are the aromatic base.
  • Use fresh herbs at the end for brightness.
  • Taste as you go — add salt gradually and adjust at the end.
  • Let it simmer slowly — never rush a good pot of soup.

The Power of a Pot of Soup

This isn’t just soup. It’s:

  • What you ate after playing outside in the cold
  • What grandma made when someone was sick
  • What filled the house with warmth on Sunday evenings
  • What taught you that simple food can be the most satisfying

A pot of vegetable soup is a pot of care, tradition, and nourishment.

Final Thoughts: A Bowl Full of Memories

Recreating grandma’s vegetable soup isn’t about perfection — it’s about comfort. It’s about taking what you have, adding love, and letting it simmer into something beautiful.

This recipe brings warmth to your kitchen and your heart, one bowl at a time.