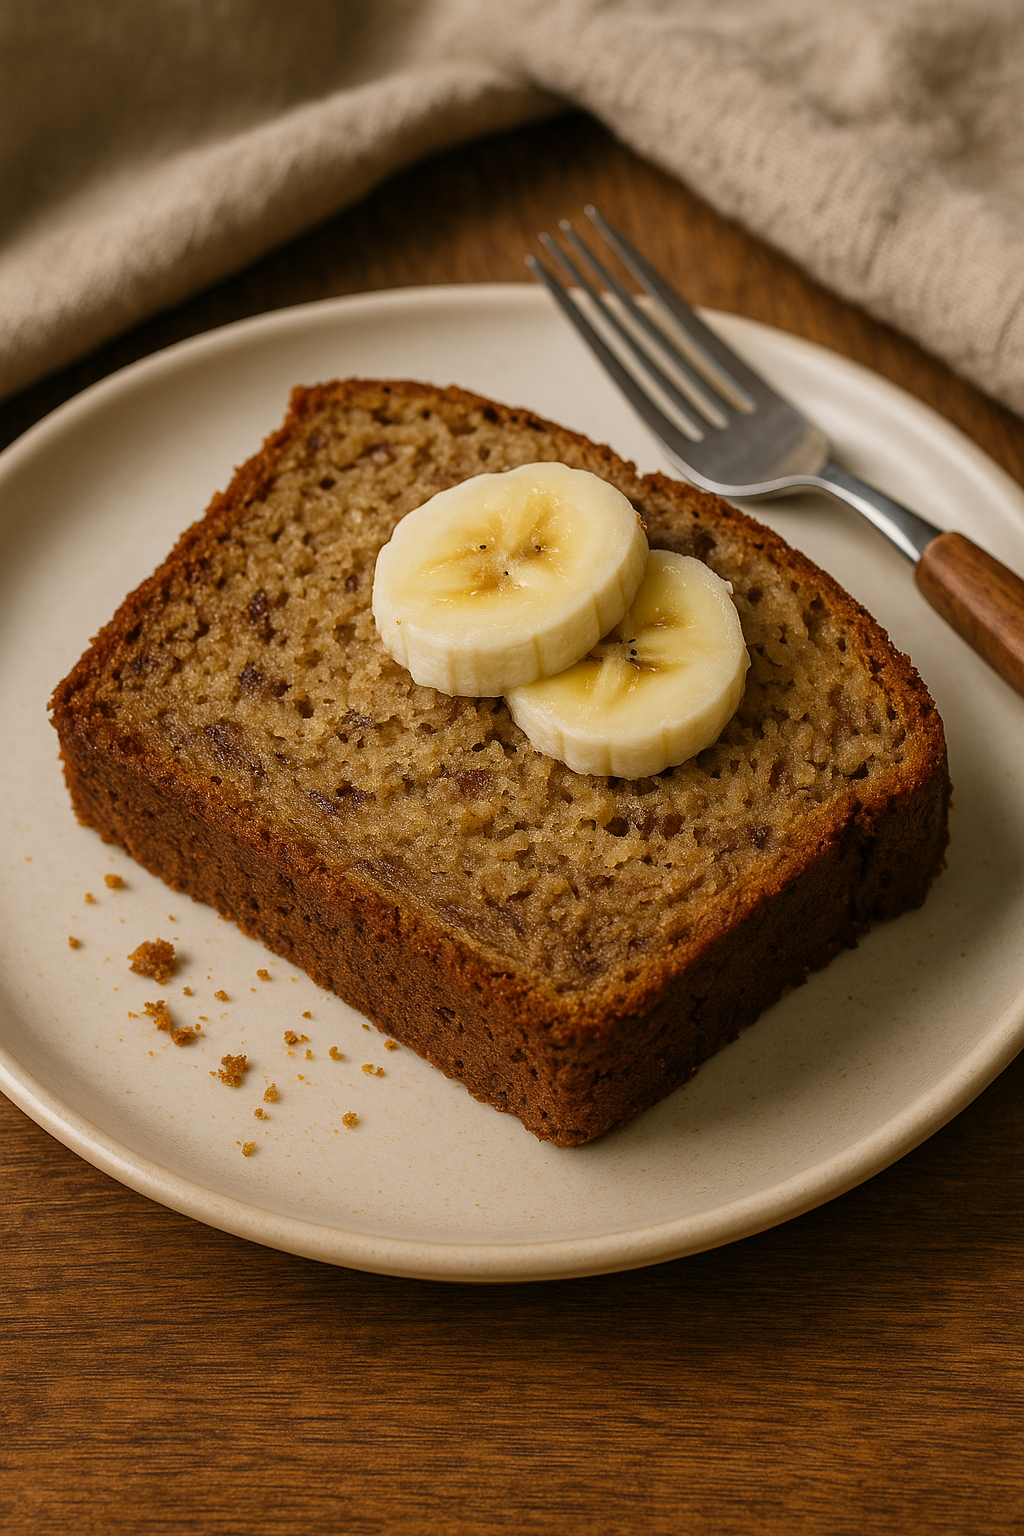
Grandma’s Banana Bread: A Moist and Classic Homemade Delight

There’s something comforting about the smell of fresh banana bread baking in the oven. It’s warm, familiar, and nostalgic — the kind of recipe that brings families together around the kitchen table. And when it comes to banana bread, no version is more beloved than the one passed down from grandma.

Grandma’s banana bread wasn’t fancy or complicated. It didn’t rely on special ingredients or modern kitchen gadgets. What made it special was the simplicity, the flavor, and the feeling that each slice was made with care. In this article, we’ll explore a complete guide to making moist, sweet, and classic banana bread — the kind that tastes like home.

Why Banana Bread Remains a Favorite

Banana bread has remained a kitchen staple for generations, and for good reason. It’s easy to make, uses ingredients most people already have, and offers flexibility to suit different tastes. Whether served for breakfast, as an afternoon snack, or a simple dessert, banana bread fits just about any occasion.

Here’s why so many people love it:

  • Great way to use ripe bananas
  • No mixer needed
  • Simple ingredients
  • Adaptable with nuts, chocolate chips, or spices
  • Freezes and stores well

Banana bread is also one of those recipes where imperfections are welcome. In fact, the riper the bananas, the better the flavor.

The Ingredients You’ll Need

This recipe makes one loaf and serves about 8–10 slices.

Core Ingredients:

  • 3 medium ripe bananas – mashed
  • ½ cup (1 stick) unsalted butter – melted
  • ¾ cup granulated sugar – or brown sugar for a deeper flavor
  • 2 large eggs
  • 1 teaspoon vanilla extract
  • 1 ½ cups all-purpose flour
  • 1 teaspoon baking soda
  • ½ teaspoon salt

Optional Additions:

  • ½ teaspoon ground cinnamon
  • ½ cup chopped walnuts or pecans
  • ½ cup chocolate chips

These optional ingredients allow you to customize the recipe while keeping the base moist and flavorful.

Step-by-Step Instructions

Making banana bread is simple. It doesn’t take long, and the preparation is straightforward. Here’s how to do it:

Step 1: Preheat the Oven

Set your oven to 175°C (350°F). Lightly grease a 9×5-inch loaf pan or line it with parchment paper to make removal easy.

Step 2: Mash the Bananas

In a large bowl, mash the bananas with a fork or potato masher until mostly smooth. A few small lumps are fine and add texture.

Step 3: Add Wet Ingredients

To the mashed bananas, add the melted butter, sugar, eggs, and vanilla extract. Mix until everything is well combined.

Step 4: Combine Dry Ingredients

In a separate bowl, whisk together the flour, baking soda, salt, and cinnamon if using.

Step 5: Mix Everything Together

Gently fold the dry ingredients into the banana mixture. Stir only until the flour disappears. Overmixing can lead to a denser loaf, so keep it light.

If you’re adding nuts or chocolate chips, fold them in at this stage.

Step 6: Bake

Pour the batter into the prepared loaf pan and smooth the top.

Place in the oven and bake for 50 to 60 minutes. Check for doneness by inserting a toothpick into the center. If it comes out clean or with a few moist crumbs, the bread is ready.

Step 7: Cool and Slice

Let the loaf cool in the pan for about 10 minutes, then transfer it to a wire rack to cool completely.

Once cool, slice and serve. Enjoy with coffee, tea, or simply on its own.

Storage and Freezing Tips

Banana bread stores well, making it perfect for meal prep or baking ahead.

  • Room Temperature: Wrap in foil or store in an airtight container for up to 3–4 days.
  • Refrigerator: Keeps for up to 1 week, but texture may change slightly.
  • Freezer: Wrap tightly in plastic wrap and freeze for up to 2 months. Thaw overnight before serving.

You can also freeze individual slices for quick, single-serving snacks.

How to Ripen Bananas Quickly

Don’t have ripe bananas? You can speed up the process in a few ways:

  • Paper Bag Method: Place bananas in a brown paper bag with an apple. In 1–2 days, they’ll soften and darken.
  • Oven Method: Place unpeeled bananas on a baking sheet and bake at 150°C (300°F) for 15–20 minutes until black. Let cool before using.

Simple Variations to Try

This banana bread is great as-is, but you can personalize it easily. Here are a few popular options:

1. Nut Banana Bread

Add chopped walnuts or pecans to the batter for crunch and flavor.

2. Chocolate Chip Banana Bread

Fold in ½ cup of chocolate chips before baking. A great option for kids.

3. Spiced Banana Bread

Add ½ teaspoon each of cinnamon and nutmeg to give it a warm, autumn flavor.

4. Banana Muffins

Scoop the batter into a muffin tin and bake at 175°C (350°F) for 18–22 minutes.

These variations allow you to use the same base recipe in many different ways.

Helpful Tips for Success

Even a simple recipe can go wrong without a few helpful reminders. Here are some tips to make sure your banana bread turns out perfect every time:

  • Use overripe bananas: The darker and softer, the better the flavor and moisture.
  • Don’t overmix: Stir the batter just until combined to keep it tender.
  • Test for doneness: Every oven is different. Always check with a toothpick.
  • Cool before slicing: Cutting too early can make the bread crumbly.

When to Serve Banana Bread

Banana bread is incredibly versatile. It’s not only for breakfast, though it pairs perfectly with coffee or tea. It also makes a great snack or light dessert.

Here are a few ways to serve it:

  • Toasted with butter
  • With a spoonful of peanut butter or cream cheese
  • As French toast slices
  • Alongside yogurt and fruit for breakfast

It’s also a thoughtful gift. Wrap it in parchment, tie with a ribbon, and bring it to a neighbor or friend.

Final Thoughts

Grandma’s banana bread reminds us that good food doesn’t have to be complicated. With a few ripe bananas and pantry basics, you can make something that feels like home.

This moist and sweet banana bread recipe is easy to follow, adaptable, and loved by all ages. Whether you’re baking for yourself or sharing with others, it’s a recipe worth keeping.

So next time you see bananas going soft on your counter, don’t toss them. Use them to make something simple, delicious, and timeless.

There’s something timeless about a loaf of banana bread — especially one baked in grandma’s kitchen. Moist, flavorful, and full of ripe banana goodness, it was her go-to recipe for using up overripe fruit and creating something delicious from simple pantry staples.

In this article, you’ll learn how to make classic banana bread from scratch, with options for add-ins and tips to ensure it turns out perfect every time.

Why You’ll Love Grandma’s Banana Bread

  • Made with real mashed bananas
  • Moist and tender — never dry
  • Easy, one-bowl recipe
  • Perfect for breakfast, snacks, or dessert
  • Freezes beautifully

Ingredients for Homemade Banana Bread

Makes one 9×5-inch loaf, about 10 slices.

  • 3 ripe bananas (the spottier, the better)
  • ½ cup unsalted butter, melted
  • ¾ cup brown sugar (or white sugar)
  • 2 large eggs
  • 1 teaspoon vanilla extract
  • 1 ½ cups all-purpose flour
  • 1 teaspoon baking soda
  • ½ teaspoon salt
  • Optional: ½ teaspoon cinnamon, ½ cup chopped nuts or chocolate chips

Step-by-Step Instructions

1. Preheat the Oven

Preheat to 175°C (350°F).

Grease and flour a 9×5-inch loaf pan or line with parchment paper.

2. Mash the Bananas

In a large bowl, mash the bananas with a fork or potato masher until mostly smooth.

3. Add the Wet Ingredients

Stir in the melted butter, sugar, eggs, and vanilla extract until well combined.

4. Add the Dry Ingredients

Sprinkle flour, baking soda, salt (and cinnamon if using) over the wet mixture.

Stir gently until just combined — do not overmix.

Fold in any add-ins like nuts or chocolate chips.

5. Pour and Bake

Pour the batter into the prepared loaf pan and smooth the top.

Bake for 50–60 minutes, or until a toothpick inserted into the center comes out clean.

Let cool in the pan for 10 minutes, then remove and cool completely on a wire rack.

Serving Suggestions

  • Plain or with a spread of butter or peanut butter
  • Toasted with a drizzle of honey or maple syrup
  • As French toast slices for breakfast
  • With coffee or hot tea
  • Topped with Greek yogurt and berries

Grandma’s tip: Make an extra loaf and freeze it for future cravings.

Storage and Freezing

Store:

  • Keep wrapped at room temperature for up to 4 days
  • Refrigerate for up to a week

Freeze:

  • Wrap slices or whole loaf tightly and freeze for up to 2 months
  • Thaw overnight or microwave slices for a quick treat

Variations to Try

  • Nutty Banana Bread: Add chopped walnuts or pecans
  • Chocolate Banana Bread: Stir in chocolate chips or cocoa powder
  • Coconut Banana Bread: Add shredded coconut and a touch of rum extract
  • Zucchini Banana Bread: Add ½ cup grated zucchini for extra moisture
  • Healthier Version: Use whole wheat flour and swap sugar for honey or maple syrup

Tips for Perfect Banana Bread

  • Use very ripe bananas — almost black is best
  • Don’t overmix the batter
  • Test doneness with a toothpick
  • Let it cool completely before slicing for best texture
  • Wrap tightly to retain moisture

Common Mistakes to Avoid

  • Dry bread? Overbaked or not enough banana
  • Gummy center? Undercooked — check doneness in the middle
  • Dense loaf? Overmixed batter or old baking soda
  • Cracked top? Normal and often expected in banana bread!

Final Thoughts: A Slice of Home

Banana bread is one of those recipes that turns simple ingredients into pure comfort. Grandma’s version was no-fuss, always moist, and always made with love.

So the next time you have a few spotty bananas on the counter, skip the trash — and bake a loaf that brings warmth, nostalgia, and that unmistakable aroma of home.

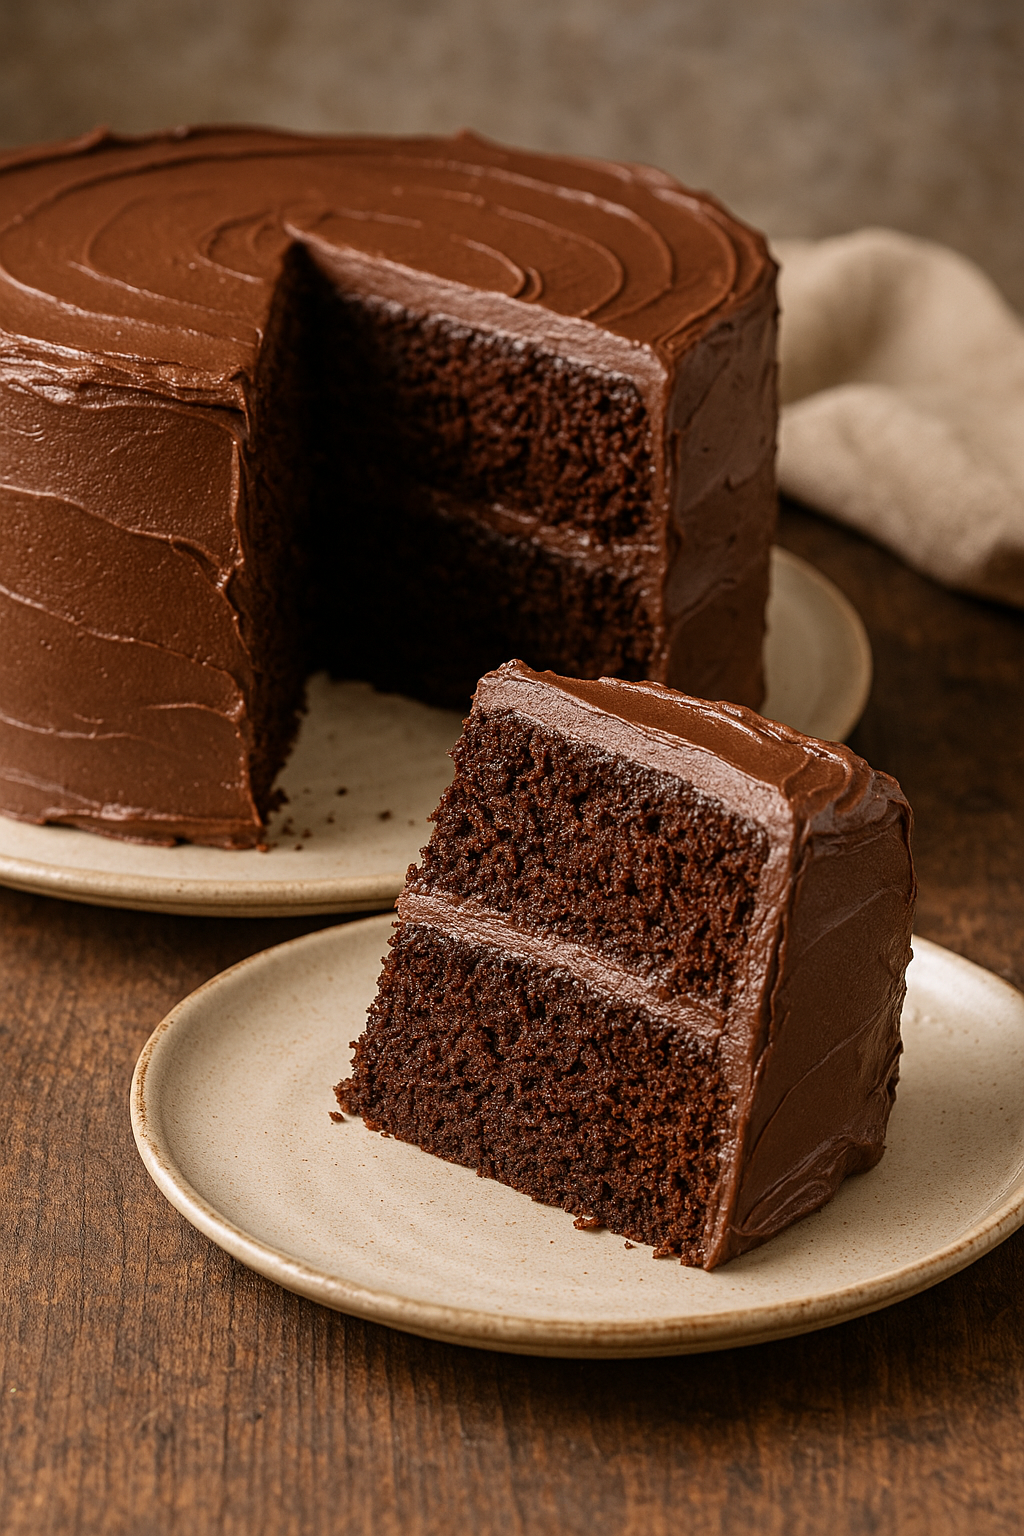
Grandma’s Chocolate Cake: Rich, Moist, and Made with Love

There’s something magical about a homemade chocolate cake — especially one made from grandma’s recipe box. With a tender crumb, deep cocoa flavor, and creamy frosting, it was a showstopper at birthdays, celebrations, or even just quiet Sunday afternoons.

In this article, you’ll learn how to make a classic chocolate cake from scratch — moist, flavorful, and irresistible.


Why You’ll Love This Chocolate Cake

  • Made with real cocoa and simple pantry ingredients
  • Incredibly moist and rich in flavor
  • Topped with a smooth and creamy frosting
  • Perfect for birthdays, holidays, or any day
  • Easy to make as a layer cake, sheet cake, or cupcakes

Ingredients for Grandma’s Chocolate Cake

Makes one 9×13-inch cake or two 9-inch layers.

For the Cake:

  • 1 ¾ cups all-purpose flour
  • ¾ cup unsweetened cocoa powder
  • 2 cups granulated sugar
  • 1 ½ teaspoons baking powder
  • 1 ½ teaspoons baking soda
  • 1 teaspoon salt
  • 2 large eggs
  • 1 cup buttermilk (or milk + 1 tbsp vinegar)
  • ½ cup vegetable oil
  • 2 teaspoons vanilla extract
  • 1 cup hot water or hot coffee (enhances the chocolate flavor)

For the Frosting:

  • ½ cup unsalted butter, softened
  • ⅓ cup unsweetened cocoa powder
  • 3 cups powdered sugar
  • ⅓ cup milk (more if needed)
  • 1 teaspoon vanilla extract
  • Pinch of salt

Step-by-Step Instructions

1. Prepare the Oven and Pans

Preheat oven to 175°C (350°F).

Grease and flour two 9-inch cake pans or a 9×13-inch baking dish. Line with parchment if desired.


2. Mix the Dry Ingredients

In a large mixing bowl, whisk together flour, cocoa, sugar, baking powder, baking soda, and salt.


3. Add Wet Ingredients

Add eggs, buttermilk, oil, and vanilla. Mix until combined and smooth.


4. Add Hot Water

Slowly pour in the hot water or coffee while mixing. The batter will be thin — that’s normal.


5. Bake

Pour the batter into prepared pans.

Bake for 30–35 minutes (round pans) or 35–40 minutes (sheet cake), until a toothpick inserted in the center comes out clean.

Let cakes cool in pans for 10 minutes, then remove and cool completely on wire racks before frosting.


6. Make the Frosting

In a large bowl, beat the softened butter and cocoa powder.

Gradually add powdered sugar and milk, mixing until smooth and fluffy.

Add vanilla and a pinch of salt. Adjust milk for desired consistency.


7. Frost the Cake

Once the cake is completely cool, frost the top and sides (or just the top for a sheet cake).

Decorate with chocolate shavings, sprinkles, or fruit if desired.


Serving Ideas

  • With vanilla or chocolate ice cream
  • Topped with fresh berries and whipped cream
  • Paired with coffee or milk
  • Layered with raspberry or caramel filling
  • Served warm with a scoop of ice cream on top

Grandma’s tip: Let the cake sit overnight — it gets even better the next day.


How to Store and Freeze

Store:

  • Cover and store at room temperature for up to 3 days
  • Refrigerate for up to 5 days

Freeze:

  • Freeze unfrosted cake layers wrapped in plastic for up to 3 months
  • Frost after thawing, or freeze fully frosted and thaw overnight in the fridge

Variations to Try

  • Chocolate Fudge Cake: Use melted chocolate in the batter
  • Mocha Cake: Add espresso powder to the batter and frosting
  • Mint Chocolate Cake: Add peppermint extract to the frosting
  • Gluten-Free: Use a gluten-free flour blend
  • Cupcakes: Bake for 18–22 minutes in cupcake liners

Troubleshooting Tips

  • Dry cake? Check baking time and use buttermilk or oil
  • Sinking in the center? Oven too hot or underbaked
  • Cracked top? Oven temp too high — try reducing by 10°C
  • Dense texture? Don’t overmix the batter

Final Thoughts: A Slice of Chocolate Heaven

Grandma’s chocolate cake wasn’t just dessert — it was a memory, a celebration, and an act of love. Whether it’s your first time baking from scratch or your hundredth, this classic recipe is one that brings joy with every bite.

So dust off that cake pan, preheat the oven, and bake something that makes everyone smile — just like grandma used to do.

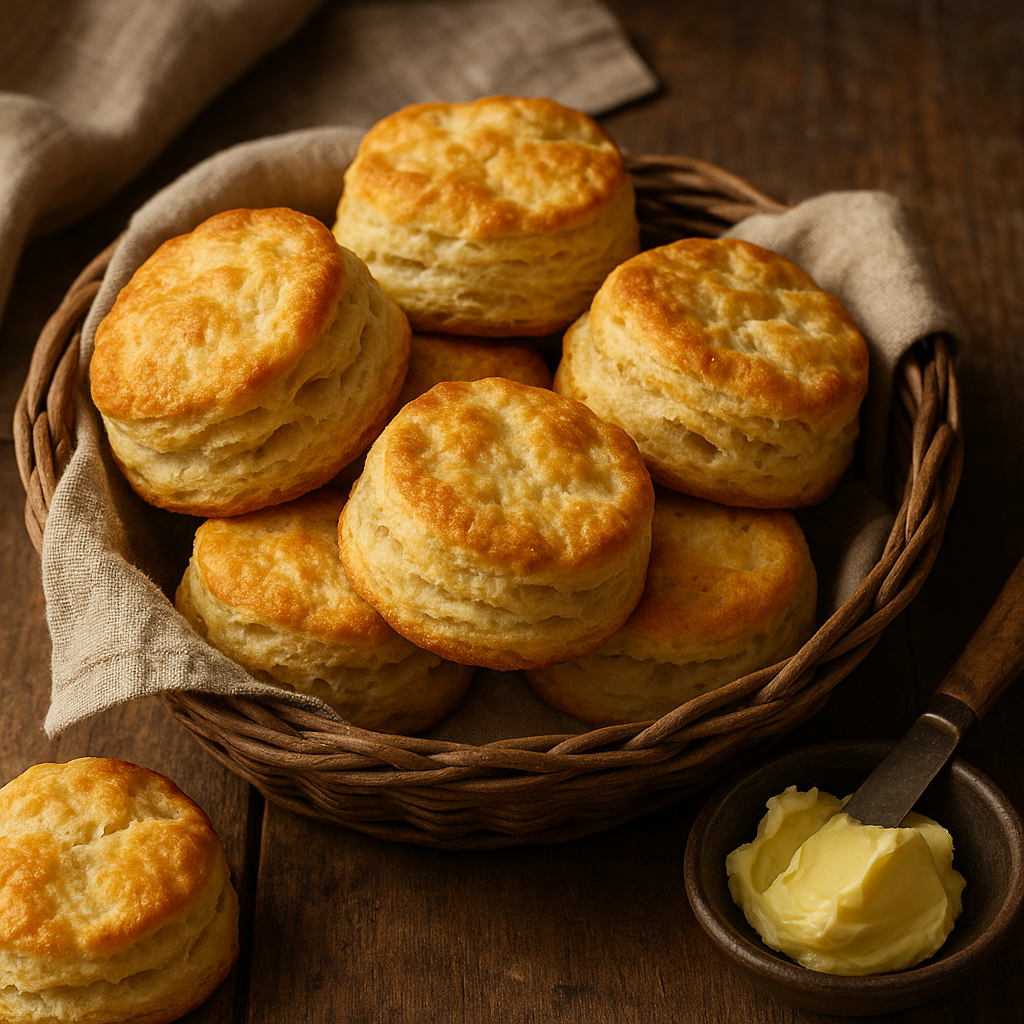
Grandma’s Homemade Biscuits: Fluffy, Buttery, and Made from Scratch

There was nothing quite like the smell of freshly baked biscuits coming out of grandma’s oven. With golden tops, soft layers, and a buttery, melt-in-your-mouth texture, they were a staple at every breakfast and Sunday dinner.

This article will walk you through how to make old-fashioned buttermilk biscuits from scratch — simple ingredients, no shortcuts, and full of that homemade love you remember.


Why You’ll Love These Homemade Biscuits

  • Made with real butter and buttermilk
  • Flaky, fluffy, and tender inside
  • Perfect for breakfast, lunch, or dinner
  • No fancy equipment required — just a bowl and your hands
  • Delicious plain or with jam, honey, or gravy

Ingredients for Grandma’s Biscuits

Makes 10–12 biscuits depending on size.

  • 2 cups all-purpose flour
  • 1 tablespoon baking powder
  • ½ teaspoon baking soda
  • 1 teaspoon salt
  • 6 tablespoons cold unsalted butter, cubed
  • ¾ cup cold buttermilk (plus more for brushing)

No buttermilk? Add 1 tablespoon lemon juice or vinegar to regular milk and let sit 5 minutes.


Step-by-Step Instructions

1. Preheat the Oven

Preheat to 220°C (425°F).

Line a baking sheet with parchment paper or lightly grease it.


2. Mix the Dry Ingredients

In a large bowl, whisk together flour, baking powder, baking soda, and salt.


3. Cut in the Butter

Add cold, cubed butter to the flour mixture.

Use a pastry cutter or your fingers to cut the butter into the flour until it resembles coarse crumbs.

You want some small lumps — that’s what creates flakiness.


4. Add Buttermilk

Pour in the buttermilk and gently stir until a shaggy dough forms.

Do not overmix — overworked dough leads to tough biscuits.


5. Fold the Dough

Turn dough onto a floured surface. Pat it into a rectangle, then fold it into thirds like a letter.

Repeat this fold 2–3 times. It builds layers for flakiness.

Pat the dough to ¾-inch thickness.


6. Cut the Biscuits

Use a floured round cutter (or a glass) to cut biscuits.

Press straight down — don’t twist, or the edges won’t rise evenly.

Place biscuits close together on the baking sheet for soft sides, or spaced apart for crispy edges.


7. Bake

Brush tops with buttermilk for a golden crust.

Bake for 12–15 minutes, or until tops are golden brown.

Let cool slightly and serve warm.


Serving Suggestions

  • With butter and honey or jam
  • Split and filled with fried chicken or eggs
  • Covered in country-style sausage gravy
  • With strawberries and whipped cream for shortcake
  • Used as a base for mini sandwiches

Grandma’s tip: Serve biscuits right out of the oven — that’s when they shine.


How to Store and Reheat

Store:

  • Cool completely and store in an airtight container at room temp for up to 2 days

Reheat:

  • Wrap in foil and warm in a 160°C (325°F) oven for 8–10 minutes
  • Or microwave individual biscuits for 10–15 seconds

Freeze:

  • Freeze unbaked biscuits on a tray, then transfer to a bag
  • Bake from frozen — add 2–3 minutes to baking time

Flavor Variations to Try

  • Cheddar and Chive Biscuits: Add shredded cheese and fresh herbs
  • Garlic Butter Biscuits: Brush with garlic-herb butter after baking
  • Sweet Biscuits: Add a tablespoon of sugar and top with cinnamon
  • Spicy Biscuits: Mix in diced jalapeños or cayenne pepper
  • Whole Wheat Version: Use half whole wheat, half all-purpose flour

Common Mistakes and Fixes

  • Tough biscuits? Overmixed dough — stir gently and briefly
  • Flat biscuits? Make sure your baking powder is fresh
  • Spread too much? Dough too warm — chill it before baking
  • Dry biscuits? Not enough fat or liquid — measure carefully

Grandma’s Biscuit Secrets

  • Use very cold butter and buttermilk
  • Don’t skip the folds — that’s how you get flaky layers
  • Handle the dough as little as possible
  • Bake hot and fast — high heat gives a good rise
  • Always use a sharp cutter and press straight down

Final Thoughts: A Classic Worth Mastering

Homemade biscuits may be simple, but they carry so much heart and history. With each warm, buttery bite, you’re not just enjoying a recipe — you’re preserving a piece of tradition, the way grandma did it.

So roll up your sleeves, flour your counter, and bake a batch of biscuits that feel like home.

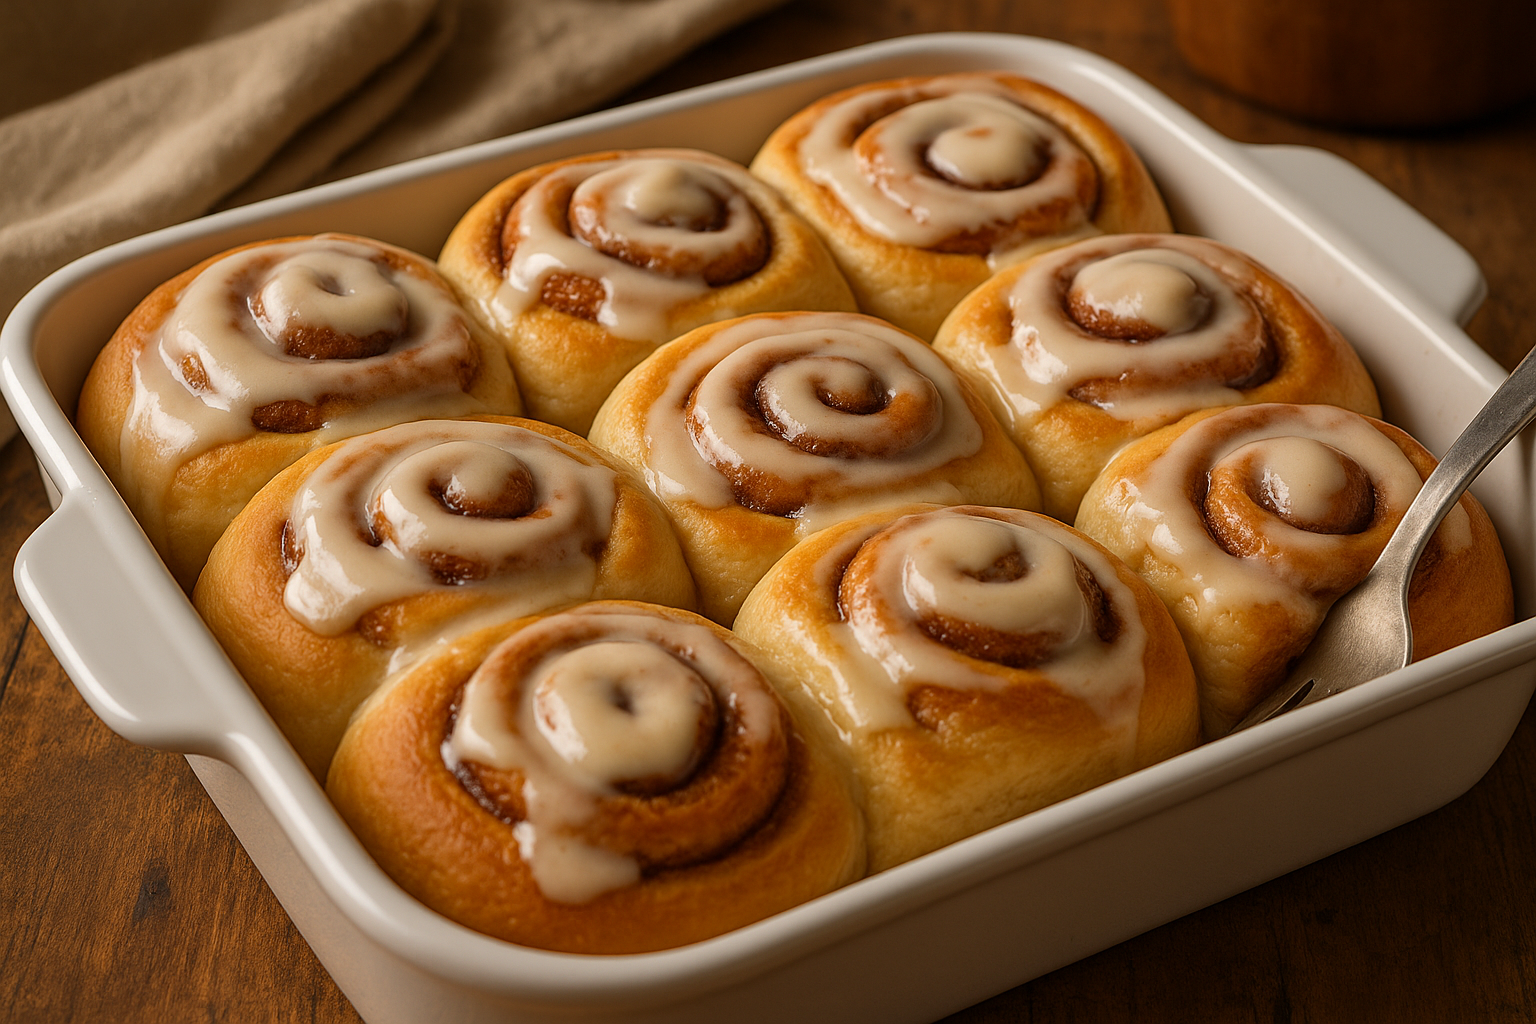
Grandma’s Cinnamon Rolls: Soft, Gooey, and Baked with Love

Few smells are as comforting as the warm, sweet scent of cinnamon rolls baking in the oven. Fluffy, buttery, and dripping with icing, grandma’s cinnamon rolls were the kind of treat that made everyone stop what they were doing and come to the kitchen.

In this article, you’ll learn how to make soft, homemade cinnamon rolls from scratch — the kind that rise high, melt in your mouth, and make any morning feel special.


Why These Cinnamon Rolls Are So Special

  • Buttery, soft dough that rises perfectly
  • Sweet cinnamon-sugar filling that caramelizes as it bakes
  • Creamy vanilla or cream cheese icing
  • Can be made ahead and baked fresh in the morning
  • A beloved treat for breakfast, brunch, or holidays

Ingredients for Grandma’s Cinnamon Rolls

Makes 12 large rolls.

For the Dough:

  • 4 cups all-purpose flour (plus more as needed)
  • 2 ¼ teaspoons (1 packet) instant yeast
  • 1 cup warm milk (about 110°F / 43°C)
  • ⅓ cup granulated sugar
  • ⅓ cup unsalted butter, melted
  • 1 teaspoon salt
  • 2 large eggs

For the Filling:

  • ¾ cup brown sugar, packed
  • 2 tablespoons ground cinnamon
  • ⅓ cup unsalted butter, softened

For the Icing:

  • 1 cup powdered sugar
  • 1–2 tablespoons milk
  • ½ teaspoon vanilla extract
  • Optional: 2 tablespoons cream cheese, softened

Step-by-Step Instructions

1. Make the Dough

In a large bowl, combine warm milk, sugar, and yeast. Let sit for 5 minutes until frothy.

Add melted butter, eggs, and salt. Gradually stir in the flour until a soft dough forms.

Knead by hand or with a mixer for 6–8 minutes, until the dough is smooth and elastic.


2. Let It Rise

Place the dough in a greased bowl, cover, and let rise in a warm place for 1–1.5 hours, or until doubled in size.


3. Prepare the Filling

Mix the brown sugar and cinnamon in a small bowl.


4. Roll and Fill

Punch down the dough and roll it into a large rectangle (about 16×12 inches).

Spread softened butter over the surface, then sprinkle with the cinnamon-sugar mixture.


5. Shape the Rolls

Starting from the long side, roll the dough into a tight log.

Cut into 12 equal pieces and place them in a greased 9×13-inch baking dish.


6. Second Rise

Cover and let the rolls rise for 30–45 minutes, until puffy and touching.

Meanwhile, preheat the oven to 175°C (350°F).


7. Bake

Bake for 20–25 minutes, or until golden brown and cooked through.

Let cool for 10 minutes before icing.


8. Make the Icing

Mix powdered sugar, vanilla, and milk (and cream cheese, if using) until smooth.

Drizzle over warm rolls.


Storage and Reheating

  • Store at room temp for 2 days, or refrigerate for up to 5 days
  • Reheat in the microwave or oven until warm
  • Freeze un-iced rolls for up to 2 months — thaw and ice after baking

Make-Ahead Option

  • Prepare rolls, cover tightly, and refrigerate overnight before the second rise
  • Let come to room temp and rise in the morning, then bake as directed

Variations to Try

  • Raisin Cinnamon Rolls: Add ½ cup raisins to the filling
  • Pecan Sticky Buns: Add chopped pecans and caramel glaze
  • Pumpkin Spice Rolls: Add pumpkin purée to the dough and pumpkin spice to the filling
  • Chocolate Rolls: Add mini chocolate chips to the filling
  • Lemon Icing: Use lemon juice instead of milk in the icing

Grandma’s Tips for the Best Cinnamon Rolls

  • Use warm milk, not hot, so you don’t kill the yeast
  • Let the dough rise in a draft-free, warm area
  • Roll the dough tightly to avoid gaps in the spirals
  • Don’t overbake — rolls should be soft, not dry
  • Add the icing while warm so it melts just enough

Final Thoughts: A Swirl of Sweet Memories

Grandma’s cinnamon rolls were more than just a breakfast treat — they were a celebration of togetherness, patience, and sweetness. Whether for holidays, birthdays, or slow Sunday mornings, this recipe brings the same magic to your own home.

Warm, gooey, and unforgettable — that’s how cinnamon rolls should be.

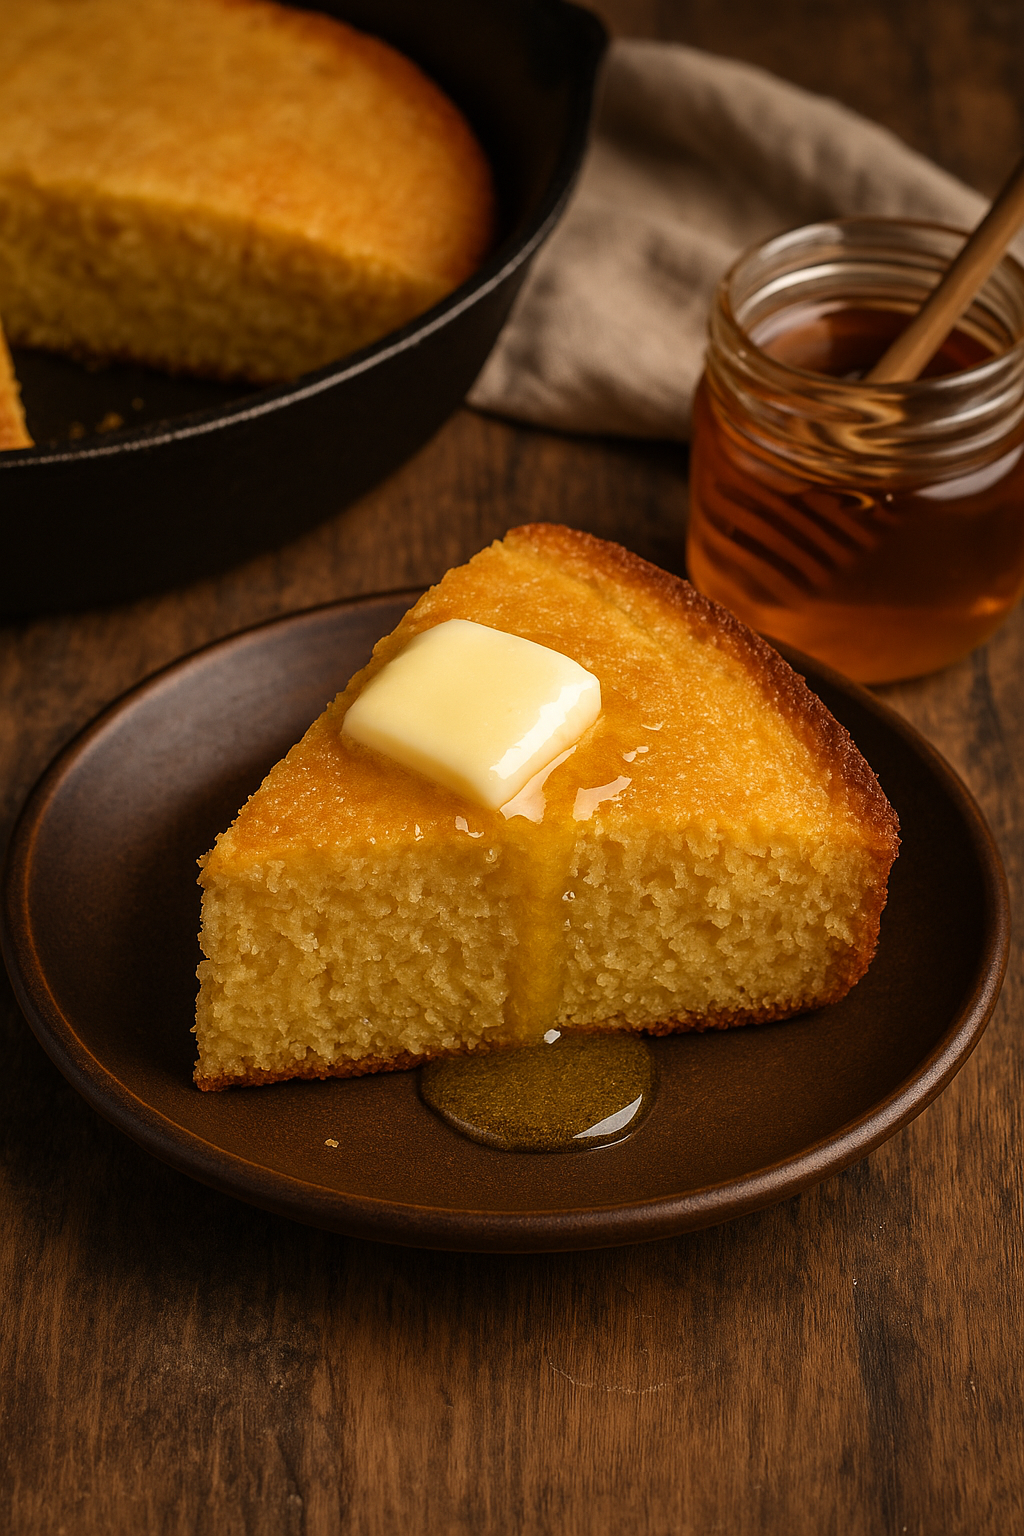
Grandma’s Old-Fashioned Cornbread: Golden, Moist, and Perfectly Sweet

Served warm from a cast-iron skillet with a pat of butter melting on top, grandma’s cornbread was the definition of simple Southern comfort. Slightly sweet, tender in the center, and golden on the edges, it was a staple at family meals — especially with soups, stews, and chili.

In this article, you’ll learn how to make homemade cornbread the old-fashioned way, with easy steps and ingredients you already have at home.


Why You’ll Love This Cornbread

  • Made from scratch in under 30 minutes
  • Moist and tender inside, with crispy golden edges
  • Lightly sweet — perfect with both savory and sweet meals
  • Versatile: bake it in a skillet, muffin tin, or baking dish
  • Delicious served warm with honey, butter, or jam

Ingredients for Classic Cornbread

This recipe serves 8 people.

  • 1 cup cornmeal (yellow or white)
  • 1 cup all-purpose flour
  • ¼ cup granulated sugar (adjust to taste)
  • 1 tablespoon baking powder
  • ½ teaspoon salt
  • 1 cup buttermilk (or milk + lemon juice substitute)
  • 2 large eggs
  • ½ cup unsalted butter, melted (plus extra for greasing pan)

Optional Add-ins: corn kernels, shredded cheese, diced jalapeños, or chopped herbs


Step-by-Step Instructions

1. Preheat Your Oven

Preheat to 200°C (400°F).

Grease a cast iron skillet, square baking dish, or muffin pan with butter.

If using a skillet, place it in the oven to preheat — this helps create a crispy crust.


2. Mix the Dry Ingredients

In a large bowl, whisk together the cornmeal, flour, sugar, baking powder, and salt.


3. Mix the Wet Ingredients

In another bowl, combine the buttermilk, eggs, and melted butter. Stir until fully blended.


4. Combine and Pour

Pour the wet ingredients into the dry ingredients and mix until just combined.

Don’t overmix — a few lumps are fine!

Carefully pour the batter into the hot greased skillet or pan.


5. Bake

Bake for 20–25 minutes, or until the top is golden and a toothpick inserted in the center comes out clean.

Let cool for 5–10 minutes before slicing and serving.


Serving Suggestions

  • With chili, soup, or stew
  • Slathered in butter and drizzled with honey
  • Alongside fried chicken or barbecue
  • Crumbled into collard greens or beans
  • As a base for stuffing or cornbread dressing

How to Store and Reheat

Store:

  • Cover and store at room temp for up to 2 days
  • Refrigerate for up to 5 days

Reheat:

  • Microwave individual slices or reheat in oven at 175°C (350°F)

Freeze:

  • Wrap slices individually in foil or plastic and freeze for up to 2 months

Variations You Can Try

  • Southern-Style: Leave out sugar for a savory cornbread
  • Sweet Cornbread: Double the sugar or add honey
  • Cheesy Jalapeño: Mix in shredded cheddar and chopped peppers
  • Cornbread Muffins: Bake in muffin tins for about 15 minutes
  • Gluten-Free: Use gluten-free all-purpose flour blend

Grandma’s Tips for Perfect Cornbread

  • Preheat the skillet — this gives the cornbread a golden, crispy edge
  • Use real buttermilk for authentic flavor and fluffiness
  • Melt the butter and let it cool slightly before mixing
  • Don’t overbake — it should be moist in the center, not dry
  • Serve it warm — that’s when the flavor shines

Final Thoughts: A Southern Tradition in Every Slice

Whether served with stew, smothered in honey, or enjoyed straight from the skillet, grandma’s cornbread is the kind of simple, soul-satisfying food that brings people together.

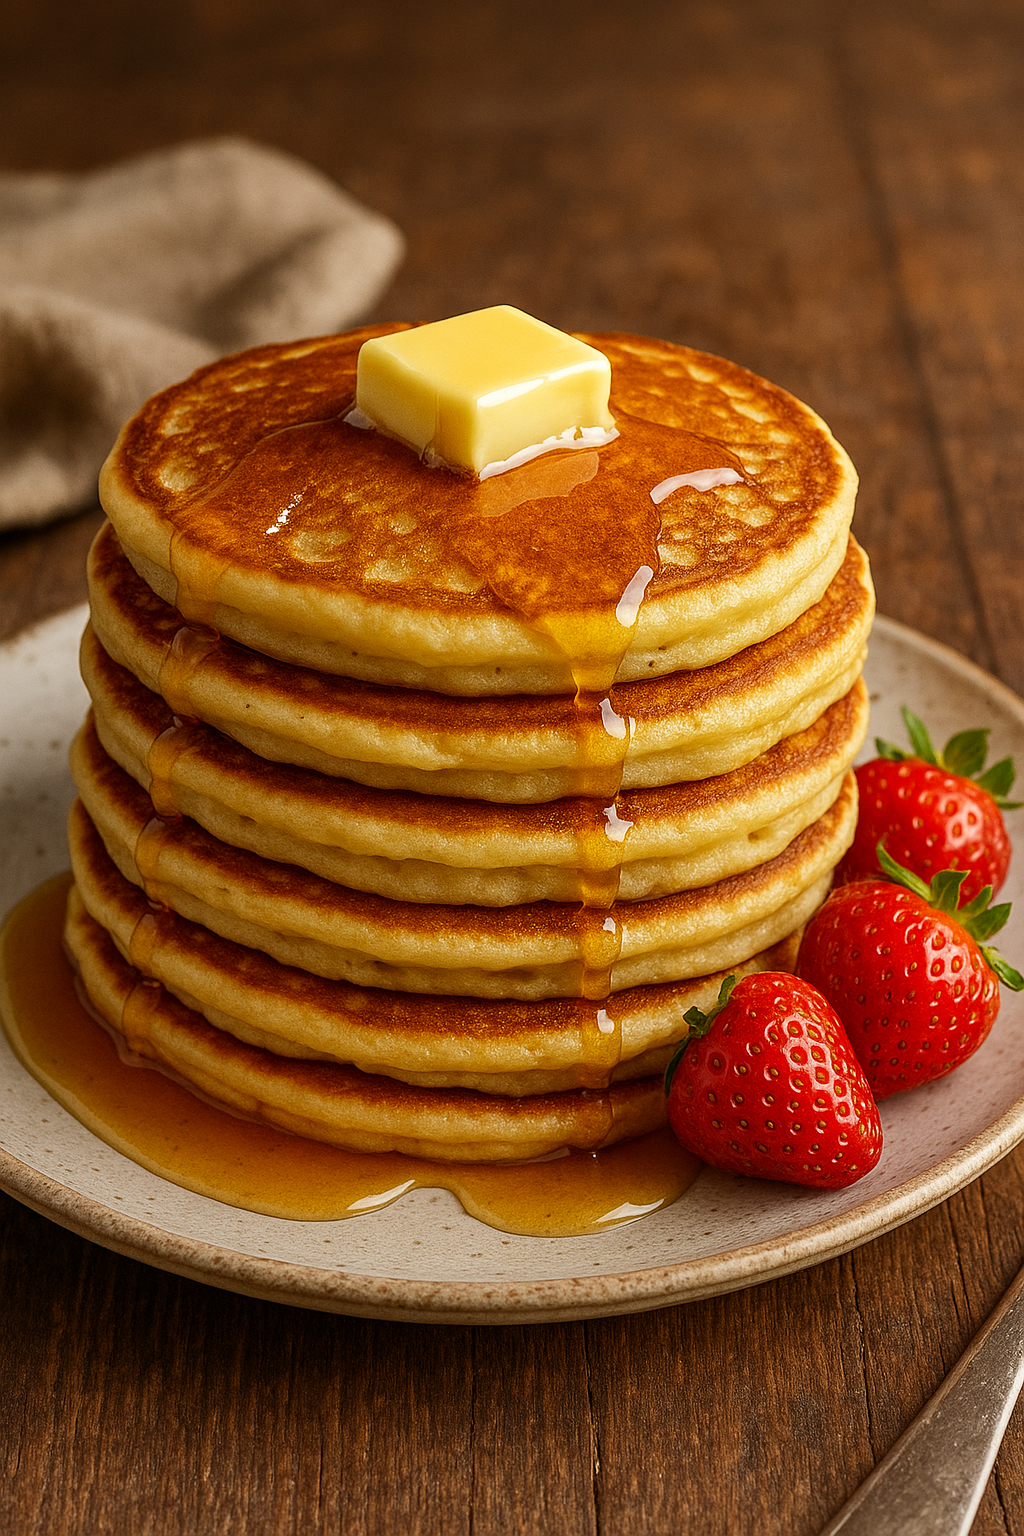
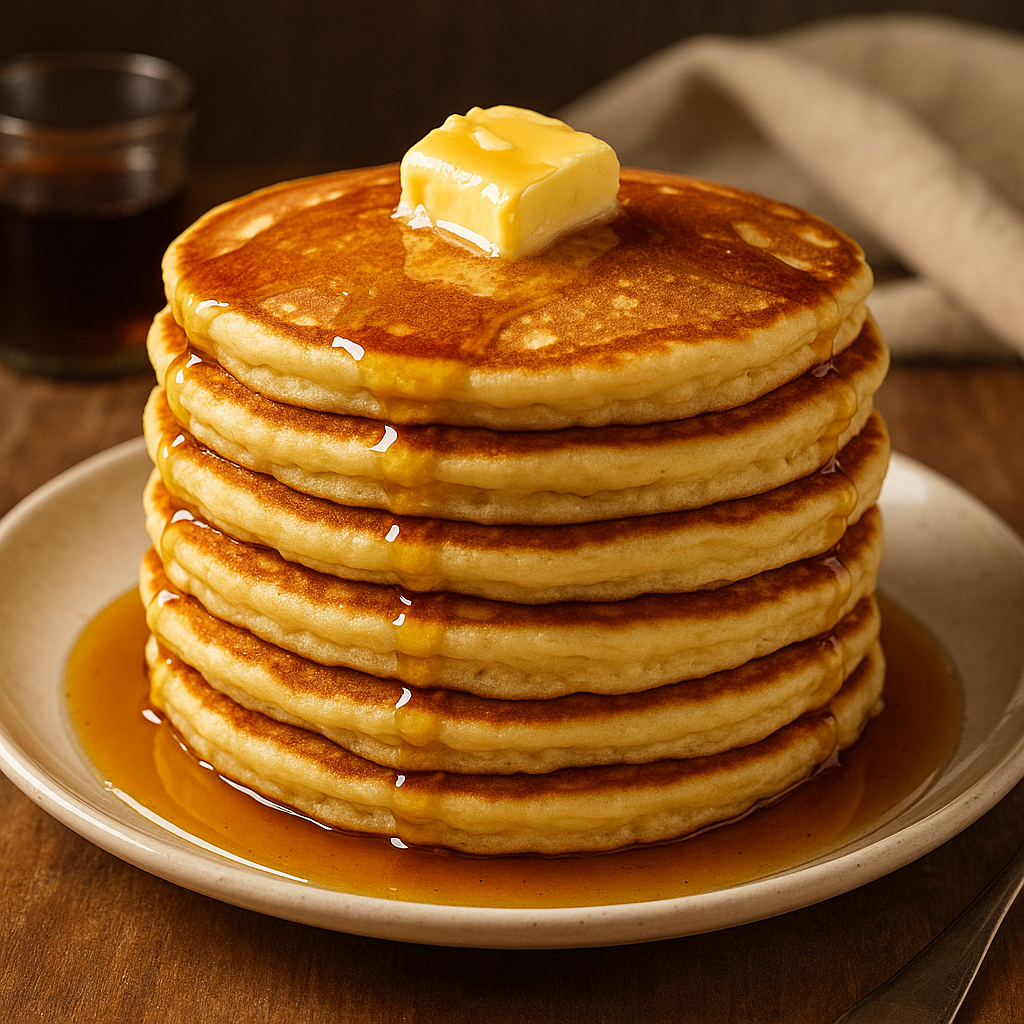
Grandma’s Buttermilk Pancakes: Fluffy, Golden, and Made from Scratch

Waking up to the smell of pancakes sizzling on grandma’s griddle was a tradition that made any morning special. Her buttermilk pancakes were soft, fluffy, and perfectly golden — served hot with melted butter and real maple syrup.

In this guide, you’ll learn how to make the ultimate homemade pancakes, just like grandma did: no boxed mix, just real ingredients and a few simple steps for perfect results every time.


Why These Pancakes Are So Loved

  • Incredibly fluffy and light thanks to buttermilk
  • Made from scratch with everyday ingredients
  • Ready in just 20 minutes
  • Perfect for weekend breakfasts, brunches, or even breakfast-for-dinner
  • Easily customizable with berries, chocolate chips, or spices

Ingredients for Grandma’s Buttermilk Pancakes

This recipe makes about 10–12 medium pancakes.

  • 2 cups all-purpose flour
  • 2 tablespoons sugar
  • 1 teaspoon baking soda
  • 2 teaspoons baking powder
  • ½ teaspoon salt
  • 2 cups buttermilk (or substitute below)
  • 2 large eggs
  • ¼ cup unsalted butter, melted
  • 1 teaspoon vanilla extract (optional)
  • Butter or oil for cooking

Buttermilk Substitute:

  • 2 cups milk + 2 tablespoons lemon juice or vinegar
  • Let sit for 5–10 minutes until slightly curdled

Step-by-Step Instructions

1. Mix the Dry Ingredients

In a large bowl, whisk together the flour, sugar, baking powder, baking soda, and salt.


2. Mix the Wet Ingredients

In another bowl, beat the eggs. Add the buttermilk, melted butter, and vanilla. Mix until well combined.


3. Combine Wet and Dry

Pour the wet ingredients into the dry ingredients.

Stir gently until just combined — a few lumps are okay! Don’t overmix or the pancakes will be tough.


4. Preheat the Griddle or Pan

Heat a skillet or griddle over medium heat. Add a bit of butter or oil to coat the surface.


5. Cook the Pancakes

Pour about ¼ cup of batter per pancake onto the hot surface.

Cook for 2–3 minutes, or until bubbles form on the surface and the edges look set. Flip and cook for another 1–2 minutes until golden brown.

Keep warm in a low oven while you finish the batch.


Serving Suggestions

  • With real maple syrup and butter
  • Topped with fresh berries and whipped cream
  • With banana slices and chopped nuts
  • Spread with jam, peanut butter, or honey
  • Rolled with fruit and yogurt for a breakfast wrap

Grandma’s Favorite: A little butter, a splash of syrup, and a smile.


Tips for Perfect Pancakes

  • Don’t overmix the batter — lumps are fine!
  • Let the batter rest for 5 minutes before cooking
  • Use medium heat to avoid burning
  • Wipe the skillet between batches to prevent sticking
  • For crispy edges, use a bit of extra butter on the griddle

Variations You’ll Love

  • Blueberry Pancakes: Add fresh or frozen blueberries to the batter
  • Chocolate Chip Pancakes: Mix in mini chocolate chips
  • Pumpkin Spice Pancakes: Add ½ cup pumpkin puree and spices
  • Lemon Ricotta Pancakes: Swap some buttermilk for ricotta and add lemon zest
  • Whole Wheat Pancakes: Replace half the flour with whole wheat flour

How to Store and Reheat

Store:

  • Let pancakes cool completely, then refrigerate in an airtight container for up to 4 days

Freeze:

  • Stack with parchment between and freeze for up to 2 months

Reheat:

  • Microwave: Heat in 15–20 second bursts
  • Toaster: Great for getting the edges crispy again
  • Oven: Bake at 175°C (350°F) for 5–10 minutes

Final Thoughts: A Breakfast That Feels Like Home

Grandma’s buttermilk pancakes weren’t just about starting the day with a full belly — they were about starting it with joy, comfort, and the kind of flavor you never forget.

Now you can bring that magic into your own kitchen — with every golden, buttery, fluffy bite.

Grandma’s Classic Banana Bread: Moist, Sweet, and Made with Ripe Bananas

There’s something magical about the smell of banana bread baking in the oven — especially when it’s grandma’s recipe. Sweet, moist, and perfectly spiced, it was her go-to solution for overripe bananas and a surefire way to bring the family together at the table.

In this article, you’ll learn how to make classic banana bread from scratch, just like grandma did. It’s easy, delicious, and impossible to eat just one slice.


Why Banana Bread Is a Timeless Favorite

  • Uses up overripe bananas that would otherwise go to waste
  • Made with simple pantry staples
  • Incredibly moist and flavorful
  • Perfect as a breakfast, snack, or dessert
  • Easily customizable with nuts, chocolate, or spices

Ingredients for Grandma’s Banana Bread

This recipe makes one 9×5 inch loaf (about 8–10 slices).

  • 3 ripe bananas, mashed
  • ½ cup unsalted butter, melted
  • ¾ cup brown sugar (or use white sugar)
  • 2 large eggs
  • 1 teaspoon vanilla extract
  • 1 ½ cups all-purpose flour
  • 1 teaspoon baking soda
  • ½ teaspoon salt
  • ½ teaspoon cinnamon (optional, but recommended)
  • Optional: ½ cup chopped walnuts, pecans, or chocolate chips

Grandma’s Tip: The riper the bananas, the sweeter and more flavorful your bread will be.


Step-by-Step Instructions

1. Preheat the Oven

Preheat your oven to 175°C (350°F). Grease a 9×5 inch loaf pan or line it with parchment paper.


2. Mash the Bananas

In a large bowl, mash the bananas with a fork until smooth.

Stir in the melted butter and mix until combined.


3. Add the Wet Ingredients

Mix in the brown sugar, eggs, and vanilla extract. Stir until fully blended.


4. Add the Dry Ingredients

In a separate bowl, whisk together the flour, baking soda, salt, and cinnamon.

Gradually add the dry mixture to the banana mixture. Stir just until combined — do not overmix.

Fold in nuts or chocolate chips if using.


5. Bake

Pour the batter into the prepared loaf pan and smooth the top.

Bake for 50–60 minutes, or until a toothpick inserted into the center comes out clean.

If the top browns too quickly, cover loosely with foil during the last 10–15 minutes.


6. Cool and Serve

Let the bread cool in the pan for 10 minutes, then transfer to a wire rack to cool completely.

Slice and serve warm or at room temperature — delicious either way!


How to Store and Freeze Banana Bread

Room Temperature:

  • Wrap in foil or plastic wrap and keep for up to 3 days

Refrigerator:

  • Lasts up to 1 week, but may dry out slightly

Freezer:

  • Wrap tightly in plastic wrap and foil; freeze for up to 3 months
  • To serve, thaw at room temperature or toast slices directly from frozen

Fun Variations

  • Chocolate Banana Bread: Add ¼ cup cocoa powder and chocolate chips
  • Banana Nut Bread: Use chopped walnuts or pecans
  • Spiced Banana Bread: Add ground nutmeg, clove, or cardamom
  • Banana Coconut Bread: Mix in shredded coconut
  • Healthy Twist: Use whole wheat flour and swap butter for coconut oil or Greek yogurt

Grandma’s Secrets for the Best Banana Bread

  • Use extra ripe bananas — black spots are good!
  • Don’t overmix the batter — stir just until no flour streaks remain
  • Let it cool fully before slicing for cleaner cuts
  • Add a few banana slices on top before baking for a beautiful finish
  • Wrap leftovers while still slightly warm to keep moisture inside

Final Thoughts: A Slice of Sweet Nostalgia

Banana bread was more than just a way to use old bananas — it was grandma’s way of turning something ordinary into something unforgettable. With its soft texture, sweet aroma, and comforting flavor, this banana bread recipe brings those memories back in every bite.

Now you can carry on that tradition with your own homemade loaf — and maybe share a slice with someone you love.


Grandma’s Buttermilk Pancakes: Fluffy, Golden, and Made from Scratch

In grandma’s kitchen, pancakes weren’t just for Saturday mornings — they were a celebration of slow breakfasts, warm syrup, and second helpings. Made from scratch with real buttermilk, her pancakes were perfectly fluffy inside, lightly crisped outside, and stacked high with love.

In this guide, you’ll learn how to recreate grandma’s legendary buttermilk pancakes — from ingredients and tips to flipping techniques and delicious topping ideas.

Why Buttermilk Pancakes Are Extra Special

Buttermilk isn’t just a fancy ingredient — it’s the key to pancakes that are:

  • Incredibly fluffy and tender
  • Slightly tangy for balance
  • Golden brown with a delicate crust
  • Perfect with sweet or savory toppings

Grandma never used boxed mixes — and after this, neither will you.

Ingredients for Classic Buttermilk Pancakes

This recipe makes 10–12 medium pancakes (serves 3–4).

Dry Ingredients:

  • 2 cups all-purpose flour
  • 2 tablespoons granulated sugar
  • 2 teaspoons baking powder
  • 1 teaspoon baking soda
  • ½ teaspoon salt

Wet Ingredients:

  • 2 cups buttermilk (or substitute below)
  • 2 large eggs
  • ¼ cup melted butter (plus more for cooking)
  • 1 teaspoon vanilla extract (optional)

Buttermilk Substitute (if needed):

  • 2 cups milk + 2 tablespoons lemon juice or white vinegar
  • Let sit for 5–10 minutes to curdle before using

Step-by-Step Instructions

1. Mix the Dry Ingredients

In a large mixing bowl, whisk together the flour, sugar, baking powder, baking soda, and salt.

2. Combine Wet Ingredients

In a separate bowl, beat the eggs lightly. Add buttermilk, melted butter, and vanilla. Mix well.

3. Combine Wet and Dry

Pour the wet mixture into the dry ingredients. Stir gently until just combined — a few small lumps are fine. Do not overmix, or your pancakes will be tough.

Grandma’s Tip: Let the batter rest for 5–10 minutes while you heat the pan. This makes the pancakes even fluffier.

4. Heat and Grease the Pan

Heat a large nonstick skillet or griddle over medium heat. Lightly grease with butter or oil.

The surface is ready when a drop of water sizzles and dances on it.

5. Cook the Pancakes

Pour ¼ cup of batter for each pancake onto the hot skillet.

Cook for 2–3 minutes, until bubbles form on the surface and the edges look set. Flip and cook another 1–2 minutes, until golden brown and cooked through.

Adjust heat as needed to avoid burning.

6. Serve Warm

Transfer pancakes to a plate and keep warm. Serve immediately with your favorite toppings.

Topping Ideas Grandma Would Approve

  • Classic butter and maple syrup
  • Fresh berries and whipped cream
  • Sliced bananas and chopped nuts
  • Jam or fruit preserves
  • Peanut butter and honey
  • Powdered sugar and lemon juice
  • Or grandma’s favorite: apple compote with cinnamon

Tips for Perfect Pancakes Every Time

  • Use fresh baking powder/soda — old leavening won’t rise
  • Don’t overmix — it’s okay if the batter is slightly lumpy
  • Let the batter rest — helps gluten relax and bubbles form
  • Wipe skillet between batches to prevent burnt butter flavor
  • Flip only once — flipping multiple times deflates the pancakes

How to Keep Pancakes Warm

Place cooked pancakes on a baking sheet in a 95°C (200°F) oven while you finish cooking the batch. Cover loosely with foil to prevent drying out.

Make-Ahead and Storage Tips

Refrigerate:

  • Store leftovers in an airtight container for up to 3 days.

Freeze:

  • Let pancakes cool completely, then stack with parchment between and freeze in a zip-top bag for up to 2 months.

Reheat:

  • Toast or microwave for a quick breakfast
  • Or warm in the oven at 150°C (300°F) until heated through

Variations to Try

  • Blueberry Pancakes: Add fresh or frozen blueberries to the batter
  • Chocolate Chip Pancakes: Stir in mini chocolate chips
  • Savory Herb Pancakes: Add grated cheese and chives
  • Cinnamon Swirl Pancakes: Drizzle cinnamon-sugar mixture on top while cooking
  • Pumpkin Pancakes: Add ½ cup pumpkin puree + pumpkin spice blend

Final Thoughts: A Stack of Happiness

There’s something magical about a stack of warm pancakes, made from scratch just like grandma used to do. They’re simple, comforting, and perfect for any day that needs a little extra joy.

Whether it’s Sunday morning with the whole family or a quiet breakfast for one, these fluffy buttermilk pancakes are a reminder that some of life’s best moments are cooked in a skillet.

How to Make Grandma’s Classic Banana Bread: Moist, Sweet, and Full of Flavor

When your bananas start turning brown, it’s not a mistake — it’s an opportunity. And no one understood that better than grandma. Instead of wasting them, she transformed overripe bananas into the most delicious, moist, and fragrant banana bread you could imagine.

In this guide, you’ll learn how to make banana bread the old-fashioned way, just like grandma used to — simple ingredients, no fancy gadgets, and a loaf so rich and comforting it barely lasted a day on the counter.

Why Banana Bread Is a Timeless Favorite

Banana bread is one of the ultimate comfort bakes. Here’s why:

  • Uses up ripe bananas instead of throwing them out
  • Comes together with basic pantry ingredients
  • Moist, tender, and full of sweet banana flavor
  • Delicious warm, cold, toasted — with or without toppings
  • Perfect for breakfast, snacks, or even dessert

Let’s dig into grandma’s secrets for the best banana bread you’ll ever taste.

Ingredients for Grandma’s Banana Bread

This recipe makes one 9×5 inch loaf — about 8–10 slices.

  • 3 very ripe bananas, mashed
  • 2 large eggs
  • ½ cup unsalted butter, melted and cooled
  • ¾ cup granulated sugar (adjust to taste)
  • 1 ½ cups all-purpose flour
  • 1 teaspoon baking soda
  • ½ teaspoon salt
  • 1 teaspoon vanilla extract
  • ½ teaspoon ground cinnamon (optional)
  • ½ cup chopped walnuts or pecans (optional)
  • ¼ cup milk or sour cream (optional, for extra moisture)

Step-by-Step Instructions

1. Preheat the Oven and Prep the Pan

Preheat your oven to 175°C (350°F).

Grease and flour a 9×5-inch loaf pan, or line it with parchment paper for easy removal.

2. Mash the Bananas

In a large bowl, mash the bananas until mostly smooth (a few chunks are okay — they add texture).

Add the melted butter and stir to combine.

3. Add Wet Ingredients

Mix in the sugar, eggs, vanilla, and milk or sour cream if using. Stir until smooth and well incorporated.

4. Mix the Dry Ingredients

In a separate bowl, whisk together flour, baking soda, salt, and cinnamon.

Gradually add the dry ingredients to the banana mixture, stirring gently just until no flour remains.

Grandma’s Tip: Don’t overmix — overworking the batter can lead to dense bread.

5. Fold in Nuts (Optional)

If using chopped nuts, gently fold them into the batter at the end.

6. Pour and Bake

Pour the batter into your prepared loaf pan and smooth the top with a spatula.

Bake for 50–60 minutes, or until a toothpick inserted into the center comes out clean.

7. Cool and Slice

Let the banana bread cool in the pan for 10–15 minutes, then transfer to a wire rack to cool completely.

Slice and serve warm, room temperature, or toasted with butter.

Banana Bread Variations Grandma Loved

Want to mix it up? Here are some fun and delicious twists:

  • Chocolate Chip Banana Bread: Add ½ cup chocolate chips
  • Peanut Butter Swirl: Swirl 2 tbsp peanut butter into the top before baking
  • Coconut Banana Bread: Add ¼ cup shredded coconut to the batter
  • Maple-Walnut: Replace sugar with maple syrup and fold in walnuts
  • Tropical: Add pineapple chunks and coconut for a fruity twist

Serving Suggestions

Banana bread is perfect on its own, but it also pairs wonderfully with:

  • Coffee or hot tea
  • A drizzle of honey or maple syrup
  • A spread of butter, cream cheese, or nut butter
  • Yogurt and fruit for a hearty breakfast

Warm it slightly before serving for that fresh-out-of-the-oven flavor.

How to Store and Reheat

Storing:

  • Wrap in foil or plastic wrap and keep at room temperature for up to 3 days.
  • Refrigerate for up to 1 week (though it may dry slightly).

Freezing:

  • Wrap tightly in plastic, then foil, and freeze for up to 3 months.
  • Slice before freezing for easy grab-and-go pieces.

Reheating:

  • Toast slices in a toaster or warm briefly in the microwave.
  • For oven reheating, wrap in foil and bake at 150°C (300°F) for 10–15 minutes.

Grandma’s Banana Bread Tips

  • Use overripe bananas with lots of brown spots — they’re sweeter and softer
  • Let melted butter cool slightly so it doesn’t cook the eggs
  • Don’t skip the salt — it enhances the banana flavor
  • Add a banana on top (sliced in half) for a beautiful presentation
  • Test with a toothpick — underbaking is better than overbaking

Final Thoughts: A Slice of Sweet Nostalgia

Grandma’s banana bread wasn’t just dessert — it was a memory, a comfort, and a family tradition. It filled the house with warmth, made everyone gather in the kitchen, and somehow tasted even better the next day (if there was any left).

Whether you’re baking it for your kids, your neighbors, or just for yourself, this classic recipe brings the sweetness of the past into the present.

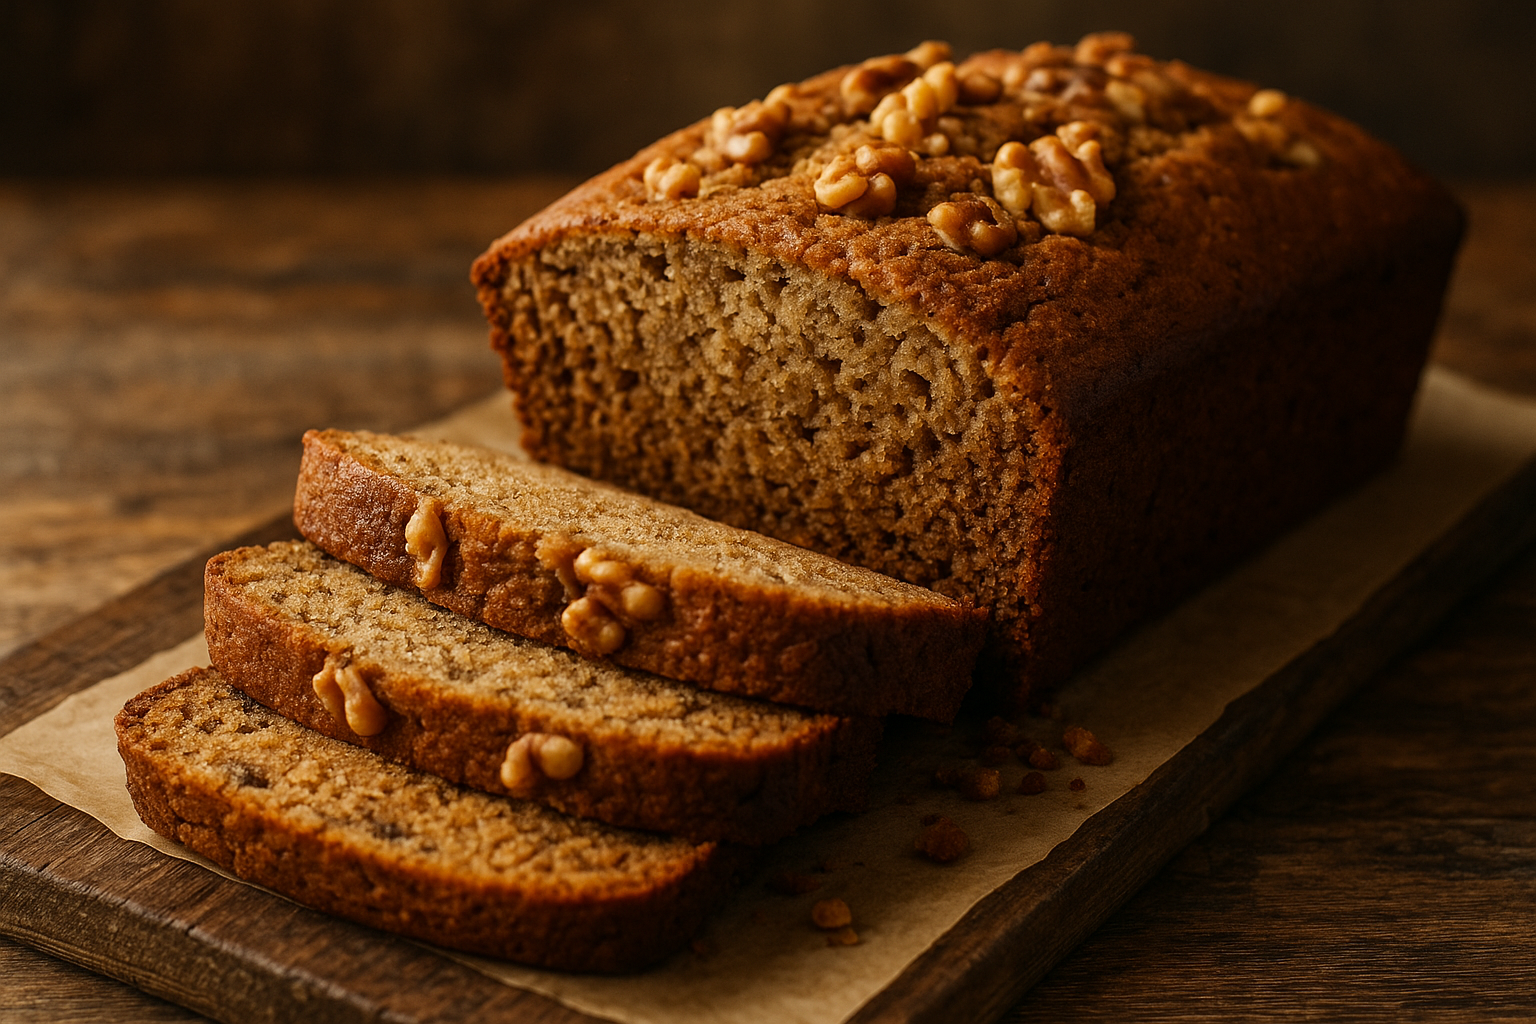
Now let’s bring this beloved treat to life with a warm, ultra-realistic image of a golden, moist banana bread loaf — freshly sliced and ready to enjoy.

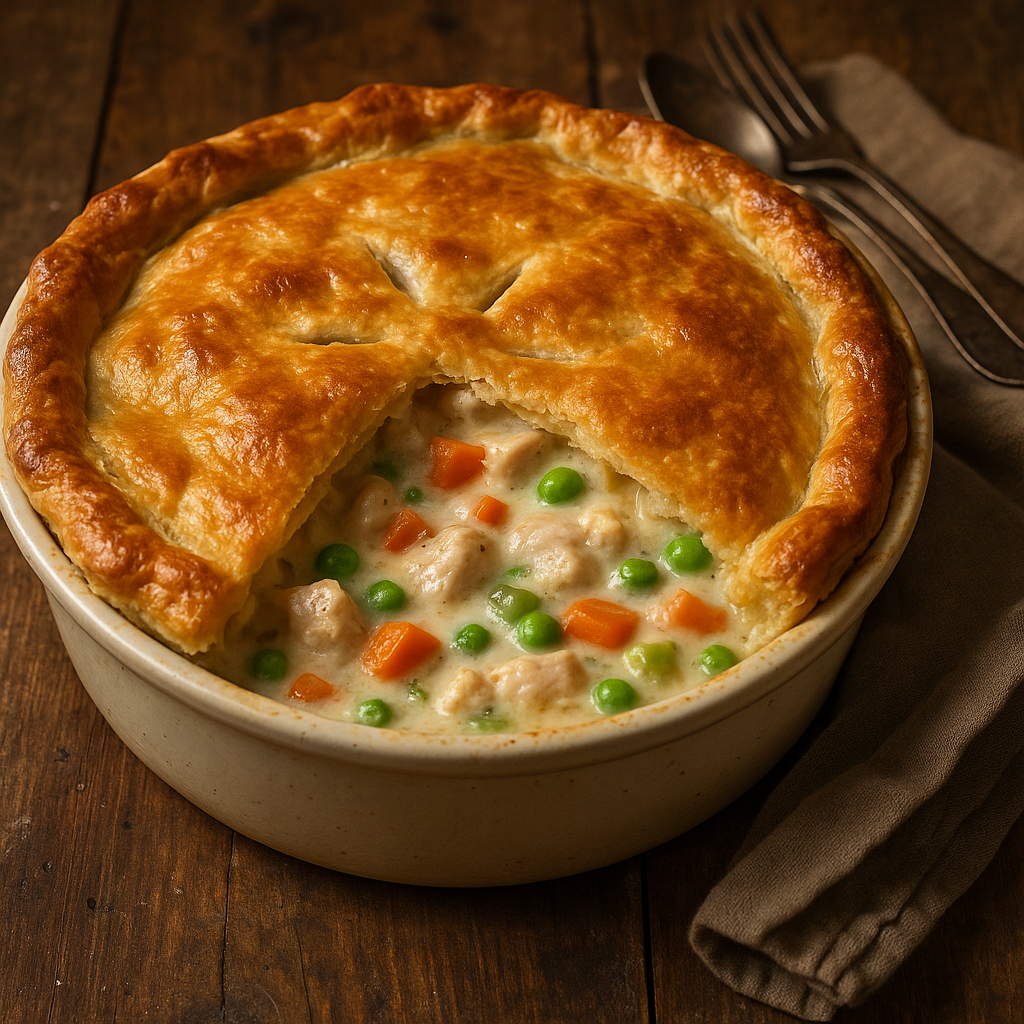
Grandma’s Traditional Chicken Pot Pie: A Golden Crust Full of Homemade Comfort

One bite of a freshly baked chicken pot pie and you’re instantly transported to grandma’s kitchen — where the windows fogged up from the oven heat and the smell of buttery crust and savory filling filled the air. This classic comfort food is more than just a meal — it’s a memory.

In this article, we’ll show you how to make grandma’s traditional chicken pot pie with a flaky, golden crust and a rich, creamy filling loaded with chicken and vegetables. It’s the ultimate recipe for cozy nights, special gatherings, or any day that needs a touch of warmth.

What Makes Grandma’s Pot Pie So Special?

Grandma didn’t rely on shortcuts. She used simple, fresh ingredients and gave them time to develop flavor. Her pot pie was:

  • Made with homemade crust or buttery puff pastry
  • Filled with real roasted or boiled chicken
  • Packed with vegetables from her garden
  • Seasoned with love and slow-cooked attention

Let’s recreate that magic.

Ingredients for Grandma’s Chicken Pot Pie

This recipe makes one 9-inch pie, serving 6 generous portions.

For the Filling:

  • 2 tablespoons butter
  • 1 small onion, diced
  • 2 cloves garlic, minced
  • 2 medium carrots, peeled and diced
  • 2 celery stalks, diced
  • 1⁄4 cup all-purpose flour
  • 2 cups chicken broth
  • 1 cup milk (whole or 2%)
  • 2 cups cooked chicken, shredded or diced
  • 1 cup frozen peas
  • ½ teaspoon dried thyme
  • Salt and black pepper to taste
  • Optional: 1 small potato, diced and pre-cooked

For the Crust:

  • 1 sheet of puff pastry (store-bought or homemade)
  • Or: double crust pastry for top and bottom
  • 1 egg (beaten with 1 tbsp milk, for egg wash)

Note: If you prefer a bottom crust, use a standard pie crust and par-bake it before adding filling.

Step-by-Step Instructions

1. Preheat Oven

Preheat your oven to 200°C (400°F). If using a bottom crust, line your pie dish and blind bake for 10 minutes with pie weights. Set aside.

2. Cook the Filling Base

In a large saucepan, melt butter over medium heat. Add the onions, garlic, carrots, and celery. Sauté until the vegetables are softened, about 5–7 minutes.

3. Make the Creamy Sauce

Sprinkle the flour over the veggies and stir to coat. Cook for 1–2 minutes to eliminate the raw flour taste.

Gradually whisk in the chicken broth and milk. Keep stirring until the mixture thickens to a creamy consistency — about 5 minutes.

4. Add Chicken and Peas

Stir in the shredded chicken, peas, thyme, salt, and pepper. Taste and adjust seasoning as needed. Let the filling simmer for another 3–5 minutes, then remove from heat.

Grandma’s Tip: Let the filling cool slightly before assembling to avoid a soggy crust.

5. Assemble the Pie

Spoon the cooled filling into the pie dish. Top with puff pastry or your prepared crust. Trim and crimp the edges.

Use a sharp knife to cut small slits in the top to allow steam to escape.

Brush with the egg wash for a shiny, golden finish.

6. Bake to Perfection

Place the pie on a baking tray (to catch any drips) and bake for 30–35 minutes, or until the crust is golden brown and the filling is bubbling.

Let it rest for at least 10 minutes before slicing — this helps the filling set.

Variations to Try

Want to make it your own? Grandma would approve. Try these:

  • Turkey Pot Pie: Great for holiday leftovers
  • Vegetarian Version: Use mushrooms, lentils, or white beans instead of chicken
  • Cheesy Filling: Stir in shredded cheddar or Parmesan
  • Herbed Crust: Mix fresh herbs into the dough for an aromatic twist
  • Mini Pot Pies: Use ramekins for individual servings — perfect for meal prep

How to Serve Chicken Pot Pie

This dish is hearty enough to stand alone, but pairs beautifully with:

  • A green salad with vinaigrette
  • Steamed green beans or broccoli
  • A glass of iced tea or white wine
  • Or just a cozy blanket and a fork on the couch!

Storing and Reheating Tips

To Store:

  • Cover leftover pie tightly with foil or transfer to an airtight container.
  • Refrigerate for up to 4 days.

To Reheat:

  • Oven: Cover loosely with foil and bake at 175°C (350°F) for 15–20 minutes.
  • Microwave: Use medium power to prevent the crust from getting rubbery.

To Freeze:

  • Freeze unbaked pot pie (assembled but not egg-washed) for up to 3 months.
  • Bake from frozen at 190°C (375°F) for about 1 hour, covering loosely with foil for the first half.

Grandma’s Secrets to the Best Pot Pie

  • Homemade broth = deeper flavor
  • Use leftover roast chicken for tenderness
  • Chill your dough before topping for better flakiness
  • Never skip the egg wash — it makes the crust shine
  • Let it rest before cutting — patience pays off!

Final Thoughts: A Crust Full of Memories

Chicken pot pie is more than a recipe — it’s a piece of heritage. It’s what grandma made when guests came over, when the weather turned cold, or when someone needed cheering up.

With every bite of tender chicken, buttery crust, and creamy filling, you’re not just tasting food — you’re tasting home, care, and generations of tradition.