Grandma’s Homemade Pancakes: Fluffy, Golden, and Irresistibly Delicious

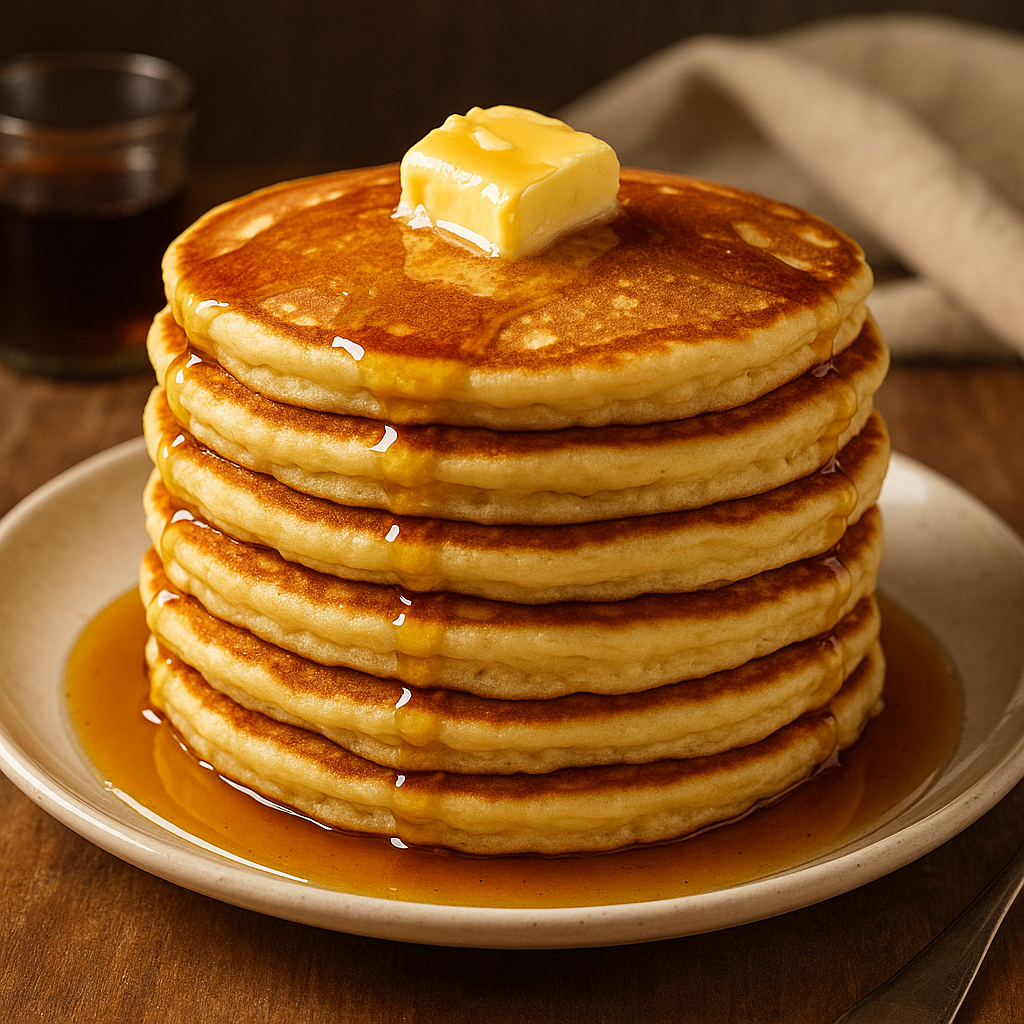
Weekends at grandma’s house always started with the smell of pancakes sizzling on the griddle. Light, fluffy, and perfectly golden, her homemade pancakes were simple but magical — served hot with butter, syrup, and a side of love.

In this article, you’ll learn how to make fluffy pancakes from scratch, using grandma’s timeless technique and pantry staples you already have at home.


Why These Pancakes Are So Special

  • Light, airy, and soft — the perfect fluffy texture
  • No boxed mix — everything from scratch
  • Fast and easy: Ready in under 30 minutes
  • Adaptable with your favorite add-ins (chocolate chips, fruit, etc.)
  • Ideal for breakfast, brunch, or breakfast-for-dinner

Ingredients for Homemade Pancakes

Makes about 10 medium pancakes.

  • 1 ½ cups all-purpose flour
  • 2 tablespoons granulated sugar
  • 1 tablespoon baking powder
  • ½ teaspoon baking soda
  • ½ teaspoon salt
  • 1 ¼ cups milk (whole or 2%)
  • 1 large egg
  • 2 tablespoons unsalted butter, melted
  • 1 teaspoon vanilla extract
  • Optional: butter or oil for greasing skillet

Step-by-Step Instructions

1. Mix the Dry Ingredients

In a large bowl, whisk together flour, sugar, baking powder, baking soda, and salt.


2. Mix the Wet Ingredients

In another bowl or measuring cup, whisk the milk, egg, melted butter, and vanilla until well combined.


3. Combine the Batter

Pour the wet ingredients into the dry ingredients.

Stir gently with a spatula until just combined. Do not overmix — lumps are okay!

Let the batter rest for 5 minutes while you heat your skillet.


4. Heat the Skillet or Griddle

Preheat a nonstick skillet or griddle over medium heat.

Lightly grease with butter or oil if needed.


5. Cook the Pancakes

Pour ¼ cup of batter per pancake onto the hot skillet.

Cook until bubbles form on top and edges look set — about 2 minutes.

Flip and cook another 1–2 minutes until golden brown and cooked through.

Transfer to a plate and keep warm while you cook the rest.


Serving Suggestions

  • With butter and maple syrup (the classic)
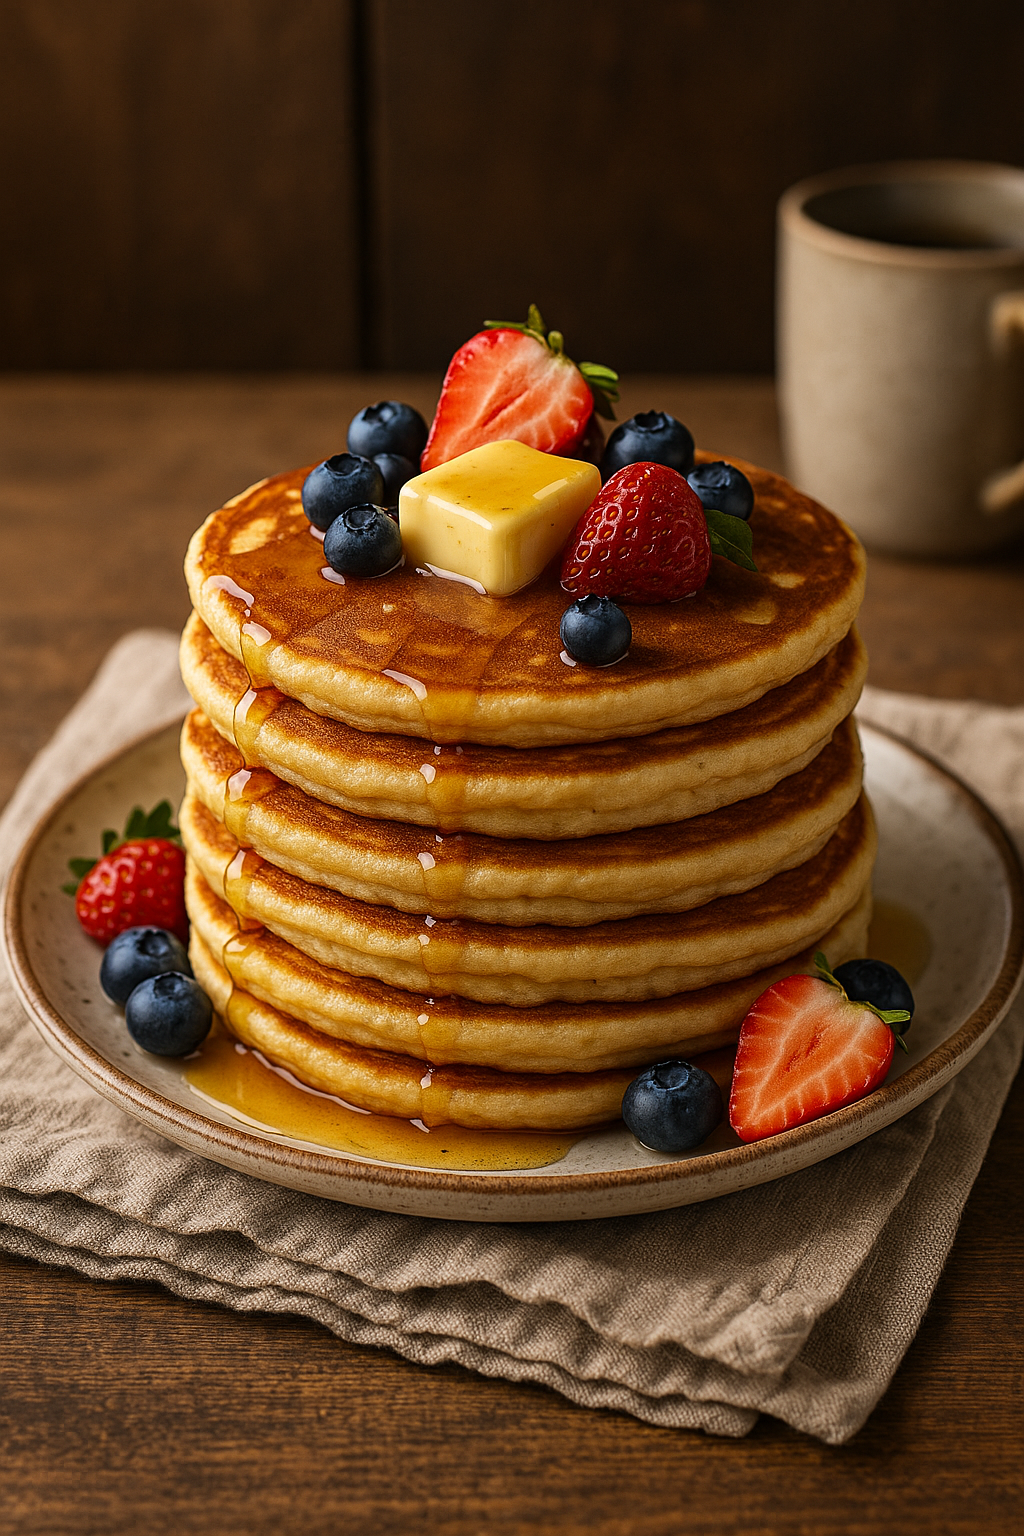
  • Topped with fresh berries and whipped cream
  • Spread with peanut butter, jam, or Nutella
  • Stacked with bananas and a drizzle of honey
  • Turned into a breakfast sandwich with egg and bacon

Grandma’s tip: Warm your syrup before serving — it makes everything better.


Add-In Ideas

  • Chocolate chips
  • Blueberries or raspberries
  • Sliced bananas or apples
  • Cinnamon and chopped nuts
  • Lemon zest and poppy seeds

Stir into the batter just before cooking or sprinkle onto each pancake after pouring the batter.


How to Store and Reheat

Store:

  • Refrigerate in an airtight container for up to 3 days

Reheat:

  • Microwave for 20–30 seconds
  • Or reheat in the oven at 160°C (325°F) for 10 minutes

Freeze:

  • Stack cooled pancakes with parchment between each
  • Freeze in a bag or container for up to 2 months
  • Toast or microwave straight from frozen

Tips for the Best Pancakes

  • Don’t overmix the batter — mix just until the flour is incorporated
  • Let the batter rest — this makes pancakes fluffier
  • Make sure your baking powder is fresh
  • Use a medium-low heat so pancakes cook through without burning
  • For extra fluffy pancakes, separate the egg and beat the white until soft peaks form — fold in at the end

Common Mistakes to Avoid

  • Flat pancakes? Batter might be overmixed or leavening too old
  • Burnt outsides, raw insides? Heat is too high
  • Dry pancakes? Try using buttermilk or adding a tablespoon of yogurt

Final Thoughts: A Stack Full of Memories

Grandma’s pancakes weren’t just breakfast — they were the start of a good day, a warm memory, and a tradition worth keeping alive. With this simple, reliable recipe, you can bring the same joy and flavor into your own kitchen.

So grab your whisk, fire up the skillet, and get ready for a stack of happiness.


Grandma’s Classic Meatloaf: Juicy, Savory, and Perfectly Baked Every Time

When it came to hearty family dinners, grandma’s meatloaf was always front and center. Juicy, flavorful, and topped with a sweet tangy glaze, it was the kind of dish that brought everyone to the table — and usually back for seconds.

This guide walks you through making traditional meatloaf from scratch, using simple ingredients and grandma’s old-fashioned method for a moist, savory loaf every time.


Why Meatloaf Is a Comfort Food Classic

  • Uses affordable, everyday ingredients
  • Easy to prep and bake in one pan
  • Feeds a whole family with plenty of leftovers
  • Customizable with herbs, vegetables, or sauces
  • Freezes and reheats beautifully

Ingredients for Grandma’s Meatloaf

This recipe makes a 9-inch loaf that serves 6–8 people.

For the Meatloaf:

  • 2 lbs (900g) ground beef (80/20 for best flavor)
  • 1 small onion, finely chopped
  • 2 cloves garlic, minced
  • ¾ cup breadcrumbs
  • ⅓ cup milk
  • 2 large eggs
  • 2 tablespoons Worcestershire sauce
  • 2 tablespoons ketchup
  • 1 teaspoon salt
  • ½ teaspoon black pepper
  • ½ teaspoon dried thyme or parsley (optional)

For the Glaze:

  • ½ cup ketchup
  • 2 tablespoons brown sugar
  • 1 tablespoon Dijon mustard or regular mustard
  • Optional: a splash of vinegar for tang

Step-by-Step Instructions

1. Preheat the Oven

Set your oven to 175°C (350°F). Line a baking sheet with parchment or lightly grease a loaf pan.


2. Prepare the Meat Mixture

In a large bowl, combine the breadcrumbs and milk. Let sit for 2–3 minutes to soak.

Add in the ground beef, chopped onion, garlic, eggs, Worcestershire sauce, ketchup, salt, pepper, and herbs.

Mix gently with your hands or a spoon until just combined. Don’t overmix — it makes the loaf tough.


3. Shape and Bake

Form the meat mixture into a loaf shape on a lined baking sheet or press gently into a loaf pan.

Bake uncovered for 40 minutes.


4. Add the Glaze

While the loaf is baking, mix the glaze ingredients in a small bowl.

After 40 minutes of baking, spread the glaze evenly on top of the meatloaf.

Return to the oven and bake for another 15–20 minutes, or until the internal temperature reaches 70°C (160°F).


5. Rest and Slice

Let the meatloaf rest for 10 minutes before slicing. This keeps it juicy and easier to serve.


Serving Suggestions

  • With mashed potatoes and green beans
  • Alongside roasted vegetables or coleslaw
  • Sliced on sandwiches with mayo and pickles
  • With a side of mac and cheese or buttered corn

Grandma’s tip: Meatloaf sandwiches the next day are even better!


Storage and Reheating

Refrigerate:

  • Store in an airtight container for up to 4 days

Reheat:

  • Microwave individual slices or reheat whole in oven at 160°C (325°F)

Freeze:

  • Wrap whole loaf or individual slices in foil and freeze up to 3 months
  • Thaw overnight in the fridge before reheating

Variations to Try

  • Cheesy Meatloaf: Add shredded cheddar or mozzarella to the mix
  • Turkey or Chicken Meatloaf: Use leaner meat and adjust moisture with extra milk or oil
  • Spicy Kick: Add hot sauce or chopped jalapeños
  • Vegetable Boost: Grate in carrots, zucchini, or mushrooms
  • BBQ Glaze: Swap ketchup glaze for your favorite BBQ sauce

Grandma’s Secrets for the Perfect Meatloaf

  • Let the breadcrumbs soak in milk — it helps keep the loaf moist
  • Don’t overwork the meat — mix just until combined
  • Bake on a baking sheet for crispier edges, or in a loaf pan for a softer texture
  • Always rest before slicing to retain juices
  • Double the glaze if you like it extra saucy

Final Thoughts: A Slice of Tradition

Grandma’s meatloaf was more than dinner — it was the heart of Sunday night meals, the comfort after long days, and a family favorite that always delivered. With this tried-and-true recipe, you can bring that same warmth and flavor to your own table — one savory slice at a time.

Grandma’s Homemade Pickles: Crisp, Tangy, and Easy to Make at Home

Long before pickles came in fancy jars from the grocery store, grandma was making her own — crunchy, vinegary, and bursting with garlic and dill. They were kept in glass jars tucked away in cool pantries, always ready to be served with sandwiches, grilled meats, or just as a salty snack.

This article teaches you how to make classic homemade pickles, grandma-style — no special equipment, no preservatives, just simple ingredients and a lot of flavor.


Why Make Your Own Pickles?

  • Incredibly easy — no canning or special tools required
  • Ready in just 24–48 hours (quick pickles!)
  • You control the flavor, crunch, and spice
  • Made with real ingredients
  • Delicious with burgers, sandwiches, charcuterie boards, and more

Ingredients for Classic Dill Pickles

This recipe makes about 2 quart-sized jars of pickles.

You’ll Need:

  • 6–8 small cucumbers (Kirby or Persian cucumbers work best)
  • 2 cups white vinegar
  • 2 cups water
  • 2 tablespoons kosher salt
  • 1 tablespoon sugar
  • 4 garlic cloves, peeled
  • 1 tablespoon black peppercorns
  • 1 tablespoon mustard seeds (optional)
  • 4–6 sprigs fresh dill
  • Optional: pinch of red pepper flakes for a spicy kick

Step-by-Step Instructions

1. Prepare the Jars

Clean and dry your jars thoroughly.

Cut cucumbers into spears, chips, or leave whole — depending on your preference and jar size.

Place fresh dill, garlic cloves, peppercorns, and mustard seeds at the bottom of each jar.

Tightly pack the cucumbers into the jars.


2. Make the Brine

In a saucepan, combine vinegar, water, salt, and sugar.

Bring to a simmer and stir until the salt and sugar are dissolved.

Remove from heat and let it cool slightly.


3. Pour the Brine

Carefully pour the warm (not hot) brine into the jars, covering the cucumbers completely.

Tap the jars gently on the counter to release air bubbles.

Seal with lids and let them cool to room temperature.


4. Refrigerate and Wait

Place jars in the refrigerator for at least 24–48 hours before eating. The longer they sit, the more flavorful they become.

They’ll stay good in the fridge for up to 1–2 months!


Serving Ideas for Grandma’s Pickles

  • With burgers, hot dogs, and sandwiches
  • On a cheese or charcuterie board
  • Chopped into potato or pasta salads
  • As a topping for tuna salad or deviled eggs
  • Just eaten cold, straight from the jar

Grandma’s tip: Save the leftover brine for pickling onions, eggs, or more cucumbers!


Flavor Variations to Try

  • Sweet Pickles: Add more sugar to the brine and reduce garlic
  • Spicy Pickles: Add sliced jalapeños or red chili flakes
  • Bread and Butter Style: Use a mix of white and apple cider vinegar, add more sugar, and include onion slices
  • Garlic Bomb: Double the garlic for a bold punch
  • Asian-Inspired: Add ginger slices and a dash of soy sauce

Storage and Shelf Life

  • Keep pickles refrigerated at all times
  • Best enjoyed within 4 weeks, though they’ll last up to 2 months if sealed properly
  • Always use clean utensils to remove pickles from the jar — no fingers!

Final Thoughts: Crunchy, Tangy, and Full of Tradition

Grandma’s pickles weren’t just snacks — they were made with care, preserved with purpose, and shared with pride. Whether packed into lunchboxes or placed in little dishes on the dinner table, they added flavor and fun to every bite.

Grandma’s Buttermilk Pancakes: Fluffy, Golden, and Made from Scratch

In grandma’s kitchen, pancakes weren’t just for Saturday mornings — they were a celebration of slow breakfasts, warm syrup, and second helpings. Made from scratch with real buttermilk, her pancakes were perfectly fluffy inside, lightly crisped outside, and stacked high with love.

In this guide, you’ll learn how to recreate grandma’s legendary buttermilk pancakes — from ingredients and tips to flipping techniques and delicious topping ideas.

Why Buttermilk Pancakes Are Extra Special

Buttermilk isn’t just a fancy ingredient — it’s the key to pancakes that are:

  • Incredibly fluffy and tender
  • Slightly tangy for balance
  • Golden brown with a delicate crust
  • Perfect with sweet or savory toppings

Grandma never used boxed mixes — and after this, neither will you.

Ingredients for Classic Buttermilk Pancakes

This recipe makes 10–12 medium pancakes (serves 3–4).

Dry Ingredients:

  • 2 cups all-purpose flour
  • 2 tablespoons granulated sugar
  • 2 teaspoons baking powder
  • 1 teaspoon baking soda
  • ½ teaspoon salt

Wet Ingredients:

  • 2 cups buttermilk (or substitute below)
  • 2 large eggs
  • ¼ cup melted butter (plus more for cooking)
  • 1 teaspoon vanilla extract (optional)

Buttermilk Substitute (if needed):

  • 2 cups milk + 2 tablespoons lemon juice or white vinegar
  • Let sit for 5–10 minutes to curdle before using

Step-by-Step Instructions

1. Mix the Dry Ingredients

In a large mixing bowl, whisk together the flour, sugar, baking powder, baking soda, and salt.

2. Combine Wet Ingredients

In a separate bowl, beat the eggs lightly. Add buttermilk, melted butter, and vanilla. Mix well.

3. Combine Wet and Dry

Pour the wet mixture into the dry ingredients. Stir gently until just combined — a few small lumps are fine. Do not overmix, or your pancakes will be tough.

Grandma’s Tip: Let the batter rest for 5–10 minutes while you heat the pan. This makes the pancakes even fluffier.

4. Heat and Grease the Pan

Heat a large nonstick skillet or griddle over medium heat. Lightly grease with butter or oil.

The surface is ready when a drop of water sizzles and dances on it.

5. Cook the Pancakes

Pour ¼ cup of batter for each pancake onto the hot skillet.

Cook for 2–3 minutes, until bubbles form on the surface and the edges look set. Flip and cook another 1–2 minutes, until golden brown and cooked through.

Adjust heat as needed to avoid burning.

6. Serve Warm

Transfer pancakes to a plate and keep warm. Serve immediately with your favorite toppings.

Topping Ideas Grandma Would Approve

  • Classic butter and maple syrup
  • Fresh berries and whipped cream
  • Sliced bananas and chopped nuts
  • Jam or fruit preserves
  • Peanut butter and honey
  • Powdered sugar and lemon juice
  • Or grandma’s favorite: apple compote with cinnamon

Tips for Perfect Pancakes Every Time

  • Use fresh baking powder/soda — old leavening won’t rise
  • Don’t overmix — it’s okay if the batter is slightly lumpy
  • Let the batter rest — helps gluten relax and bubbles form
  • Wipe skillet between batches to prevent burnt butter flavor
  • Flip only once — flipping multiple times deflates the pancakes

How to Keep Pancakes Warm

Place cooked pancakes on a baking sheet in a 95°C (200°F) oven while you finish cooking the batch. Cover loosely with foil to prevent drying out.

Make-Ahead and Storage Tips

Refrigerate:

  • Store leftovers in an airtight container for up to 3 days.

Freeze:

  • Let pancakes cool completely, then stack with parchment between and freeze in a zip-top bag for up to 2 months.

Reheat:

  • Toast or microwave for a quick breakfast
  • Or warm in the oven at 150°C (300°F) until heated through

Variations to Try

  • Blueberry Pancakes: Add fresh or frozen blueberries to the batter
  • Chocolate Chip Pancakes: Stir in mini chocolate chips
  • Savory Herb Pancakes: Add grated cheese and chives
  • Cinnamon Swirl Pancakes: Drizzle cinnamon-sugar mixture on top while cooking
  • Pumpkin Pancakes: Add ½ cup pumpkin puree + pumpkin spice blend

Final Thoughts: A Stack of Happiness

There’s something magical about a stack of warm pancakes, made from scratch just like grandma used to do. They’re simple, comforting, and perfect for any day that needs a little extra joy.

Whether it’s Sunday morning with the whole family or a quiet breakfast for one, these fluffy buttermilk pancakes are a reminder that some of life’s best moments are cooked in a skillet.