Grandma’s Homemade Tomato Sauce: A Slow-Simmered Classic Full of Tradition

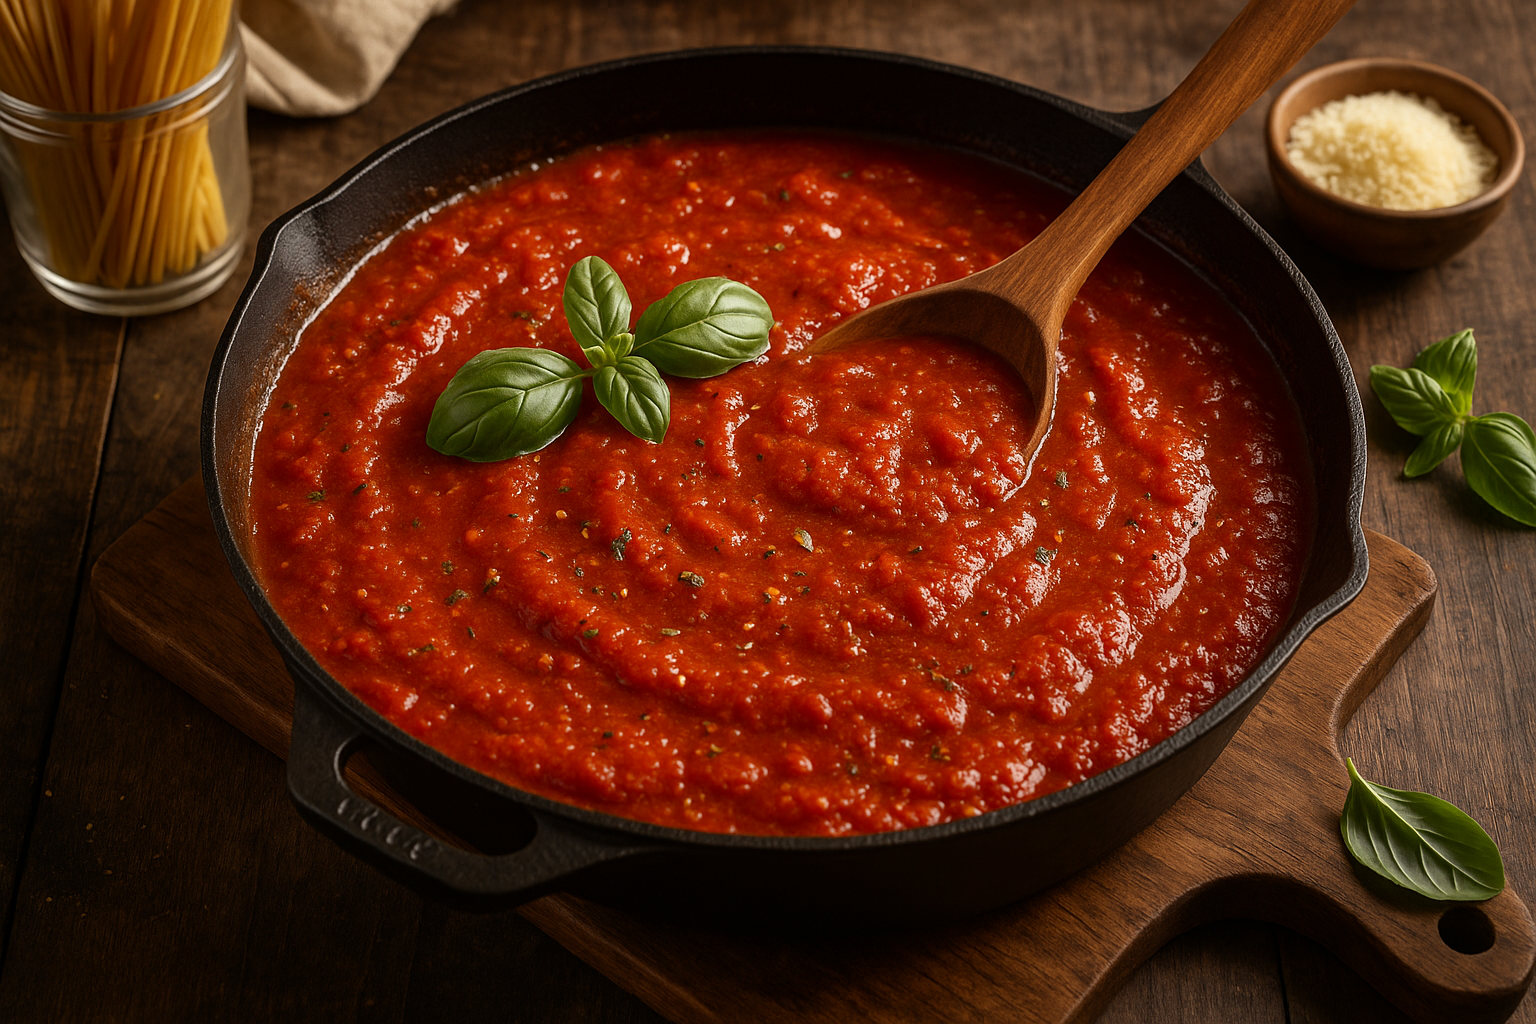
In grandma’s kitchen, tomato sauce wasn’t just something that came from a jar — it was an all-day process, filled with rich aromas, bubbling pots, and the kind of care that only tradition can teach. This sauce was the base for Sunday dinners, lasagnas, meatballs, and impromptu spaghetti nights.

In this guide, you’ll learn how to make homemade tomato sauce from scratch, just like grandma did — slowly simmered, deeply flavorful, and built from simple, whole ingredients.

Why Homemade Tomato Sauce Is Worth It

While store-bought sauces are convenient, grandma’s version wins every time — here’s why:

  • Made from real tomatoes, not concentrate
  • Free of preservatives, sugar, and fillers
  • Slow-simmered for deep flavor
  • Easily customizable with herbs and spices
  • Can be made in large batches and frozen

Ingredients for Grandma’s Tomato Sauce

This recipe yields about 6 cups of sauce, enough for 2–3 meals.

Basic Ingredients:

  • 2 tablespoons olive oil
  • 1 medium onion, finely chopped
  • 4 cloves garlic, minced
  • 2 cans (28 oz or 800g each) whole peeled tomatoes OR 10–12 fresh ripe tomatoes (peeled and chopped)
  • 2 tablespoons tomato paste (for richness)
  • 1 teaspoon salt
  • ½ teaspoon black pepper
  • 1 teaspoon sugar (optional, to balance acidity)
  • 1 teaspoon dried oregano
  • ½ teaspoon dried basil
  • 1 bay leaf
  • Optional: ½ teaspoon red pepper flakes

Finish with:

  • 1 tablespoon butter (for creaminess)
  • Handful of chopped fresh basil or parsley
  • Grated Parmesan cheese (optional)

Step-by-Step Instructions

1. Sauté the Aromatics

In a large pot, heat the olive oil over medium heat.

Add the chopped onion and cook until translucent — about 5 minutes. Stir in the garlic and cook for another 1–2 minutes, just until fragrant (don’t let it burn).

2. Add Tomatoes

If using canned tomatoes, crush them by hand or blend slightly for smoother texture. If using fresh tomatoes, peel and chop them.

Add tomatoes and their juice to the pot along with the tomato paste. Stir to combine.

3. Add Seasonings

Stir in salt, pepper, sugar (if using), oregano, basil, bay leaf, and red pepper flakes if you want a little heat.

Bring the sauce to a simmer.

4. Simmer Low and Slow

Lower the heat and simmer uncovered for 45 minutes to 1½ hours, stirring occasionally. The longer it cooks, the deeper the flavor.

If it gets too thick, add a splash of water or broth. If too thin, let it simmer uncovered to reduce.

5. Blend (Optional)

For a smooth sauce, blend with an immersion blender directly in the pot, or use a regular blender in batches (be careful with hot liquids). For a rustic, chunky sauce, skip this step.

6. Finish and Adjust

Remove bay leaf. Stir in a tablespoon of butter to add shine and richness. Taste and adjust salt, herbs, or sugar.

Stir in fresh basil or parsley at the end for a burst of freshness.

Grandma’s Tomato Sauce Tips

  • Use ripe, in-season tomatoes if making from fresh — Roma or San Marzano are ideal
  • Cook long and slow to break down acidity and bring out sweetness
  • Use butter at the end — it mellows sharpness and adds silkiness
  • Don’t skip the onion and garlic — they build the flavor foundation
  • Freeze in portions for easy future meals

How to Use Grandma’s Tomato Sauce

This sauce is versatile and goes far beyond pasta. Use it for:

  • Spaghetti or linguine with fresh herbs and cheese
  • Lasagna or baked ziti
  • Pizza sauce (just reduce slightly more)
  • Meatballs or sausage in sauce
  • Eggplant Parmesan
  • Shakshuka or poached eggs in tomato sauce
  • Stuffed peppers or zucchini

Storage and Freezing

Refrigerate:

  • Store in airtight containers for up to 5–7 days.

Freeze:

  • Freeze in freezer bags or containers for up to 3 months.
  • Use ice cube trays to freeze in small portions.

Reheat:

  • Thaw in the fridge or heat directly from frozen on the stove.
  • Stir well and re-season if needed.

Variations You Can Try

  • Add red wine: Splash in ¼ cup red wine during simmering for depth
  • Meaty version: Brown ground beef or sausage with the onions
  • Creamy version: Stir in a splash of cream or dollop of ricotta at the end
  • Roasted flavor: Use fire-roasted tomatoes or roast your own beforehand
  • Fresh garden version: Add chopped zucchini, mushrooms, or bell peppers

Final Thoughts: A Sauce That Feeds the Soul

Grandma’s tomato sauce wasn’t just a recipe — it was the heart of the meal, the reason everyone gathered around the table. It was made without shortcuts, always in big batches, and always with the hope that someone would come back for seconds.

Whether you’re making spaghetti for two or lasagna for a crowd, this slow-simmered sauce is your base for building beautiful meals and beautiful memories.

How to Make Grandma’s Classic Banana Bread: Moist, Sweet, and Full of Flavor

When your bananas start turning brown, it’s not a mistake — it’s an opportunity. And no one understood that better than grandma. Instead of wasting them, she transformed overripe bananas into the most delicious, moist, and fragrant banana bread you could imagine.

In this guide, you’ll learn how to make banana bread the old-fashioned way, just like grandma used to — simple ingredients, no fancy gadgets, and a loaf so rich and comforting it barely lasted a day on the counter.

Why Banana Bread Is a Timeless Favorite

Banana bread is one of the ultimate comfort bakes. Here’s why:

  • Uses up ripe bananas instead of throwing them out
  • Comes together with basic pantry ingredients
  • Moist, tender, and full of sweet banana flavor
  • Delicious warm, cold, toasted — with or without toppings
  • Perfect for breakfast, snacks, or even dessert

Let’s dig into grandma’s secrets for the best banana bread you’ll ever taste.

Ingredients for Grandma’s Banana Bread

This recipe makes one 9×5 inch loaf — about 8–10 slices.

  • 3 very ripe bananas, mashed
  • 2 large eggs
  • ½ cup unsalted butter, melted and cooled
  • ¾ cup granulated sugar (adjust to taste)
  • 1 ½ cups all-purpose flour
  • 1 teaspoon baking soda
  • ½ teaspoon salt
  • 1 teaspoon vanilla extract
  • ½ teaspoon ground cinnamon (optional)
  • ½ cup chopped walnuts or pecans (optional)
  • ¼ cup milk or sour cream (optional, for extra moisture)

Step-by-Step Instructions

1. Preheat the Oven and Prep the Pan

Preheat your oven to 175°C (350°F).

Grease and flour a 9×5-inch loaf pan, or line it with parchment paper for easy removal.

2. Mash the Bananas

In a large bowl, mash the bananas until mostly smooth (a few chunks are okay — they add texture).

Add the melted butter and stir to combine.

3. Add Wet Ingredients

Mix in the sugar, eggs, vanilla, and milk or sour cream if using. Stir until smooth and well incorporated.

4. Mix the Dry Ingredients

In a separate bowl, whisk together flour, baking soda, salt, and cinnamon.

Gradually add the dry ingredients to the banana mixture, stirring gently just until no flour remains.

Grandma’s Tip: Don’t overmix — overworking the batter can lead to dense bread.

5. Fold in Nuts (Optional)

If using chopped nuts, gently fold them into the batter at the end.

6. Pour and Bake

Pour the batter into your prepared loaf pan and smooth the top with a spatula.

Bake for 50–60 minutes, or until a toothpick inserted into the center comes out clean.

7. Cool and Slice

Let the banana bread cool in the pan for 10–15 minutes, then transfer to a wire rack to cool completely.

Slice and serve warm, room temperature, or toasted with butter.

Banana Bread Variations Grandma Loved

Want to mix it up? Here are some fun and delicious twists:

  • Chocolate Chip Banana Bread: Add ½ cup chocolate chips
  • Peanut Butter Swirl: Swirl 2 tbsp peanut butter into the top before baking
  • Coconut Banana Bread: Add ¼ cup shredded coconut to the batter
  • Maple-Walnut: Replace sugar with maple syrup and fold in walnuts
  • Tropical: Add pineapple chunks and coconut for a fruity twist

Serving Suggestions

Banana bread is perfect on its own, but it also pairs wonderfully with:

  • Coffee or hot tea
  • A drizzle of honey or maple syrup
  • A spread of butter, cream cheese, or nut butter
  • Yogurt and fruit for a hearty breakfast

Warm it slightly before serving for that fresh-out-of-the-oven flavor.

How to Store and Reheat

Storing:

  • Wrap in foil or plastic wrap and keep at room temperature for up to 3 days.
  • Refrigerate for up to 1 week (though it may dry slightly).

Freezing:

  • Wrap tightly in plastic, then foil, and freeze for up to 3 months.
  • Slice before freezing for easy grab-and-go pieces.

Reheating:

  • Toast slices in a toaster or warm briefly in the microwave.
  • For oven reheating, wrap in foil and bake at 150°C (300°F) for 10–15 minutes.

Grandma’s Banana Bread Tips

  • Use overripe bananas with lots of brown spots — they’re sweeter and softer
  • Let melted butter cool slightly so it doesn’t cook the eggs
  • Don’t skip the salt — it enhances the banana flavor
  • Add a banana on top (sliced in half) for a beautiful presentation
  • Test with a toothpick — underbaking is better than overbaking

Final Thoughts: A Slice of Sweet Nostalgia

Grandma’s banana bread wasn’t just dessert — it was a memory, a comfort, and a family tradition. It filled the house with warmth, made everyone gather in the kitchen, and somehow tasted even better the next day (if there was any left).

Whether you’re baking it for your kids, your neighbors, or just for yourself, this classic recipe brings the sweetness of the past into the present.

Now let’s bring this beloved treat to life with a warm, ultra-realistic image of a golden, moist banana bread loaf — freshly sliced and ready to enjoy.

Grandma’s Cornmeal Cake with Fennel: A Taste of Tradition

Few recipes can bring back warm childhood memories like a slice of homemade cornmeal cake.
The combination of soft texture, subtle sweetness, and the aroma of fennel seeds is unmistakable—a symbol of comfort and love.In this article, we’ll explore how to make Grandma’s Cornmeal Cake with Fennel, a cherished recipe that has stood the test of time.

What Is Cornmeal Cake?

Cornmeal cake, known in Brazil as bolo de fubá, is a traditional cake made with finely ground cornmeal.
It’s a common treat in many Latin and Southern households and is especially loved for its unique texture and slightly grainy yet soft bite.

Often served with coffee or tea, it’s a staple at breakfast tables and afternoon get-togethers.

Why Fennel Seeds?

Fennel seeds add a subtle, sweet licorice-like aroma that blends beautifully with the mild flavor of the cornmeal. In traditional recipes, fennel is used sparingly but effectively to give the cake its nostalgic taste. It’s one of those little touches that make the difference between a good cornmeal cake and a memorable one.

Ingredients You’ll Need

Before you get started, gather the following ingredients:

  • 1 cup of fine cornmeal
  • 1 cup of all-purpose flour
  • 1 ½ cups of sugar
  • 3 eggs
  • 1 cup of milk
  • ½ cup of vegetable oil (or melted butter)
  • 1 tablespoon of fennel seeds
  • 1 tablespoon of baking powder
  • A pinch of salt
  • Butter and flour for greasing the pan

Optional: powdered sugar for dusting after baking

Step-by-Step Instructions

1. Preheat and Prepare

Preheat your oven to 180°C (350°F). Grease a cake pan with butter and dust it lightly with flour. A bundt cake pan works great for this recipe.

2. Mix the Dry Ingredients

In a large mixing bowl, combine the cornmeal, flour, sugar, fennel seeds, baking powder, and salt. Mix well to distribute everything evenly.

3. Mix the Wet Ingredients

In a separate bowl, beat the eggs lightly and add the milk and oil. Stir until the mixture is smooth and fully combined.

4. Combine Everything

Gradually pour the wet ingredients into the bowl with the dry mixture, stirring constantly. Mix until the batter is smooth, but do not overmix.

5. Pour and Bake

Pour the batter into the prepared pan and tap it gently on the counter to remove any air bubbles. Place it in the preheated oven and bake for 35–45 minutes or until a toothpick inserted in the center comes out clean.

6. Cool and Serve

Allow the cake to cool in the pan for about 10 minutes, then turn it out onto a rack to cool completely. Dust with powdered sugar before serving for a nice touch.

Tips from Grandma’s Kitchen

  • Use fresh fennel seeds: The aroma fades over time, so always check for freshness. Toasting them slightly before adding to the batter can intensify the flavor.
  • Don’t overmix: Stir just enough to incorporate the ingredients. Overmixing can lead to a dense cake.
  • Adjust sugar to taste: Some grandmas liked their cakes sweeter, others less so—feel free to taste and modify.
  • Add a citrus twist: A bit of orange or lemon zest can add brightness to the flavor if you want a modern touch.

When to Serve This Cake?

This cake is perfect for:

  • Sunday family breakfasts
  • Afternoon coffee with friends
  • Holiday brunches
  • School snacks for kids
  • A homemade gift from the heart

Its simple ingredients and comforting flavor make it versatile and universally loved.

Preserving the Flavor of the Past

Traditional recipes like this one do more than just fill our stomachs—they fill our hearts. They connect us to our roots, our childhood memories, and the people we love. Baking a cake like Grandma’s Cornmeal Cake with Fennel is a way to keep those connections alive, one delicious slice at a time.

Whether you’re recreating it for the first time or you’re passing the tradition forward, this cake is more than food—it’s a story, a hug, a warm reminder that love can indeed be baked.