Grandma’s Macaroni and Cheese: Creamy, Baked, and Made with Real Cheese

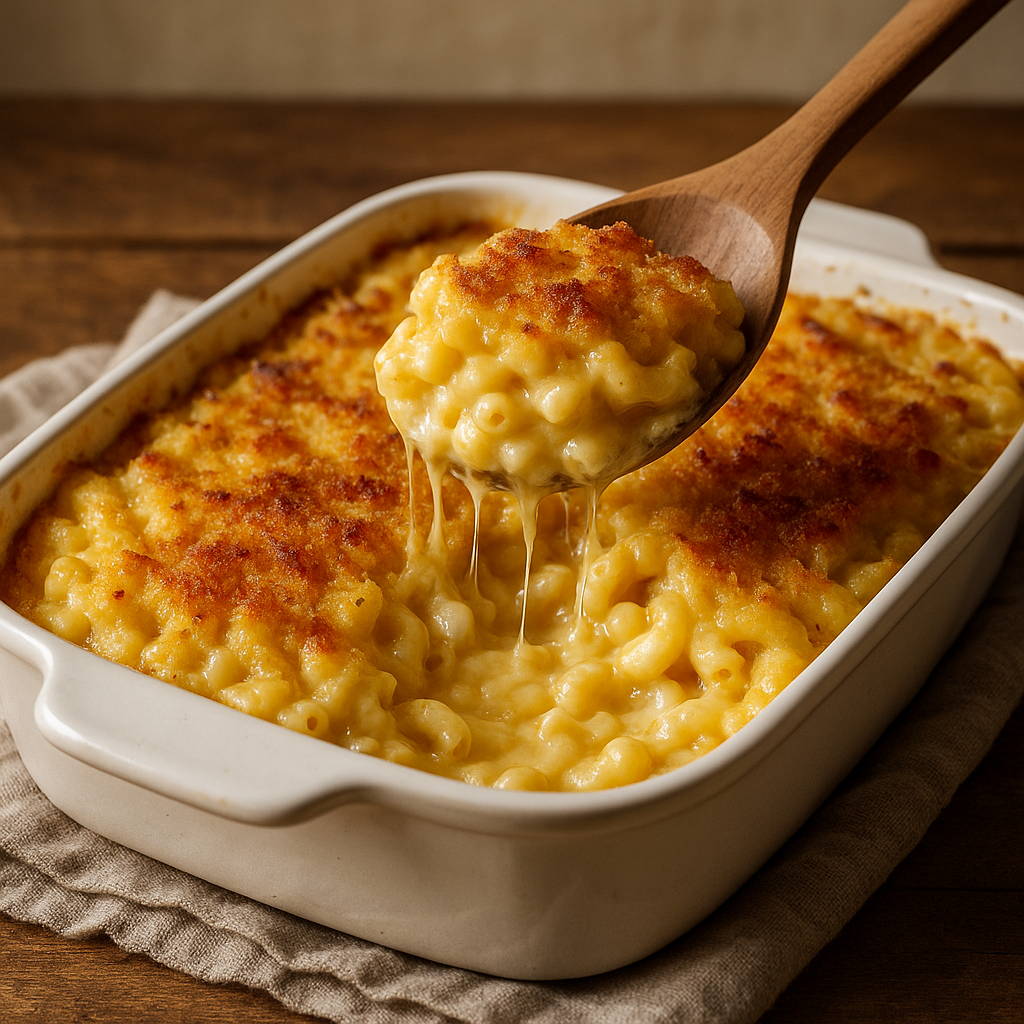
Macaroni and cheese was more than just a side dish at grandma’s house — it was a star. Rich, creamy, baked to perfection, and topped with a crispy golden crust, her version was the ultimate comfort food.

In this article, you’ll learn how to make classic baked mac and cheese from scratch, using real cheese, elbow pasta, and a homemade cheese sauce that’s unforgettable.

Why You’ll Love This Mac and Cheese

  • Made with real ingredients and no artificial powders
  • Creamy inside, crispy and golden on top
  • Great for weeknight dinners, potlucks, or holidays
  • Customizable with different cheeses or add-ins
  • Freezes and reheats well

Ingredients for Baked Mac and Cheese

Serves 6–8.

  • 1 lb (450g) elbow macaroni
  • 4 tablespoons unsalted butter
  • 4 tablespoons all-purpose flour
  • 3 cups whole milk (or 2%)
  • 2 cups shredded sharp cheddar cheese
  • 1 cup shredded mozzarella or Monterey Jack
  • ½ teaspoon salt
  • ¼ teaspoon ground black pepper
  • ¼ teaspoon garlic powder (optional)
  • ¼ teaspoon paprika (for topping)
  • Optional topping: 1 cup breadcrumbs mixed with 2 tbsp melted butter

Step-by-Step Instructions

1. Cook the Pasta

Bring a large pot of salted water to a boil.

Cook the macaroni for 1–2 minutes less than package directions (it’ll finish cooking in the oven). Drain and set aside.

2. Make the Cheese Sauce

In a large saucepan, melt the butter over medium heat.

Whisk in the flour and cook for 1–2 minutes until bubbling but not browned.

Gradually whisk in the milk. Cook, whisking constantly, until the sauce thickens (about 5 minutes).

Remove from heat and stir in cheese, salt, pepper, and garlic powder until smooth.

3. Combine Pasta and Sauce

Add the drained macaroni to the cheese sauce and stir to coat evenly.

4. Bake

Preheat oven to 180°C (350°F).

Transfer the mac and cheese to a greased 9×13-inch baking dish.

Sprinkle breadcrumbs and a dash of paprika on top if desired.

Bake for 20–25 minutes, or until bubbly and golden brown.

Let cool for 5 minutes before serving.

Serving Suggestions

  • As a main dish with a green salad
  • With grilled or fried chicken
  • As a side for barbecue ribs or pulled pork
  • Served with steamed broccoli or roasted vegetables
  • Topped with crispy bacon or hot sauce

Grandma’s tip: Mix in a little extra cheese before baking — there’s no such thing as too cheesy.

Add-In Ideas and Variations

  • Bacon Mac & Cheese: Add cooked chopped bacon
  • Buffalo Mac & Cheese: Stir in buffalo sauce and blue cheese crumbles
  • Southern Style: Add eggs to the cheese sauce before baking for a firmer texture
  • Creamy Stove-Top Version: Skip the baking and enjoy it straight from the pot
  • Veggie Mac: Add peas, spinach, or roasted cauliflower

How to Store and Reheat

Store:

  • Refrigerate in an airtight container for up to 4 days

Reheat:

  • Oven: Cover with foil and bake at 160°C (325°F) for 20 minutes
  • Microwave: Reheat individual portions with a splash of milk

Freeze:

  • Cool completely, wrap tightly, and freeze for up to 2 months
  • Thaw overnight in fridge and reheat as above

Tips for the Best Texture

  • Slightly undercook pasta to avoid mushiness after baking
  • Use whole milk for a richer sauce
  • Shred your own cheese — pre-shredded can be waxy
  • Let sauce thicken before adding cheese
  • Bake until just bubbly — overbaking can dry it out

Common Mistakes to Avoid

  • Grainy sauce? Cheese was added to boiling liquid — lower the heat
  • Dry mac and cheese? Overbaked or not enough sauce
  • Oily separation? Cheese overheated — melt gently off the heat
  • Mushy pasta? Cook pasta just until al dente

Final Thoughts: A Cheesy Legacy

Grandma’s mac and cheese wasn’t just food — it was celebration, comfort, and tradition in every spoonful. With this simple, from-scratch recipe, you can bring that same warmth to your table.

Make it for family, friends, or just for yourself — and taste the timeless joy of real homemade comfort.

Grandma’s Traditional Chicken Pot Pie: A Golden Crust Full of Homemade Comfort

One bite of a freshly baked chicken pot pie and you’re instantly transported to grandma’s kitchen — where the windows fogged up from the oven heat and the smell of buttery crust and savory filling filled the air. This classic comfort food is more than just a meal — it’s a memory.

In this article, we’ll show you how to make grandma’s traditional chicken pot pie with a flaky, golden crust and a rich, creamy filling loaded with chicken and vegetables. It’s the ultimate recipe for cozy nights, special gatherings, or any day that needs a touch of warmth.

What Makes Grandma’s Pot Pie So Special?

Grandma didn’t rely on shortcuts. She used simple, fresh ingredients and gave them time to develop flavor. Her pot pie was:

  • Made with homemade crust or buttery puff pastry
  • Filled with real roasted or boiled chicken
  • Packed with vegetables from her garden
  • Seasoned with love and slow-cooked attention

Let’s recreate that magic.

Ingredients for Grandma’s Chicken Pot Pie

This recipe makes one 9-inch pie, serving 6 generous portions.

For the Filling:

  • 2 tablespoons butter
  • 1 small onion, diced
  • 2 cloves garlic, minced
  • 2 medium carrots, peeled and diced
  • 2 celery stalks, diced
  • 1⁄4 cup all-purpose flour
  • 2 cups chicken broth
  • 1 cup milk (whole or 2%)
  • 2 cups cooked chicken, shredded or diced
  • 1 cup frozen peas
  • ½ teaspoon dried thyme
  • Salt and black pepper to taste
  • Optional: 1 small potato, diced and pre-cooked

For the Crust:

  • 1 sheet of puff pastry (store-bought or homemade)
  • Or: double crust pastry for top and bottom
  • 1 egg (beaten with 1 tbsp milk, for egg wash)

Note: If you prefer a bottom crust, use a standard pie crust and par-bake it before adding filling.

Step-by-Step Instructions

1. Preheat Oven

Preheat your oven to 200°C (400°F). If using a bottom crust, line your pie dish and blind bake for 10 minutes with pie weights. Set aside.

2. Cook the Filling Base

In a large saucepan, melt butter over medium heat. Add the onions, garlic, carrots, and celery. Sauté until the vegetables are softened, about 5–7 minutes.

3. Make the Creamy Sauce

Sprinkle the flour over the veggies and stir to coat. Cook for 1–2 minutes to eliminate the raw flour taste.

Gradually whisk in the chicken broth and milk. Keep stirring until the mixture thickens to a creamy consistency — about 5 minutes.

4. Add Chicken and Peas

Stir in the shredded chicken, peas, thyme, salt, and pepper. Taste and adjust seasoning as needed. Let the filling simmer for another 3–5 minutes, then remove from heat.

Grandma’s Tip: Let the filling cool slightly before assembling to avoid a soggy crust.

5. Assemble the Pie

Spoon the cooled filling into the pie dish. Top with puff pastry or your prepared crust. Trim and crimp the edges.

Use a sharp knife to cut small slits in the top to allow steam to escape.

Brush with the egg wash for a shiny, golden finish.

6. Bake to Perfection

Place the pie on a baking tray (to catch any drips) and bake for 30–35 minutes, or until the crust is golden brown and the filling is bubbling.

Let it rest for at least 10 minutes before slicing — this helps the filling set.

Variations to Try

Want to make it your own? Grandma would approve. Try these:

  • Turkey Pot Pie: Great for holiday leftovers
  • Vegetarian Version: Use mushrooms, lentils, or white beans instead of chicken
  • Cheesy Filling: Stir in shredded cheddar or Parmesan
  • Herbed Crust: Mix fresh herbs into the dough for an aromatic twist
  • Mini Pot Pies: Use ramekins for individual servings — perfect for meal prep

How to Serve Chicken Pot Pie

This dish is hearty enough to stand alone, but pairs beautifully with:

  • A green salad with vinaigrette
  • Steamed green beans or broccoli
  • A glass of iced tea or white wine
  • Or just a cozy blanket and a fork on the couch!

Storing and Reheating Tips

To Store:

  • Cover leftover pie tightly with foil or transfer to an airtight container.
  • Refrigerate for up to 4 days.

To Reheat:

  • Oven: Cover loosely with foil and bake at 175°C (350°F) for 15–20 minutes.
  • Microwave: Use medium power to prevent the crust from getting rubbery.

To Freeze:

  • Freeze unbaked pot pie (assembled but not egg-washed) for up to 3 months.
  • Bake from frozen at 190°C (375°F) for about 1 hour, covering loosely with foil for the first half.

Grandma’s Secrets to the Best Pot Pie

  • Homemade broth = deeper flavor
  • Use leftover roast chicken for tenderness
  • Chill your dough before topping for better flakiness
  • Never skip the egg wash — it makes the crust shine
  • Let it rest before cutting — patience pays off!

Final Thoughts: A Crust Full of Memories

Chicken pot pie is more than a recipe — it’s a piece of heritage. It’s what grandma made when guests came over, when the weather turned cold, or when someone needed cheering up.

With every bite of tender chicken, buttery crust, and creamy filling, you’re not just tasting food — you’re tasting home, care, and generations of tradition.