Long before pickles came in fancy jars from the grocery store, grandma was making her own — crunchy, vinegary, and bursting with garlic and dill. They were kept in glass jars tucked away in cool pantries, always ready to be served with sandwiches, grilled meats, or just as a salty snack.
This article teaches you how to make classic homemade pickles, grandma-style — no special equipment, no preservatives, just simple ingredients and a lot of flavor.
Why Make Your Own Pickles?
- Incredibly easy — no canning or special tools required
- Ready in just 24–48 hours (quick pickles!)
- You control the flavor, crunch, and spice
- Made with real ingredients
- Delicious with burgers, sandwiches, charcuterie boards, and more
Ingredients for Classic Dill Pickles
This recipe makes about 2 quart-sized jars of pickles.
You’ll Need:
- 6–8 small cucumbers (Kirby or Persian cucumbers work best)
- 2 cups white vinegar
- 2 cups water
- 2 tablespoons kosher salt
- 1 tablespoon sugar
- 4 garlic cloves, peeled
- 1 tablespoon black peppercorns
- 1 tablespoon mustard seeds (optional)
- 4–6 sprigs fresh dill
- Optional: pinch of red pepper flakes for a spicy kick
Step-by-Step Instructions
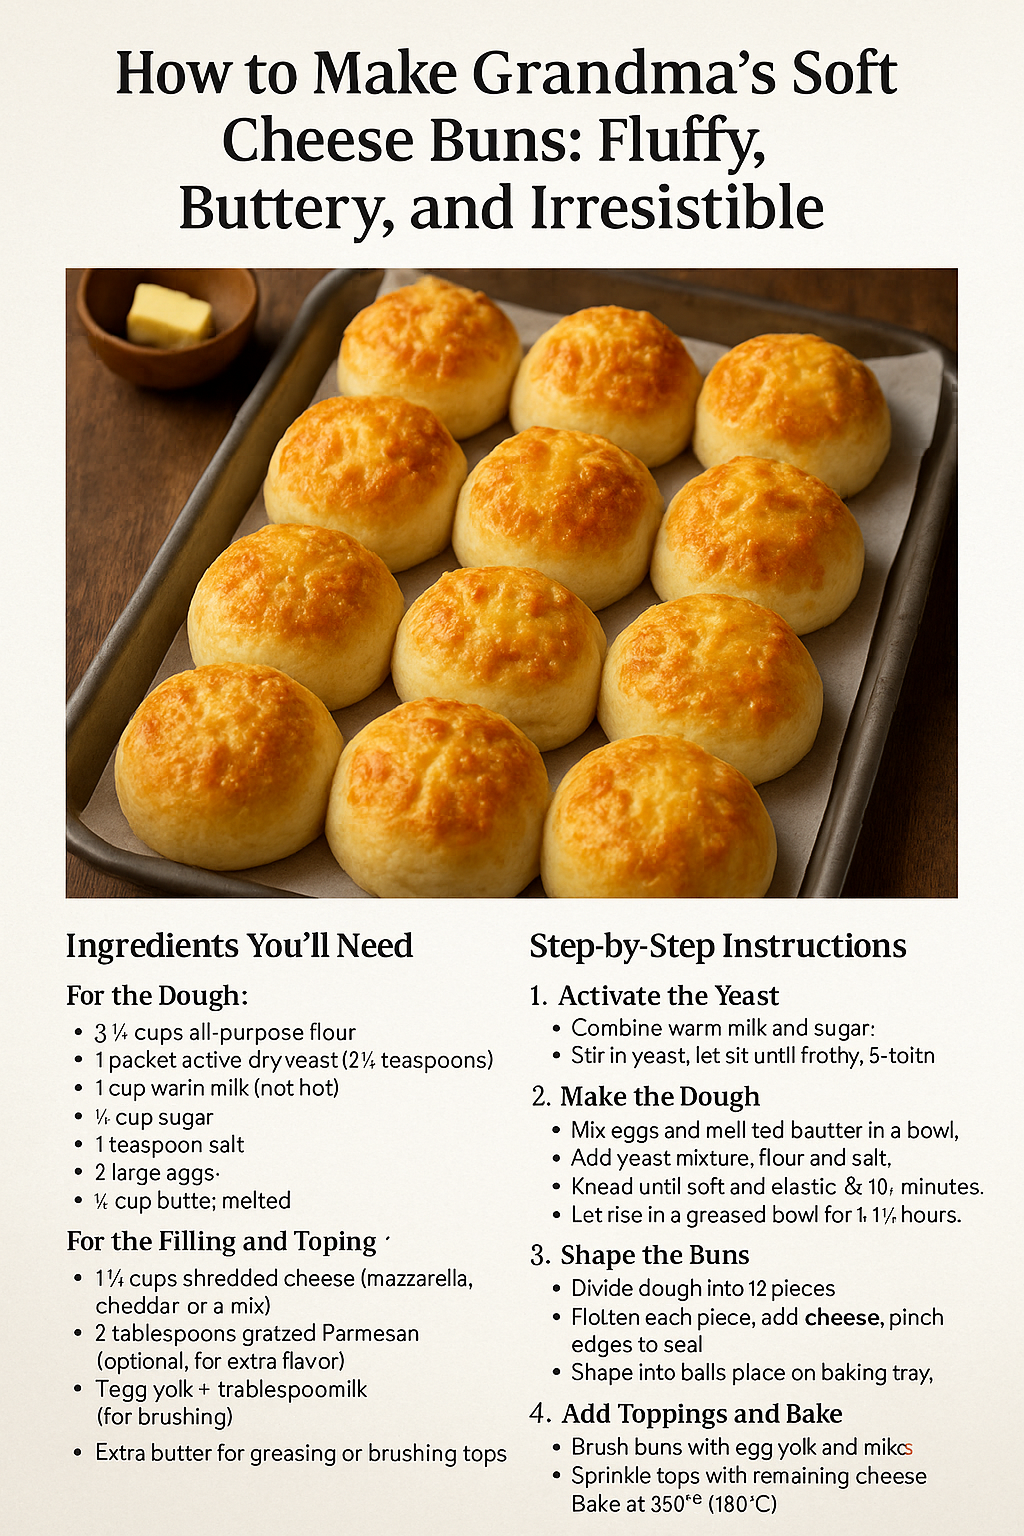
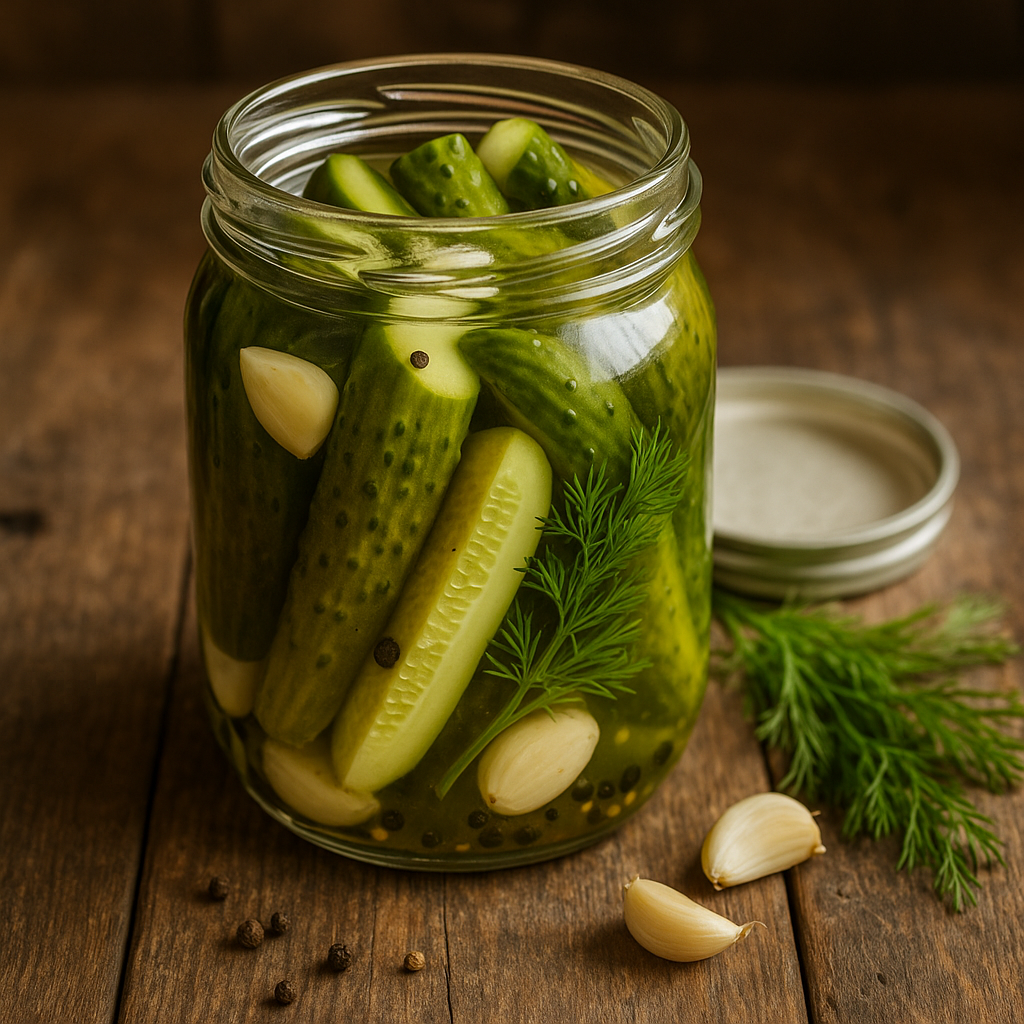
1. Prepare the Jars
Clean and dry your jars thoroughly.
Cut cucumbers into spears, chips, or leave whole — depending on your preference and jar size.
Place fresh dill, garlic cloves, peppercorns, and mustard seeds at the bottom of each jar.
Tightly pack the cucumbers into the jars.
2. Make the Brine
In a saucepan, combine vinegar, water, salt, and sugar.
Bring to a simmer and stir until the salt and sugar are dissolved.
Remove from heat and let it cool slightly.
3. Pour the Brine
Carefully pour the warm (not hot) brine into the jars, covering the cucumbers completely.
Tap the jars gently on the counter to release air bubbles.
Seal with lids and let them cool to room temperature.
4. Refrigerate and Wait
Place jars in the refrigerator for at least 24–48 hours before eating. The longer they sit, the more flavorful they become.
They’ll stay good in the fridge for up to 1–2 months!
Serving Ideas for Grandma’s Pickles
- With burgers, hot dogs, and sandwiches
- On a cheese or charcuterie board
- Chopped into potato or pasta salads
- As a topping for tuna salad or deviled eggs
- Just eaten cold, straight from the jar
Grandma’s tip: Save the leftover brine for pickling onions, eggs, or more cucumbers!
Flavor Variations to Try
- Sweet Pickles: Add more sugar to the brine and reduce garlic
- Spicy Pickles: Add sliced jalapeños or red chili flakes
- Bread and Butter Style: Use a mix of white and apple cider vinegar, add more sugar, and include onion slices
- Garlic Bomb: Double the garlic for a bold punch
- Asian-Inspired: Add ginger slices and a dash of soy sauce
Storage and Shelf Life
- Keep pickles refrigerated at all times
- Best enjoyed within 4 weeks, though they’ll last up to 2 months if sealed properly
- Always use clean utensils to remove pickles from the jar — no fingers!
Final Thoughts: Crunchy, Tangy, and Full of Tradition
Grandma’s pickles weren’t just snacks — they were made with care, preserved with purpose, and shared with pride. Whether packed into lunchboxes or placed in little dishes on the dinner table, they added flavor and fun to every bite.