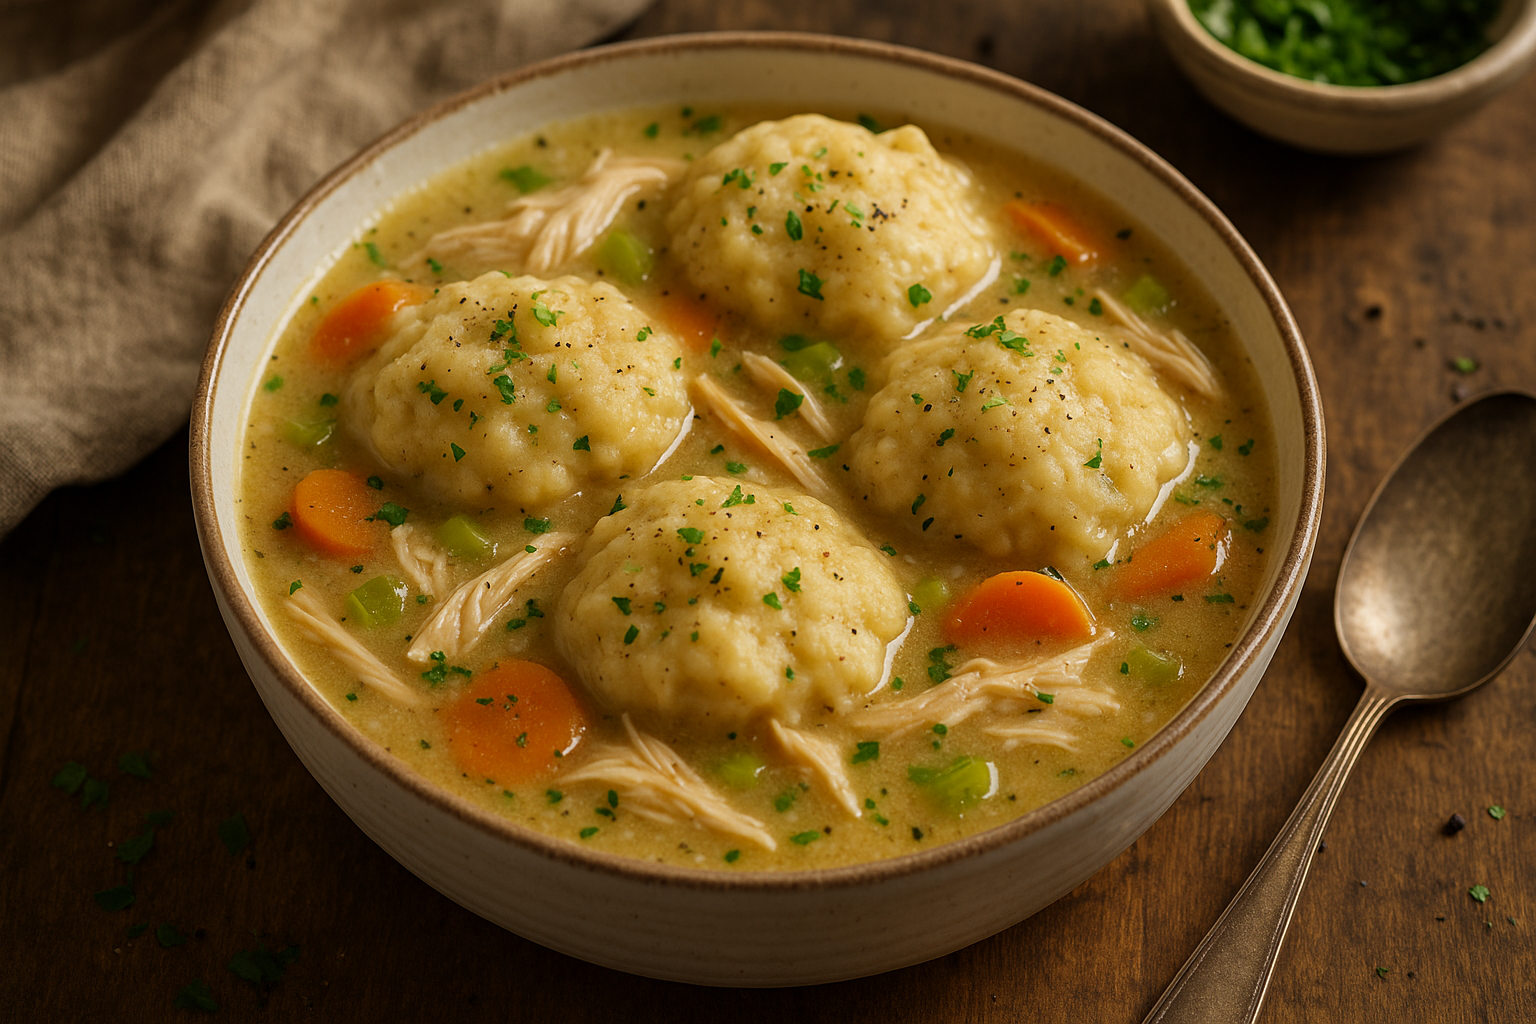
Grandma’s Chicken and Dumplings: A Creamy Bowl of Pure Comfort

There’s no dish that says “comfort” quite like a steaming bowl of chicken and dumplings. With tender chicken, soft vegetables, a creamy broth, and fluffy dumplings floating on top, this was one of grandma’s most-loved recipes — especially on cold days or when someone needed a little extra love.

In this guide, we’ll teach you how to make homemade chicken and dumplings from scratch, just like grandma did: rich, hearty, and packed with soul.


Why This Dish Is So Special

  • A one-pot meal perfect for family dinners
  • Features tender shredded chicken and fluffy dumplings
  • The broth is creamy, flavorful, and soul-soothing
  • Made with basic ingredients and lots of love
  • A true comfort food classic for all seasons

Ingredients for Grandma’s Chicken and Dumplings

This recipe serves 6–8 people.

For the Stew:

  • 2 tablespoons butter or oil
  • 1 onion, chopped
  • 2 garlic cloves, minced
  • 3 carrots, sliced
  • 2 celery stalks, chopped
  • 4 cups chicken broth
  • 2 cups cooked shredded chicken (rotisserie or homemade)
  • 1 cup milk or half-and-half
  • 2 tablespoons all-purpose flour
  • 1 teaspoon dried thyme or poultry seasoning
  • Salt and black pepper to taste
  • Optional: 1 bay leaf or chopped parsley

For the Dumplings:

  • 1 cup all-purpose flour
  • 2 teaspoons baking powder
  • ½ teaspoon salt
  • 2 tablespoons butter, melted
  • ½ cup whole milk (plus more if needed)

Step-by-Step Instructions

1. Cook the Base

In a large pot or Dutch oven, melt the butter over medium heat.

Add the onion, garlic, carrots, and celery. Cook for about 5–6 minutes, until soft.

Sprinkle in the flour and stir for 1–2 minutes to coat the vegetables.

Slowly whisk in the chicken broth and bring to a gentle simmer.


2. Add Chicken and Seasonings

Stir in the shredded chicken, milk, thyme, salt, pepper, and bay leaf (if using).

Let the stew simmer uncovered for 10–15 minutes until it thickens slightly.


3. Make the Dumplings

In a bowl, whisk together the flour, baking powder, and salt.

Add the melted butter and milk, stirring just until combined — don’t overmix.

The dough should be thick but spoonable.


4. Add the Dumplings

Drop spoonfuls of dumpling dough (about a tablespoon each) on top of the simmering stew.

Cover with a lid and let cook on low heat for 15 minutes — do not lift the lid during this time.

The dumplings will puff up and steam until fluffy.


5. Serve Hot

Remove the bay leaf, if used. Taste and adjust seasoning.

Serve warm in deep bowls, topped with fresh parsley or a pat of butter if desired.


Tips for Success

  • Use rotisserie chicken for ease, or boil your own with aromatics
  • Don’t uncover the pot while dumplings cook — steam is key!
  • Add peas or corn for extra texture and color
  • If stew gets too thick, add a splash of milk or broth to loosen
  • For richer flavor, stir in a bit of cream at the end

Variations You’ll Love

  • Creamy Herb Dumplings: Add chopped chives or parsley to the dumpling mix
  • Cheesy Dumplings: Mix in shredded cheddar or parmesan
  • Spicy Twist: Add crushed red pepper or hot sauce to the stew base
  • Veggie Boost: Stir in spinach or kale at the end
  • Gluten-Free Option: Use a gluten-free flour blend for both stew and dumplings

Storage and Reheating

Store:

  • Refrigerate leftovers in an airtight container for up to 4 days

Reheat:

  • Gently on the stovetop with a splash of broth or milk
  • Microwave in short bursts, covered with a damp paper towel

Freeze:

  • Best to freeze the stew base without dumplings, then add fresh dumplings when reheating

Final Thoughts: A Bowl Full of Love

Grandma’s chicken and dumplings weren’t just warm and hearty — they were healing, the kind of food that made you feel cared for with every bite. From the fluffy dumplings to the creamy, savory stew, this dish brings comfort straight to the heart.

Now it’s your turn to bring that kind of care and comfort to your kitchen — one spoonful at a time.

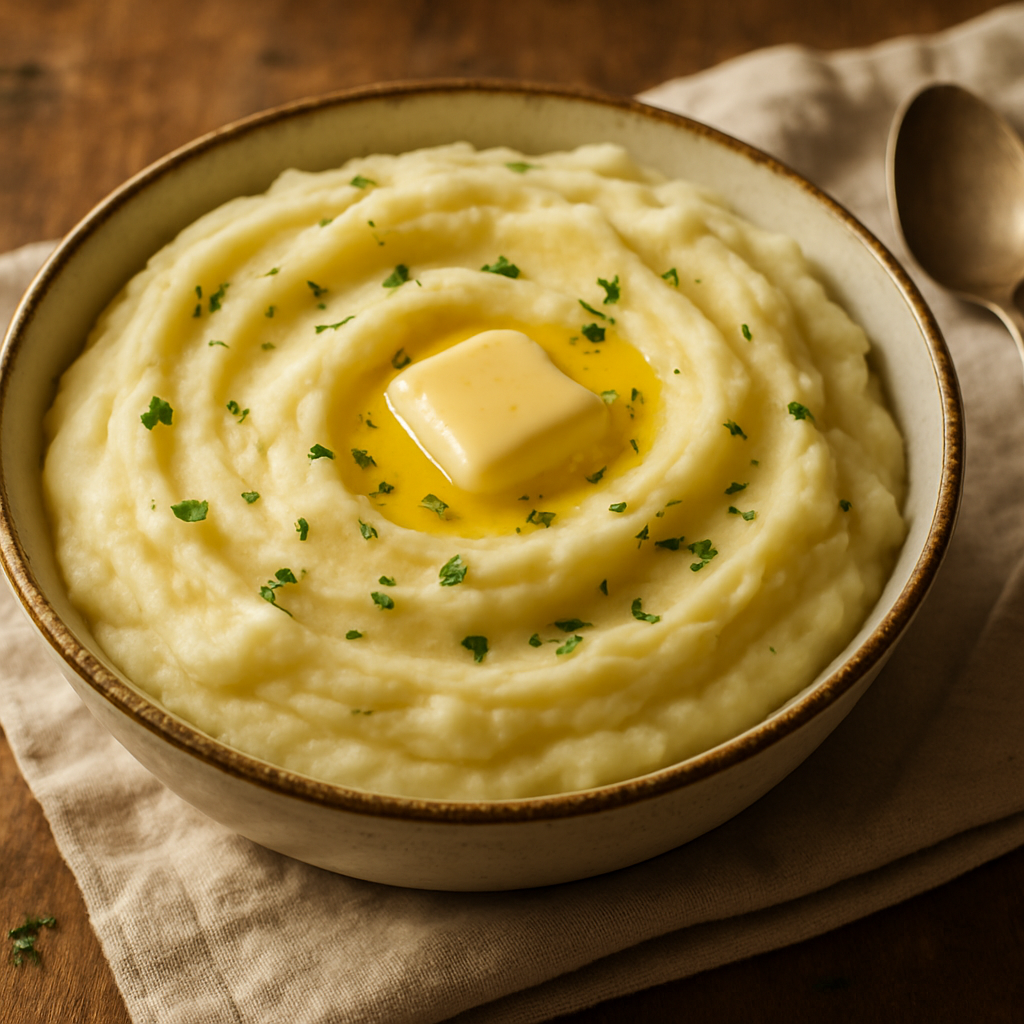
Grandma’s Creamy Mashed Potatoes: Fluffy, Buttery, and Full of Flavor

In grandma’s kitchen, mashed potatoes were never an afterthought. They were a star on the table — smooth, rich, and seasoned to perfection. Whether served with gravy, alongside roast beef, or with a pat of melting butter, her mashed potatoes were the ultimate comfort food side dish.

In this guide, we’ll show you how to make classic creamy mashed potatoes from scratch — the way grandma always did them: simple, hearty, and irresistibly good.

Why These Mashed Potatoes Are So Loved

  • Perfectly fluffy and smooth
  • Rich in butter and creaminess
  • Seasoned just right — not bland, not salty
  • Made with real potatoes, not flakes
  • A versatile base for countless meals

Let’s begin with the basics.

Ingredients for Grandma’s Mashed Potatoes

This recipe serves 4 to 6 people.

  • 2 pounds (900g) Yukon Gold or Russet potatoes, peeled and cut into chunks
  • 4 tablespoons unsalted butter (plus more for topping)
  • ½ to ¾ cup whole milk or cream (warmed)
  • Salt to taste (about 1 ½ teaspoons)
  • Freshly ground black pepper, to taste
  • Optional: garlic, sour cream, cream cheese, or herbs for added flavor

Yukon Gold gives a buttery texture, while Russet makes it fluffy. A mix works beautifully too.

Step-by-Step Instructions

1. Boil the Potatoes

Place the peeled, chopped potatoes in a large pot. Cover with cold, salted water.

Bring to a boil and simmer for 15–20 minutes, or until fork-tender.

Grandma’s Tip: Always start with cold water so the potatoes cook evenly.

2. Drain and Dry

Drain the potatoes and return them to the pot.

Place the pot back on low heat for 1–2 minutes, stirring occasionally — this helps evaporate excess water and makes the mash creamier.

3. Mash the Potatoes

Use a potato masher, ricer, or hand mixer (depending on your desired texture). Mash until smooth.

4. Add Butter and Milk

Stir in butter until fully melted.

Gradually add warm milk (or cream), a little at a time, until you reach your desired consistency — fluffy, smooth, and creamy.

5. Season to Taste

Add salt and pepper to taste. Stir well and taste again.

If desired, stir in extras like garlic, sour cream, or herbs.

6. Serve Warm

Transfer to a serving dish. Top with a pat of butter, chopped parsley, or gravy if desired.

Serve immediately while hot and fresh.

Add-In Variations

Customize your mashed potatoes to suit the meal or occasion:

  • Garlic Mashed Potatoes: Add roasted or sautéed garlic cloves
  • Cheddar & Chive Mash: Stir in sharp cheddar and fresh chives
  • Sour Cream & Onion: Mix in sour cream and caramelized onions
  • Cream Cheese Mash: Add 2–3 tablespoons of cream cheese for extra richness
  • Herb Mash: Fold in fresh thyme, rosemary, or dill

How to Make Ahead and Store

Make-Ahead:

  • Prepare mashed potatoes, then place in a buttered baking dish
  • Cover and refrigerate up to 2 days
  • Reheat in the oven at 175°C (350°F), covered with foil, until warm

Store Leftovers:

  • Refrigerate in an airtight container for up to 4 days

Reheat:

  • Stovetop: Reheat gently with a splash of milk and butter
  • Microwave: Reheat in short bursts, stirring often
  • Oven: Cover with foil and heat until warm through

Grandma’s Tips for the Best Mashed Potatoes

  • Don’t overmix — especially with a mixer, or you’ll get gluey texture
  • Warm the milk and butter before adding
  • Salt the water — this seasons the potatoes from within
  • Choose the right potato — starchy is best for fluffiness
  • Mash while hot — they absorb ingredients better warm

Serving Ideas

These mashed potatoes go beautifully with:

  • Roast chicken or turkey
  • Pot roast or meatloaf
  • Gravy, mushroom sauce, or butter drizzles
  • Grilled veggies or sautéed greens

Or enjoy them with just a spoon — grandma certainly did!

Final Thoughts: A Side Dish with Soul

Grandma’s mashed potatoes weren’t just filler on the plate — they were part of the memory. Passed around the table in a warm bowl, scooped generously with love, and always, always made from scratch.

Now you can keep the tradition alive with this rich, fluffy, and foolproof recipe that’s been loved for generations.

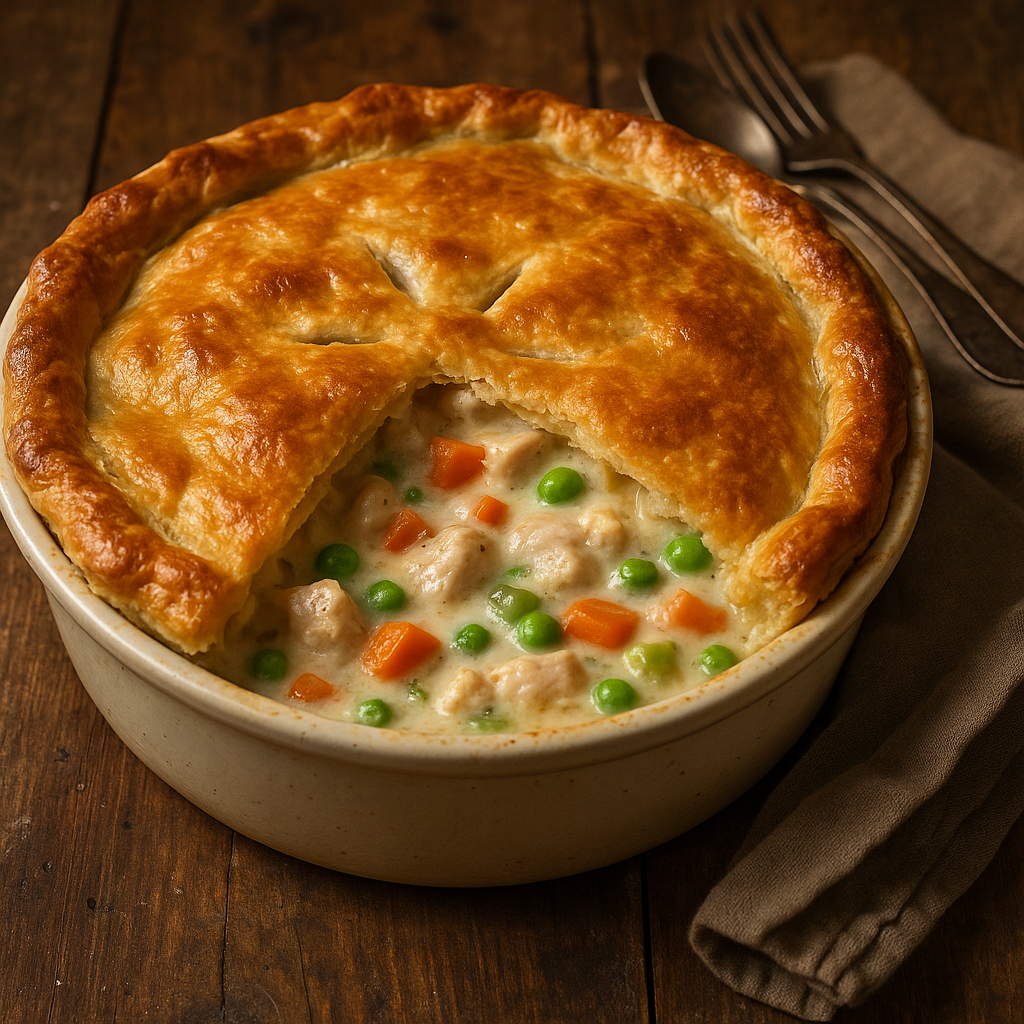
Grandma’s Traditional Chicken Pot Pie: A Golden Crust Full of Homemade Comfort

One bite of a freshly baked chicken pot pie and you’re instantly transported to grandma’s kitchen — where the windows fogged up from the oven heat and the smell of buttery crust and savory filling filled the air. This classic comfort food is more than just a meal — it’s a memory.

In this article, we’ll show you how to make grandma’s traditional chicken pot pie with a flaky, golden crust and a rich, creamy filling loaded with chicken and vegetables. It’s the ultimate recipe for cozy nights, special gatherings, or any day that needs a touch of warmth.

What Makes Grandma’s Pot Pie So Special?

Grandma didn’t rely on shortcuts. She used simple, fresh ingredients and gave them time to develop flavor. Her pot pie was:

  • Made with homemade crust or buttery puff pastry
  • Filled with real roasted or boiled chicken
  • Packed with vegetables from her garden
  • Seasoned with love and slow-cooked attention

Let’s recreate that magic.

Ingredients for Grandma’s Chicken Pot Pie

This recipe makes one 9-inch pie, serving 6 generous portions.

For the Filling:

  • 2 tablespoons butter
  • 1 small onion, diced
  • 2 cloves garlic, minced
  • 2 medium carrots, peeled and diced
  • 2 celery stalks, diced
  • 1⁄4 cup all-purpose flour
  • 2 cups chicken broth
  • 1 cup milk (whole or 2%)
  • 2 cups cooked chicken, shredded or diced
  • 1 cup frozen peas
  • ½ teaspoon dried thyme
  • Salt and black pepper to taste
  • Optional: 1 small potato, diced and pre-cooked

For the Crust:

  • 1 sheet of puff pastry (store-bought or homemade)
  • Or: double crust pastry for top and bottom
  • 1 egg (beaten with 1 tbsp milk, for egg wash)

Note: If you prefer a bottom crust, use a standard pie crust and par-bake it before adding filling.

Step-by-Step Instructions

1. Preheat Oven

Preheat your oven to 200°C (400°F). If using a bottom crust, line your pie dish and blind bake for 10 minutes with pie weights. Set aside.

2. Cook the Filling Base

In a large saucepan, melt butter over medium heat. Add the onions, garlic, carrots, and celery. Sauté until the vegetables are softened, about 5–7 minutes.

3. Make the Creamy Sauce

Sprinkle the flour over the veggies and stir to coat. Cook for 1–2 minutes to eliminate the raw flour taste.

Gradually whisk in the chicken broth and milk. Keep stirring until the mixture thickens to a creamy consistency — about 5 minutes.

4. Add Chicken and Peas

Stir in the shredded chicken, peas, thyme, salt, and pepper. Taste and adjust seasoning as needed. Let the filling simmer for another 3–5 minutes, then remove from heat.

Grandma’s Tip: Let the filling cool slightly before assembling to avoid a soggy crust.

5. Assemble the Pie

Spoon the cooled filling into the pie dish. Top with puff pastry or your prepared crust. Trim and crimp the edges.

Use a sharp knife to cut small slits in the top to allow steam to escape.

Brush with the egg wash for a shiny, golden finish.

6. Bake to Perfection

Place the pie on a baking tray (to catch any drips) and bake for 30–35 minutes, or until the crust is golden brown and the filling is bubbling.

Let it rest for at least 10 minutes before slicing — this helps the filling set.

Variations to Try

Want to make it your own? Grandma would approve. Try these:

  • Turkey Pot Pie: Great for holiday leftovers
  • Vegetarian Version: Use mushrooms, lentils, or white beans instead of chicken
  • Cheesy Filling: Stir in shredded cheddar or Parmesan
  • Herbed Crust: Mix fresh herbs into the dough for an aromatic twist
  • Mini Pot Pies: Use ramekins for individual servings — perfect for meal prep

How to Serve Chicken Pot Pie

This dish is hearty enough to stand alone, but pairs beautifully with:

  • A green salad with vinaigrette
  • Steamed green beans or broccoli
  • A glass of iced tea or white wine
  • Or just a cozy blanket and a fork on the couch!

Storing and Reheating Tips

To Store:

  • Cover leftover pie tightly with foil or transfer to an airtight container.
  • Refrigerate for up to 4 days.

To Reheat:

  • Oven: Cover loosely with foil and bake at 175°C (350°F) for 15–20 minutes.
  • Microwave: Use medium power to prevent the crust from getting rubbery.

To Freeze:

  • Freeze unbaked pot pie (assembled but not egg-washed) for up to 3 months.
  • Bake from frozen at 190°C (375°F) for about 1 hour, covering loosely with foil for the first half.

Grandma’s Secrets to the Best Pot Pie

  • Homemade broth = deeper flavor
  • Use leftover roast chicken for tenderness
  • Chill your dough before topping for better flakiness
  • Never skip the egg wash — it makes the crust shine
  • Let it rest before cutting — patience pays off!

Final Thoughts: A Crust Full of Memories

Chicken pot pie is more than a recipe — it’s a piece of heritage. It’s what grandma made when guests came over, when the weather turned cold, or when someone needed cheering up.

With every bite of tender chicken, buttery crust, and creamy filling, you’re not just tasting food — you’re tasting home, care, and generations of tradition.

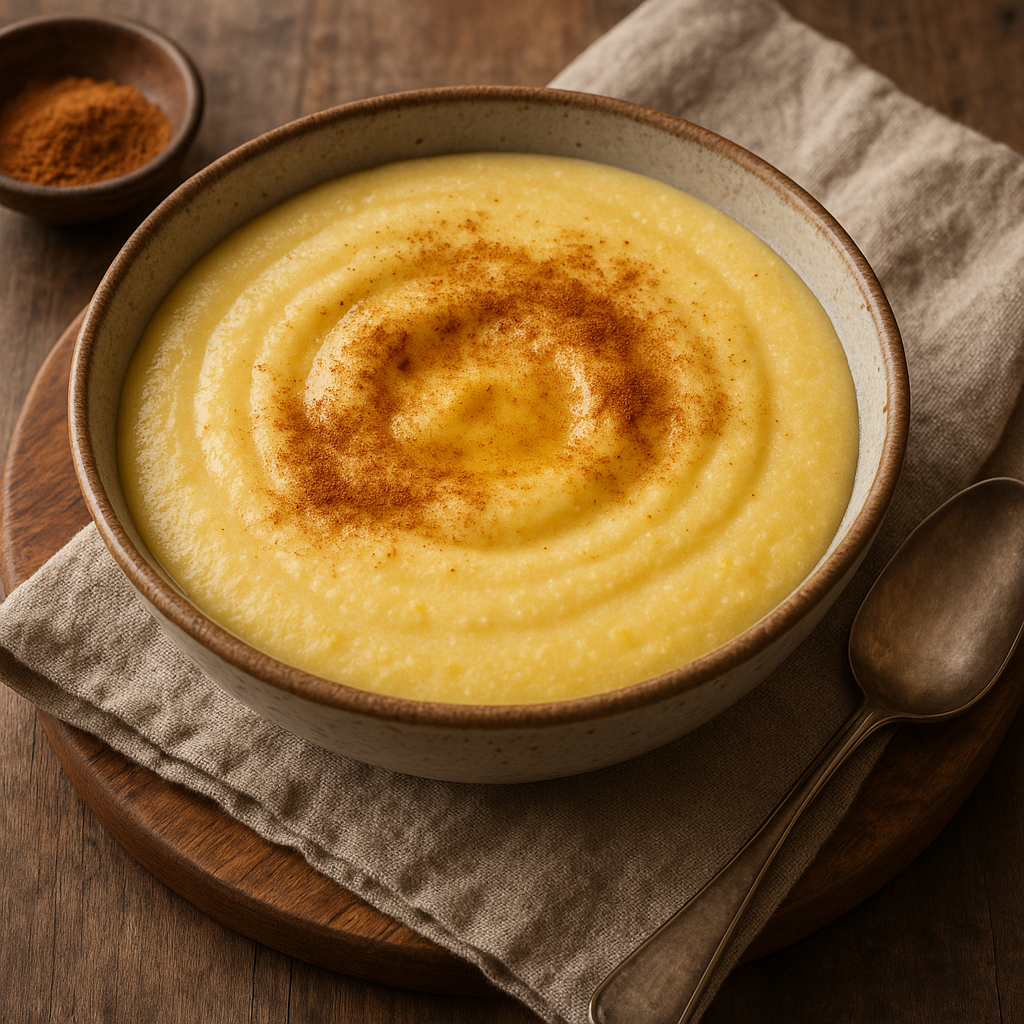
How to Make Grandma’s Creamy Cornmeal Porridge: A Warm and Comforting Classic

Some dishes don’t need anything fancy to make them special. They don’t require exotic ingredients or modern techniques — just a few pantry staples, a pot, and someone who knows how to stir with love. One of those dishes is grandma’s creamy cornmeal porridge.

Rich, smooth, and subtly sweet, this traditional porridge is more than breakfast — it’s a hug in a bowl. Whether served warm on cold mornings or gently sweetened for an evening treat, this recipe is a timeless comfort food passed down through generations.

In this article, you’ll learn how to prepare creamy cornmeal porridge just like grandma did — with step-by-step instructions, variations, and tips to get that perfect texture every time.

What Is Cornmeal Porridge?

Cornmeal porridge is a smooth and creamy dish made from fine yellow or white cornmeal, simmered slowly in milk or water. Often flavored with cinnamon, nutmeg, vanilla, and sweetened with sugar or condensed milk, it’s a favorite in Caribbean, Southern, and rural kitchens around the world.

Unlike instant cereals, cornmeal porridge takes time — and that’s what makes it so delicious.

Ingredients You’ll Need

This recipe makes 2–3 generous servings.

Basic Ingredients:

  • 1 cup fine cornmeal (yellow or white)
  • 3 cups water
  • 2 cups milk (whole or evaporated preferred)
  • ½ teaspoon salt
  • 1 cinnamon stick (or ½ teaspoon ground cinnamon)
  • ½ teaspoon nutmeg (optional)
  • 1 teaspoon vanilla extract
  • 2–3 tablespoons sugar (or to taste)
  • 2 tablespoons sweetened condensed milk (optional, for richness)

Note: If using coarse cornmeal or polenta, you may need longer cooking time and more liquid.

Step-by-Step Instructions

1. Mix Cornmeal and Cold Water

In a medium bowl, whisk the cornmeal with 2 cups of cold water until smooth and lump-free.

Grandma’s Tip: Never add cornmeal directly to boiling liquid — always start with cold water to prevent clumps.

2. Bring Milk and Spices to a Simmer

In a medium saucepan, combine 1 cup of water, milk, salt, cinnamon stick, and nutmeg. Heat gently over medium heat until it starts to simmer — don’t let it boil.

3. Slowly Add Cornmeal Mixture

Reduce the heat to low. Slowly pour the cornmeal mixture into the simmering milk while stirring constantly with a whisk or wooden spoon.

Keep stirring gently to prevent sticking or lumps. The mixture will begin to thicken after 2–3 minutes.

4. Simmer Until Creamy

Continue to cook over low heat, stirring frequently, for 15–20 minutes, or until the porridge is thick and smooth. Add a little more water or milk if it becomes too thick too quickly.

5. Add Sweeteners and Flavor

Remove the cinnamon stick. Stir in the sugar, vanilla extract, and condensed milk (if using). Taste and adjust the sweetness to your liking.

Optional: For a touch of citrus, add a thin strip of orange peel while simmering.

6. Serve Warm

Serve the porridge warm in bowls. Sprinkle with extra cinnamon or nutmeg on top, and drizzle with more condensed milk or honey for extra indulgence.

Tips for the Perfect Porridge

  • Use fine cornmeal for a smooth texture — coarse varieties will need longer cooking.
  • Stir constantly in the beginning, then frequently as it thickens.
  • Cook on low heat to prevent scorching and allow the flavor to develop.
  • Let it rest for a few minutes before serving to thicken further and cool slightly.
  • Add warm milk before serving if you prefer a looser texture.

Variations Grandma Loved

Want to switch it up? Try these ideas:

  • Spiced version: Add clove, ginger, or allspice for a Caribbean flair.
  • Tropical version: Stir in mashed ripe banana or grated coconut.
  • Savory twist: Skip the sugar and add cheese, black pepper, and butter.
  • Fruit topping: Serve with sliced bananas, raisins, or berry compote.
  • Nutty version: Top with chopped walnuts, pecans, or almonds and honey.

How to Store and Reheat

Storage:

  • Let porridge cool completely.
  • Store in an airtight container in the fridge for up to 3 days.

Reheating:

  • Reheat in a saucepan over low heat, stirring constantly.
  • Add a splash of milk or water to loosen it up.
  • Stir until smooth and warm throughout.

It’s just as delicious the next day — grandma always made extra!

Is Cornmeal Porridge Healthy?

Absolutely! It’s:

  • Gluten-free (if using certified cornmeal)
  • A good source of complex carbohydrates and fiber
  • Easy to digest and naturally filling
  • Packed with calcium and protein when made with milk
  • Customizable for dietary needs (vegan, low-sugar, dairy-free)

Final Thoughts: A Bowl of Simplicity, Made with Love

Cornmeal porridge is a dish that reminds us of simpler times — of quiet mornings, kitchen warmth, and a grandma who knew how to make everything better with a wooden spoon and a gentle smile.

Whether you’re making it for breakfast, dessert, or just a moment of comfort, this recipe brings back that feeling of home. Creamy, soothing, and endlessly customizable, it’s one of those traditions that never goes out of style.