
There’s nothing like the smell of fresh bread wafting through the kitchen — especially when it’s filled with melty, savory cheese. One of grandma’s most beloved recipes was her soft cheese buns: golden on the outside, tender on the inside, and bursting with warm cheesy goodness.
These buns weren’t just snacks — they were little bites of comfort, made to share, to impress guests, or simply to enjoy with coffee on a quiet afternoon. In this detailed guide, you’ll learn how to bake these traditional cheese buns just like grandma did — simple, fluffy, and incredibly satisfying.
What Are Cheese Buns?
Cheese buns (also known in some cultures as cheese rolls or cheese bread) are soft rolls made with a yeasted dough, filled or topped with cheese, and baked until golden brown. Grandma’s version had cheese in the center and on top, creating the perfect balance of gooey inside and crispy edges.
They’re great for breakfast, as a snack, with soup, or served on a brunch table. Plus, they smell absolutely amazing while baking!
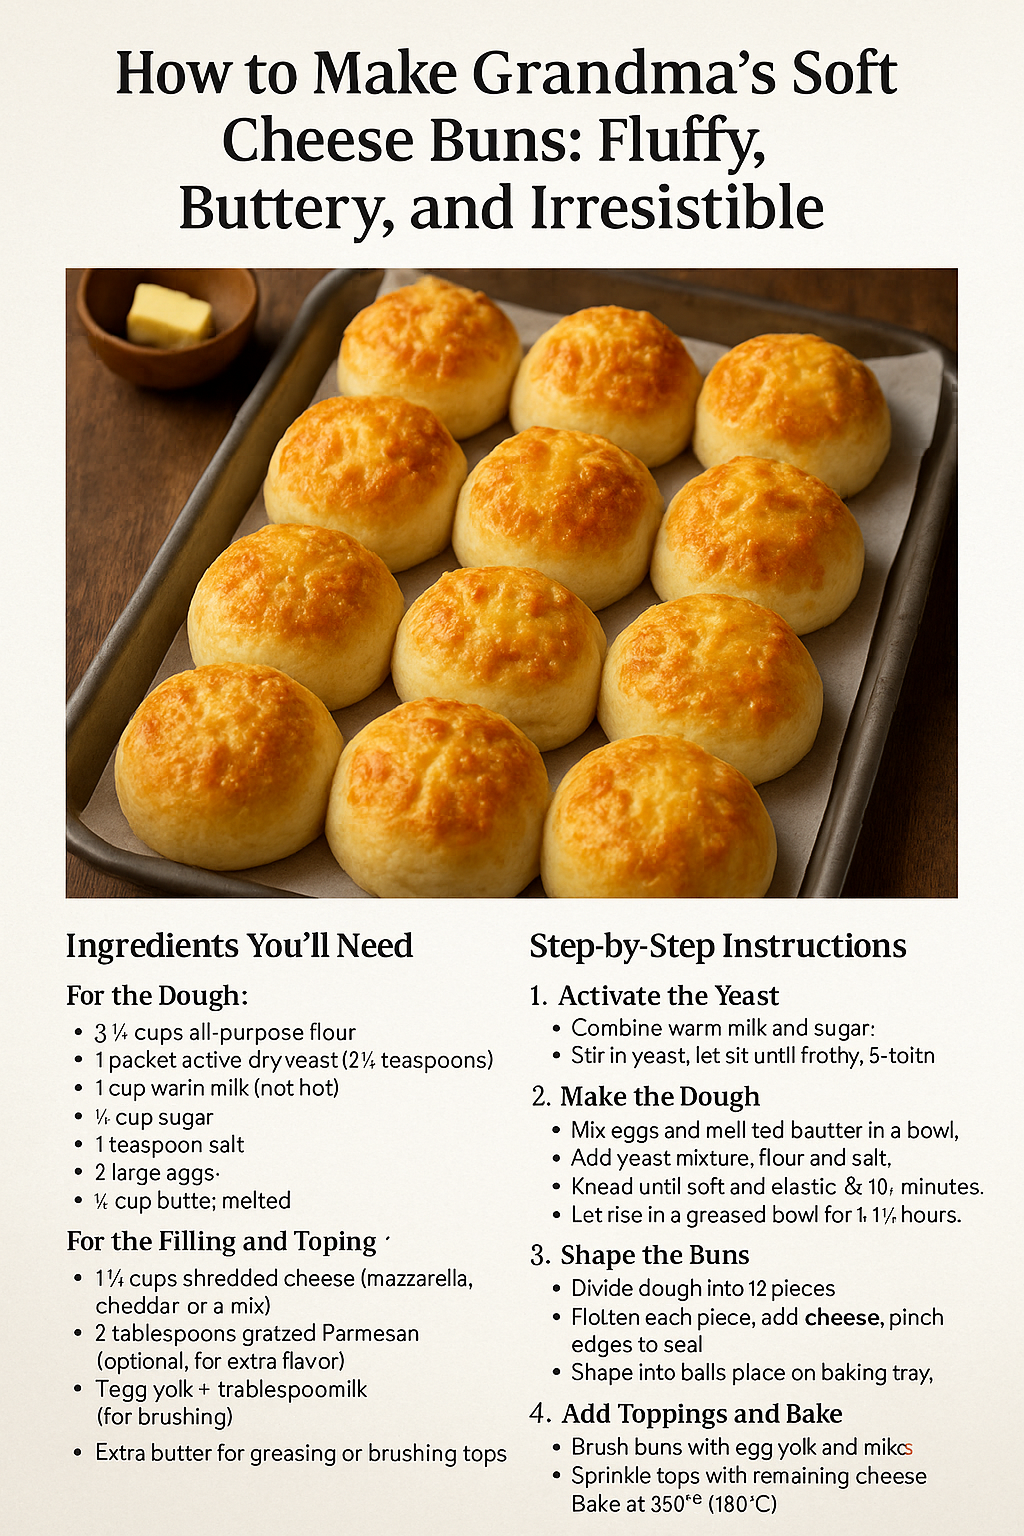
Ingredients You’ll Need
This recipe makes about 12 buns.
For the Dough:
- 3 ½ cups all-purpose flour
- 1 packet active dry yeast (2 ¼ teaspoons)
- 1 cup warm milk (not hot)
- ¼ cup sugar
- 1 teaspoon salt
- 2 large eggs
- ¼ cup butter, melted
For the Filling and Topping:
- 1 ½ cups shredded cheese (mozzarella, cheddar, or a mix)
- 2 tablespoons grated Parmesan (optional, for extra flavor)
- 1 egg yolk + 1 tablespoon milk (for brushing)
- Extra butter for greasing or brushing tops
Step-by-Step Instructions
1. Activate the Yeast
In a small bowl, combine the warm milk and sugar. Sprinkle in the yeast, stir gently, and let sit for 5–10 minutes until frothy.
Grandma’s Tip: If the yeast doesn’t bubble, it’s not active — start again with a fresh packet.
2. Make the Dough
In a large mixing bowl, beat the eggs and add the melted butter. Pour in the yeast mixture and mix to combine.
Add the flour and salt gradually, stirring with a wooden spoon or using a stand mixer with a dough hook. Knead for 8–10 minutes, until the dough is soft, smooth, and elastic.
Add a bit more flour if the dough is too sticky, but don’t overdo it — a slightly tacky dough yields softer buns.
3. Let the Dough Rise
Form the dough into a ball, place it in a greased bowl, and cover with a clean towel or plastic wrap. Let it rise in a warm place for 1 to 1½ hours, or until doubled in size.
4. Shape the Buns
Punch down the dough and divide it into 12 equal pieces. Flatten each piece into a small circle. Add a tablespoon of shredded cheese in the center and pinch the dough closed like a pouch.
Shape into balls and place seam-side down on a greased baking tray or parchment paper-lined sheet.
5. Second Rise
Cover the shaped buns loosely and let them rise again for 30–40 minutes, until puffy.
6. Add Toppings and Bake
Preheat the oven to 180°C (350°F).
Brush the tops of the buns with the egg yolk + milk mixture. Sprinkle the remaining cheese (and Parmesan, if using) over the tops.
Bake for 20–25 minutes, or until golden brown and the cheese is bubbling.
7. Cool Slightly and Serve
Let the buns cool for 5–10 minutes before serving. Enjoy them warm for the best cheesy experience!
Why Grandma’s Cheese Buns Were Always Perfect
Her secret wasn’t just in the ingredients — it was in the way she made them:
- She never rushed the dough. Letting it rise fully made them light and fluffy.
- She always used real butter and fresh cheese.
- She often added a sprinkle of love — the kind that made every bite special.
Variations You Can Try
Want to make this recipe your own? Try these ideas:
- Spicy cheese buns: Add a pinch of chili flakes or jalapeños to the filling.
- Herb cheese buns: Mix rosemary, thyme, or parsley into the dough or topping.
- Garlic cheese buns: Add roasted garlic to the filling or brush garlic butter on top after baking.
- Mini cheese rolls: Make smaller versions for party snacks or lunchboxes.
How to Store and Reheat
- Room temp: Store in an airtight container for up to 2 days.
- Fridge: Up to 5 days, though they’re best fresh.
- Freeze: Freeze baked buns (cooled) for up to 1 month. Thaw and reheat in the oven for best texture.
Reheating:
- Microwave for 20–30 seconds for a quick warm-up.
- For crispy tops, reheat in a toaster oven or regular oven at 160°C (325°F) for 5–8 minutes.
Serving Suggestions
Grandma served her cheese buns in many ways:
- With coffee or tea in the morning
- Alongside soups or stews
- As a savory snack with jam or tomato relish
- On the dinner table as a cheesy bread option
They’re versatile, easy to serve, and always appreciated.
Final Thoughts: Little Pillows of Joy
Baking these buns is more than just making bread — it’s recreating a memory, a moment, and a taste of comfort that’s impossible to forget.
Whether you’re baking for your family, impressing guests, or simply treating yourself, these fluffy, cheesy buns will transport you right back to grandma’s kitchen — where everything was made with care, and every bite was a reminder that food can be love.